Some of the parts we sell are eligible for mail-in rebates since we can recycle them. We will display any applicable rebates in your shopping cart. To redeem your rebate, contact Customer Service after you have received your part.
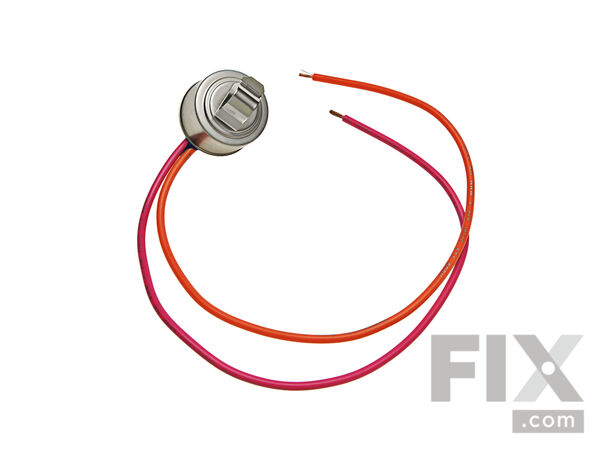
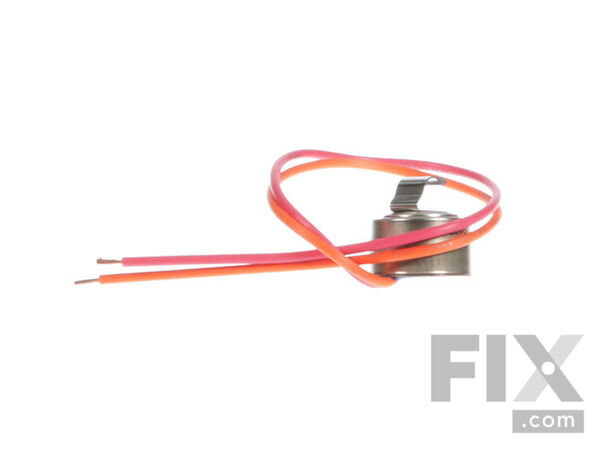
Defrost Thermostat
- Fix Number:
- FIX1017716
- Manufacturer #:
- WR50X10068
- Manufactured by:
- GE
- Product Description
- If your freezer has a buildup of frost, or is not maintaining the proper temperature, there may be an issue with the defrost thermostat. This device stops the evaporator coil from overheating while the defrost cycle is running, as it stops the heater at the end of the cycle. The thermostat goes by other names such as the defrost limiter thermostat, the high limit thermostat, and the refrigerator defrost bi-metal thermostat. This is a genuine OEM replacement part, designed to fit your model of refrigerator. The defrost thermostat is located in the freezer portion of your refrigerator, attached to the tubing of the evaporator coil, and will require a few different tools to replace. These include wire strippers, electrical tape, quarter-inch nut driver, and a couple of wire connectors. Be sure to disconnect the power supply to your fridge before beginning this repair.
- Works with the following brands:
- General Electric, Hotpoint
- Works with the following products
- Refrigerator
- Fixes the following symptoms
- Fridge too warm, Freezer section too warm, Freezer not defrosting, Frost buildup
- Part# WR50X10068 replaces these:
- AP3884317, 1170024, WR50X10068, WR50X10015, WR50X10017, WR50X10018, WR50X10028, WR50X10051, WR50X10052, WR50X10053, WR50X10054, WR50X10074, WR50X10075, WR50X10079
Product Description
If your freezer has a buildup of frost, or is not maintaining the proper temperature, there may be an issue with the defrost thermostat. This device stops the evaporator coil from overheating while the defrost cycle is running, as it stops the heater at the end of the cycle. The thermostat goes by other names such as the defrost limiter thermostat, the high limit thermostat, and the refrigerator defrost bi-metal thermostat. This is a genuine OEM replacement part, designed to fit your model of refrigerator. The defrost thermostat is located in the freezer portion of your refrigerator, attached to the tubing of the evaporator coil, and will require a few different tools to replace. These include wire strippers, electrical tape, quarter-inch nut driver, and a couple of wire connectors. Be sure to disconnect the power supply to your fridge before beginning this repair.
-
Works with the following brands:General Electric, Hotpoint
-
Works with the following products:Refrigerator
-
Fixes the following symptoms:Fridge too warm, Freezer section too warm, Freezer not defrosting, Frost buildup
-
Part# WR50X10068 replaces these:AP3884317, 1170024, WR50X10068, WR50X10015, WR50X10017, WR50X10018 ... Show more , WR50X10028, WR50X10051, WR50X10052, WR50X10053, WR50X10054, WR50X10074, WR50X10075, WR50X10079 Show less
Videos For installing this part.
Replacing your Defrost Thermostat

Questions and Answers
We're sorry, but our Q&A experts are temporarily unavailable.
Please check back later if you still haven't found the answer you need.
Related Parts Additional or alternate parts to consider.
Installation Instructions Provided by Fix customers like you.
- < Prev
- 1
- 2
- 3
- Next >
- Customer:
- saul from wylie, TX
- Parts Used:
- MWFP, WR50X10068, WR55X10025, WR51X10055
- Difficulty Level:
- Really Easy
- Total Repair Time:
- 30 - 60 mins
- Tools:
- Pliers
- Customer:
- CHRISTOPHER from CHILDERSBURG, AL
- Parts Used:
- WR50X10068, WR55X10025
- Difficulty Level:
- Really Easy
- Total Repair Time:
- 15 - 30 mins
- Tools:
- Nutdriver, Screw drivers
- Customer:
- DIXON from BRONX, NY
- Parts Used:
- WR50X10068, WR55X10025
- Difficulty Level:
- Really Easy
- Total Repair Time:
- 30 - 60 mins
attached to line just above where heater is attached.
You will find that is quicker to cut thermostat wire, then splice together with wire nut. reassemble in reverse order. To check ice door, you must remove inner door panel, mine had to selenoid rusted and locked up. Removed , cleaned, reinstalledm worked ok. Hope this helps someone. Thank you from your good service!
- Customer:
- Sean from Walkersville, MD
- Parts Used:
- WR50X10068, WR55X10025
- Difficulty Level:
- Easy
- Total Repair Time:
- 15 - 30 mins
- Tools:
- Nutdriver, Pliers, Screw drivers
- Customer:
- javier from edinburg, TX
- Parts Used:
- WR50X10068, WR55X10025
- Difficulty Level:
- Really Easy
- Total Repair Time:
- 30 - 60 mins
- Tools:
- Nutdriver, Pliers
- Customer:
- Lajos from HOUSTON, TX
- Parts Used:
- WD18X10039, WD24X10041, WR50X10068, WR55X10025, WD28X265
- Difficulty Level:
- A Bit Difficult
- Total Repair Time:
- More than 2 hours
- Tools:
- Nutdriver, Pliers, Wrench (Adjustable)
remove screws that secure the dishwasher and slowly pull the dishwasher to make sure electricity turn off and then unplug from the wall outlet then pull slowly from the opening very lower part of the dishwasher is your water line turn water off locati ... Read more on under kitchen sink turn off and go and unscrew the water one under the dishwater fitting is 1/2 in unscrew you will have a little water coming out undo the dishwasher drain line as a clamp undo clamp and disconnect line beware as something to catch water w
- Customer:
- Roy from Ronkonkoma, NY
- Parts Used:
- WR50X10068, WR55X10025
- Difficulty Level:
- Really Easy
- Total Repair Time:
- Less than 15 mins
- Tools:
- Screw drivers
- Customer:
- Robert from Islamorada, FL
- Parts Used:
- WR51X10101, WR50X10068
- Difficulty Level:
- Really Easy
- Total Repair Time:
- 15 - 30 mins
- Tools:
- Screw drivers
- Customer:
- Calvin from Homestead, FL
- Parts Used:
- WR51X10101, WR50X10068
- Difficulty Level:
- A Bit Difficult
- Total Repair Time:
- 1- 2 hours
- Tools:
- Nutdriver
- Customer:
- John Conrad from Mount Vernon, NY
- Parts Used:
- WR50X10068
- Difficulty Level:
- Very Easy
- Total Repair Time:
- 15 - 30 mins
- Tools:
- Nutdriver, Pliers, Screw drivers
- < Prev
- 1
- 2
- 3
- Next >
- < Prev
- 1
- Next >
Model Compatibility
Manufacturer Part Number: WR50X10068


