Ratings submitted by customers like you who bought this part.
?
$20.58
In Stock
Fix Number:
FIX469522
Manufacturer #:
5303918214
Manufactured by:
Frigidaire
Product Description
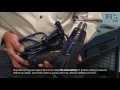
This is a genuine OEM kit for the defrost thermostat in your freezer. This kit comes with the clip, leads, and heat shrink. Some indicators that you may need to replace your thermostat is if there is excessive frost in your fridge or freezer, or the appliance will not defrost. Using a multimeter, you can determine if the thermostat is faulty. The thermostat is located behind a panel in the back of the freezer, so you will need to empty out the shelves in order to access it. Please be sure to disconnect the power supply to your appliance before beginning this repair. The tools you will need for this project include a 1/4-inch nut driver, wire strippers, and a heat gun or blow dryer. After you have replaced the thermostat, your fridge and freezer should start cooling again within 30 minutes of being plugged in.
Works with the following brands:
Frigidaire, Kenmore, Electrolux, Crosley
Works with the following products
Refrigerator
Fixes the following symptoms
Fridge too cold, Fridge too warm, Freezer section too warm, Freezer not defrosting
This is a genuine OEM kit for the defrost thermostat in your freezer. This kit comes with the clip, leads, and heat shrink. Some indicators that you may need to replace your thermostat is if there is excessive frost in your fridge or freezer, or the appliance will not defrost. Using a multimeter, you can determine if the thermostat is faulty. The thermostat is located behind a panel in the back of the freezer, so you will need to empty out the shelves in order to access it. Please be sure to disconnect the power supply to your appliance before beginning this repair. The tools you will need for this project include a 1/4-inch nut driver, wire strippers, and a heat gun or blow dryer. After you have replaced the thermostat, your fridge and freezer should start cooling again within 30 minutes of being plugged in.
Works with the following brands:
Frigidaire, Kenmore, Electrolux, Crosley
Works with the following products:
Refrigerator
Fixes the following symptoms:
Fridge too cold, Fridge too warm, Freezer section too warm, Freezer not defrosting
We're sorry, but our Q&A experts are temporarily unavailable.
Please check back later if you still haven't found the answer you need.
2 questions answered by our experts.
< Prev
1
Next >
Sort by:
Search filter:
Clear Filter
Your search term must have 3 or more characters.
Keep searches simple. Use keywords, e.g. "leaking", "pump", "broken" or "fit".
Sorry, we couldn't find any existing answers that matched. Try using some different or simpler keywords, or submit your new question by using the "Ask a Question" button above!
Jeremy
June 6, 2023
I replaced defrost thermostat kit due to the refrigerator being too warm. Now freezer is too cold. What is recommended next step? Thanks!
For model number FFHS2611PF6
Hello Jeremy, thank you for the great question. We recommend firstly adjusting the temperature in the freezer compartment, it may have been turned up when the fridge was to warm. If that does not fix the issue, then you will need to replace the Damper Control Assembly part number PS8746718. We hope this helps.
I have already replaced the defrost thermostat on my unit. The temps are set at 0 & 33, the coils are still freezing up. I have to thaw them about 4 weeks. What else could be the problem. I have searched for the defrost timer and unsuccessful found it. Does my unit have one?
For model number FLSC23F6DSN
Hello Devon, thank you for reaching out. According to our research, your model does not come with the defrost timer. Based on the description that you have provided, the issue is most probably with the defrost heater, part number FIX2581596. You may need to replace it to fix the issue. It melts frost from the evaporator fins during the automatic defrost cycle. Glad to be of help!
Refrigerated side not cooling well. Little or no air blowing through vent at top into refrigerator. Ice build up on back panel in lower part of the freezer. Coil was found to be totally iced up when panel was removed.
The video showed how to do the repair very well so I don't think a detailed description will add anything. I first removed all the ice from the coil with a hair dryer and also pouring hot water over it. The only other thing I did differently was that after I clipped on the wire connecto
... Read morers, I sealed them with clear silicone caulking. The repair kit came with sleeves you are supposed to slip over the connectors and heat shrink over the connectors with a heat gun. I do not have a heat gun, so I used the silicone instead. I just smeared it all around both open ends of each connector to seal them up.
Im from Mexico, I had to buy all the parts in US, I made an overhaul to my refrigerator, also I replace the main control board wich has the defrost timer integrated in this mother board, tooks me more de 2 session of 2 hours each one to complete the whole reparation. The most difficult part was remove and install the defrost heater elemen
... Read moret, because you most handle with the evaporator, need patience and time, also was difficult for me to replace the main control box because the access to it in the bottom of the fridge, too norrow the space and too short the harness cables that connect to it. gasket, defrost control, crisper support and bulb, very easy. excellent service from this site. After almost 3 weeks the service guy I called at the begining is still looking for the parts, Im glad I did my self.
changed thermostat, spliced in new thermostat after using blowdryer to melt iced up area, fridge was running warm because of problem. fridge runnng great now
Tried the defrost method worked for a day then started frosting and warming. Figured it was the thermostat ordered it and it came the next day. Followed the repair instructions and video link that came with it and it was a piece of cake! Easy repair, just followed the instructions and video link that came withe part. It's best to have a
... Read morepair of wire strippers and crimper.
this is the water filter base that holds the pure source 2 filter/bypass-frigidare will fix this for you. If you call them you will have to ask them-they will not offer.They changed the design of the filter so it won't stay in. Turn both refrig/freezer temp dials to 0 and unscrew lightbulb. Take out all hex screws except the back left. T
... Read morehis will allow you to drop down the entire plastic harness that holds the temp knobs.thermostat and the water filter base.You will have to disconnect the water lines they just snap out of the back of the old base. They are 2 small phillips head screws that hold the filter in place. You can see how it all fits in when you look at it. Its a bit of a challenge because your working in a small area. I'm a girl and I did it-you can do it.
Read less
0 of 1 peoplefound this instruction helpful.
Was this instruction helpful to you?
Thank you for voting!
< Prev
1
Next >
Model Compatibility
This part works with the following models:
Fix Number: FIX469522
Manufacturer Part Number: 5303918214
Some of the parts we sell are eligible for mail-in rebates since we can recycle them. We will display any applicable rebates in your shopping cart. To redeem your rebate, contact Customer Service after you have received your part.