Some of the parts we sell are eligible for mail-in rebates since we can recycle them. We will display any applicable rebates in your shopping cart. To redeem your rebate, contact Customer Service after you have received your part.
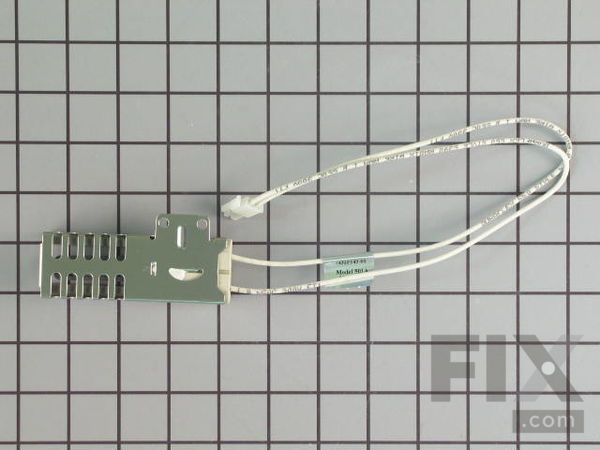
IGNTR-OVEN
- Fix Number:
- FIX16744717
- Manufacturer #:
- W11596211
- Manufactured by:
- Whirlpool
- Product Description
- This part ignites to help bake your food. This bake or broil igniter ignites the gas for the oven burner by glowing white. If any of the following symptoms occur, it is best to replace this part: little to no heat when baking, oven will not turn on, gas igniter glows, but does not light up or element will not heat. *Tip: Match up the connecter with the old part. Refer to the manual provided by the manufacturer for installation instructions and accurate guidance. As a safety precaution, remember to unplug your appliance from the power source.
- Works with the following brands:
- Maytag, Whirlpool, KitchenAid, Jenn-Air
- Works with the following products
- Range
- Fixes the following symptoms
- Little to no heat when baking, Will Not Start, Gas igniter glows, but will not light
- Part# W11596211 replaces these:
- 74007965, 7432P143-60, W11532055, WP7432P143-60
Product Description
This part ignites to help bake your food. This bake or broil igniter ignites the gas for the oven burner by glowing white. If any of the following symptoms occur, it is best to replace this part: little to no heat when baking, oven will not turn on, gas igniter glows, but does not light up or element will not heat. *Tip: Match up the connecter with the old part. Refer to the manual provided by the manufacturer for installation instructions and accurate guidance. As a safety precaution, remember to unplug your appliance from the power source.
-
Works with the following brands:Maytag, Whirlpool, KitchenAid, Jenn-Air
-
Works with the following products:Range
-
Fixes the following symptoms:Little to no heat when baking, Will Not Start, Gas igniter glows, but will not light
-
Part# W11596211 replaces these:74007965, 7432P143-60, W11532055, WP7432P143-60
Questions and Answers
We're sorry, but our Q&A experts are temporarily unavailable.
Please check back later if you still haven't found the answer you need.
Installation Instructions Provided by Fix customers like you.
- < Prev
- 1
- Next >
- Customer:
- David T from Salem, OR
- Parts Used:
- W11596211
- Difficulty Level:
- Really Easy
- Total Repair Time:
- Less than 15 mins
- Tools:
- Screw drivers
- Customer:
- Gary from LANSDALE, PA
- Parts Used:
- W11596211
- Difficulty Level:
- Easy
- Total Repair Time:
- 15 - 30 mins
- Tools:
- Nutdriver, Screw drivers
Step 2: Unscrew back left protective plate over the gas inlet. Next remove the screw holding down the gas tube. (Note the orientation of the bake igniter wire for reassembly) Gently slid the tube to the right to disconnect.
Step 3: Remove the tw ... Read more o screws holding the bake igniter.
Note: I screw all the screws back in there holes so I do not mix them up or loss them.
Step 4: Remove the back cover of the oven. Start by removing the two screws just above the gas value. Next the two screws on the bottom left. Next remove the side screws. Don't forget to disconnet the emergence shut-off line from the gas value. Now remove back cover.
Step 5: Disconnet the bake igniter connector. (Have a buddy lightly pull the old bake igniter in the oven a little bit to find the correct wire in the back). Tie a string to the old bake igniter and pull through into the oven. Retie the string into the new bake igniter and pull bake through to the bake. Reconnect to the wire you originally removed it from.
Step 6: Starting backwards from Step 4, reconnect the emergency disconnect lin E into the gas valve. Reinstall the back cover.
Step 7: Reinsert the gas tube back into the gas inlet. Make sure you guide the bake igniter wire around the back of the gas tube as noted in step 2. Screw tube back in place. Reinstall protective plate over gas inlet. Now, very carefully (igniter is very fragile), reinstall the two screws to fasten the bake igniter onto the gas tube.
Step 8: Reinstall the two cover plates from Step 1 and install the wingnut.
Fingers crossed, try starting the oven. It should fire up. Good luck with your repair.
- Customer:
- Cathy from Rice Lake, WI
- Parts Used:
- W11596211
- Difficulty Level:
- Really Easy
- Total Repair Time:
- 15 - 30 mins
- Tools:
- Screw drivers
- Customer:
- Jerome from Oakhurst, NJ
- Parts Used:
- W11596211
- Difficulty Level:
- Very Easy
- Total Repair Time:
- 15 - 30 mins
- Tools:
- Nutdriver, Screw drivers
- < Prev
- 1
- Next >
- < Prev
- 1
- Next >
Model Compatibility
Manufacturer Part Number: W11596211


