Some of the parts we sell are eligible for mail-in rebates since we can recycle them. We will display any applicable rebates in your shopping cart. To redeem your rebate, contact Customer Service after you have received your part.
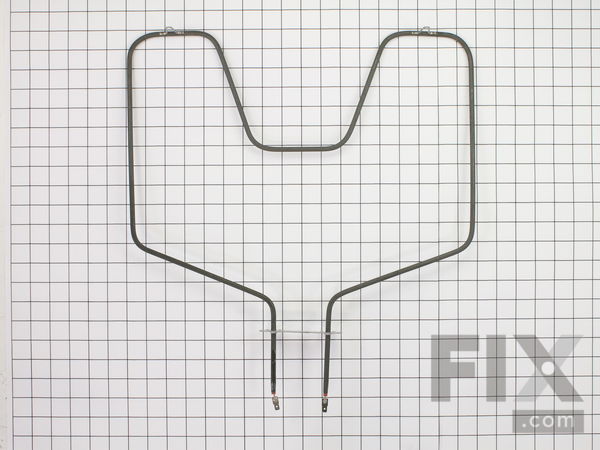
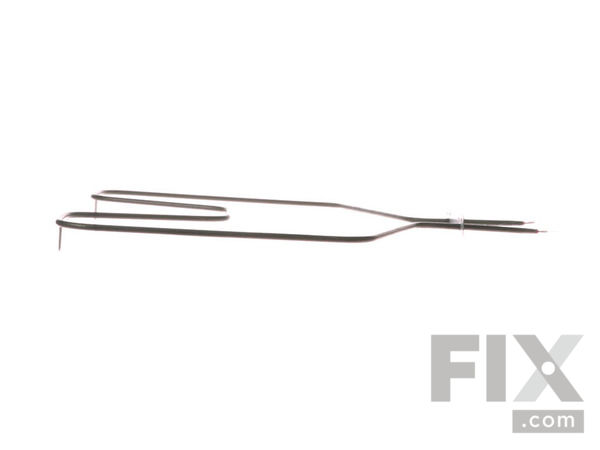
Bake Element
$61.87
In Stock
- Fix Number:
- FIX249247
- Manufacturer #:
- WB44K5012
- Manufactured by:
- GE
- Product Description
- This is a genuine OEM part is a partially open-style bake element for your oven, and comes with 1/4-inch push-on terminals. The bake element is found in the bottom of your oven, and it is responsible for providing the heat to cook your food. If your oven is not heating up, or has inconsistent temperatures, it may be time to replace the element. You can test the element with a multimeter to see if it is faulty. Please be sure to turn off the power to your range before beginning this repair.
- Works with the following brands:
- Kenmore, General Electric, Hotpoint, RCA
- Works with the following products
- Range, Microwave Oven Combo
- Fixes the following symptoms
- Little to no heat when baking, Element will not heat, Oven not heating evenly, Oven is too hot
- Part# WB44K5012 replaces these:
- AP2030968, 1944, WB44K5012, 325883, 326365, 340521, 4334928, 65988, WB44K5012E, WB44M0001, WB44M1, WB44X0230, WB44X0234, WB44X230, WB44X234
Part Number Cross Reference
Product Description
This is a genuine OEM part is a partially open-style bake element for your oven, and comes with 1/4-inch push-on terminals. The bake element is found in the bottom of your oven, and it is responsible for providing the heat to cook your food. If your oven is not heating up, or has inconsistent temperatures, it may be time to replace the element. You can test the element with a multimeter to see if it is faulty. Please be sure to turn off the power to your range before beginning this repair.
-
Works with the following brands:Kenmore, General Electric, Hotpoint, RCA
-
Works with the following products:Range, Microwave Oven Combo
-
Fixes the following symptoms:Little to no heat when baking, Element will not heat, Oven not heating evenly, Oven is too hot
-
Part# WB44K5012 replaces these:AP2030968, 1944, WB44K5012, 325883, 326365, 340521 ... Show more , 4334928, 65988, WB44K5012E, WB44M0001, WB44M1, WB44X0230, WB44X0234, WB44X230, WB44X234 Show less
Videos For installing this part.
Replacing your Bake Element

Questions and Answers
We're sorry, but our Q&A experts are temporarily unavailable.
Please check back later if you still haven't found the answer you need.
Installation Instructions Provided by Fix customers like you.
- < Prev
- 1
- 2
- 3
- Next >
Sort by:
Search filter:
Clear Filter
Your search term must have 3 or more characters.
Keep searches simple. Use keywords, e.g. "leaking", "pump", "broken" or "fit".
Sorry, we couldn't find any existing installation instruction that matched.
- Customer:
- Bill from Aiken, SC
- Parts Used:
- WB44K5012
- Difficulty Level:
- Really Easy
- Total Repair Time:
- 30 - 60 mins
- Tools:
- Nutdriver
Bottom Oven Element Burned Out
Per the video. Removed element with no problem. Sliding element back was a little hard but it went back in and element works. Thanks a lot. Bill
3 of 3 people
found this instruction helpful.
Was this instruction helpful to you?
Thank you for voting!
Electric heating element brackets broken & upper elements brackets broken
After watching the how to video I decided I could make the repair without waiting for my busy husband to make the repair. The repair went extremely well and I was delighted that my oven heated much more quickly. I ordered the part and to my surprise it arrived a day later. I installed it on Good Friday and prepared my Easter dinner with n
... Read more
o problem on Easter Sunday! Thank you for the video, without it I would not have attempted the repair on my own.
Read less
2 of 3 people
found this instruction helpful.
Was this instruction helpful to you?
Thank you for voting!
- Customer:
- Cecilia from Georgetown, TX
- Parts Used:
- WB44K5012
- Difficulty Level:
- Very Easy
- Total Repair Time:
- 15 - 30 mins
- Tools:
- Nutdriver, Pliers
Oven heating element burned out.
I followed the instructions from your video of how to do the repair. It was a piece of cake thanks to the video.
1 person
found this instruction helpful.
Was this instruction helpful to you?
Thank you for voting!
- Customer:
- JAMES from WHITE SULPHUR SPRINGS, WV
- Parts Used:
- WB44K5012
- Difficulty Level:
- Really Easy
- Total Repair Time:
- 30 - 60 mins
- Tools:
- Nutdriver
Old burner not working. It was burnt into.
Pull range out and unplug it. Remove 2 hex head screws from burner retaining plate. Pull burner towards oven door. Disconnect wires. Connect the wires to new burner. Place burner back in place and secure with screws. Plug range back in and place it back in place. Done.
1 person
found this instruction helpful.
Was this instruction helpful to you?
Thank you for voting!
- Customer:
- Harold from Homosassa, FL
- Parts Used:
- WB44K5012
- Difficulty Level:
- Really Easy
- Total Repair Time:
- 15 - 30 mins
- Tools:
- Nutdriver, Pliers
The Bake Oven Heating Element Not Working
Disconnect the power supply, remove 2 screws that hold heating element in with a 1/4" nutdriver , remove the element , disconnect the electrical connections, reinstall the new element.
1 person
found this instruction helpful.
Was this instruction helpful to you?
Thank you for voting!
The Baking element was bad and the oven light socket.
1) Moved the oven away from the wall. 2) disconnected the power. 3) unbolted the original oven heating element. 4) connected the new element to the connecters then rebolted the heating element. Next replaced the light bulb socket. Had to take the back of the oven off (4 hex screws) . Then un-fastened the light socket and installed the
... Read more
new one. Was done in an hour.
Read less
1 of 2 people
found this instruction helpful.
Was this instruction helpful to you?
Thank you for voting!
- Customer:
- Marie from Albuquerque, NM
- Parts Used:
- WB44K5012
- Difficulty Level:
- Really Easy
- Total Repair Time:
- 15 - 30 mins
- Tools:
- Nutdriver
The Baking Element broke.
Turn off the power to the oven/set breaker switch to off. Remove the 2 retaining screws and pull the element out until the wire leads are accessible to disconnect the Baking Element and remove. Leave the wire exposed for installation. Just reverse the steps to reinstall the element. Set the breaker switch to on and test the baking functio
... Read more
n.
Read less
0 of 1 people
found this instruction helpful.
Was this instruction helpful to you?
Thank you for voting!
- Customer:
- Marcia from Bristol, IN
- Parts Used:
- WB44K5012
- Difficulty Level:
- Really Easy
- Total Repair Time:
- 30 - 60 mins
Oven coil broke
Simply unscrewed it from the back and when the new coil came I simply plugged it into the outlet wires where it had been connected. ------An 80 yr. woman
0 of 1 people
found this instruction helpful.
Was this instruction helpful to you?
Thank you for voting!
- Customer:
- Billie from Laramie, WY
- Parts Used:
- WB44K5012
- Difficulty Level:
- Very Easy
- Total Repair Time:
- 15 - 30 mins
- Tools:
- Socket set
Oven element burned up
First, my mom and I watched the video to see if we thought it was something we could tackle. The video made it look very simple to remove the old element and replace with the new. The part was delivered in record time. The repair was as easy for us as the video explained. I don't think I would have had the courage to do the repair if not
... Read more
for the video. Repair was a huge success!!!
Read less
0 of 1 people
found this instruction helpful.
Was this instruction helpful to you?
Thank you for voting!
- Customer:
- Frederick from Hamilton, OH
- Parts Used:
- WB44K5012
- Difficulty Level:
- Very Easy
- Total Repair Time:
- Less than 15 mins
- Tools:
- Pliers, Wrench (Adjustable)
Bottom coil burnt out.
Removed damaged coil. Installed new coil. Two screws, took less than 10 minutes. Working great.
0 of 1 people
found this instruction helpful.
Was this instruction helpful to you?
Thank you for voting!
- < Prev
- 1
- 2
- 3
- Next >
★
Customer Reviews
Filter By Rating:
- < Prev
- 1
- Next >
Sort by:
Search filter:
Clear Filter
Your search term must have 3 or more characters.
Keep searches simple. Use keywords, e.g. "leaking", "pump", "broken" or "fit".
Sorry, we couldn't find any existing reviews that matched. Try using some different or simpler keywords.
Louis G - June 22, 2021
Verified Purchase
Perfect Part
Exactly what was required to put the unit back in service.
Model Compatibility
This part works with the following models:
Fix Number: FIX249247
Manufacturer Part Number: WB44K5012
Manufacturer Part Number: WB44K5012
Brand
Model Number
Description
✖
Mail-In Recycling Rebate


