Some of the parts we sell are eligible for mail-in rebates since we can recycle them. We will display any applicable rebates in your shopping cart. To redeem your rebate, contact Customer Service after you have received your part.
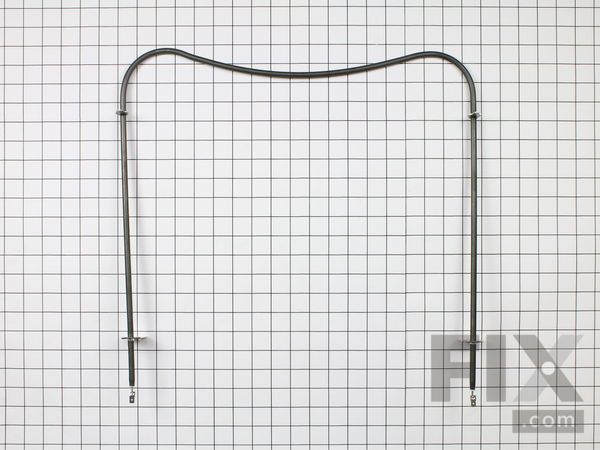
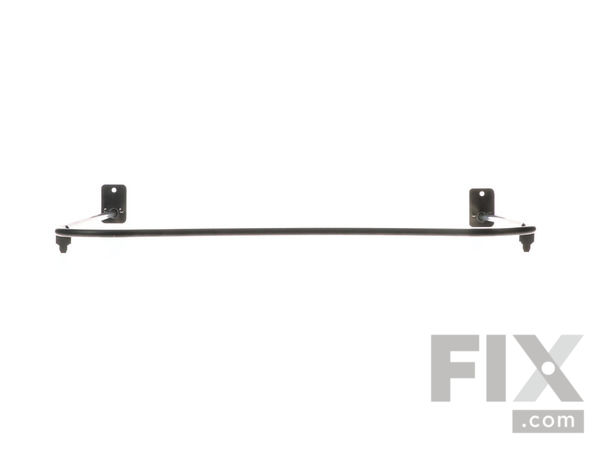
Bake Element
$102.34
In Stock
- Fix Number:
- FIX11752540
- Manufacturer #:
- WPW10310274
- Manufactured by:
- Whirlpool
- Product Description
- This bake element is found on the bottom of the oven. his bake element is for ranges. The bake element is at the bottom of the oven and supplies the heat for baking. Unplug the range or shut off the house circuit breaker for the range before installing this part. Wear work gloves to protect your hands.
- Works with the following brands:
- Jenn-Air, Whirlpool, Maytag, Amana
- Works with the following products
- Range
- Fixes the following symptoms
- Element will not heat, Little to no heat when baking, Oven not heating evenly
- Part# WPW10310274 replaces these:
- AP6019234, 74010883, 7406P439-60, W10310274
Part Number Cross Reference
Product Description
This bake element is found on the bottom of the oven. his bake element is for ranges. The bake element is at the bottom of the oven and supplies the heat for baking. Unplug the range or shut off the house circuit breaker for the range before installing this part. Wear work gloves to protect your hands.
-
Works with the following brands:Jenn-Air, Whirlpool, Maytag, Amana
-
Works with the following products:Range
-
Fixes the following symptoms:Element will not heat, Little to no heat when baking, Oven not heating evenly
-
Part# WPW10310274 replaces these:AP6019234, 74010883, 7406P439-60, W10310274
Questions and Answers
We're sorry, but our Q&A experts are temporarily unavailable.
Please check back later if you still haven't found the answer you need.
Installation Instructions Provided by Fix customers like you.
- < Prev
- 1
- Next >
Sort by:
Search filter:
Clear Filter
Your search term must have 3 or more characters.
Keep searches simple. Use keywords, e.g. "leaking", "pump", "broken" or "fit".
Sorry, we couldn't find any existing installation instruction that matched.
- Customer:
- Jeffrey from South Kingstown, RI
- Parts Used:
- WPW10310274
- Difficulty Level:
- Very Difficult
- Total Repair Time:
- More than 2 hours
- Tools:
- Screw drivers
The oven bake element burned out
The burnt out element was easy to remove by unscrewing the two screws that hold it in place. The problem was removing the old part. When the old oven element was removed, only the right side connection came out of the oven box with the wire connected. The left side wire was not long enough to extend beyond the insulation and the oven back
... Read more
. That is when the trouble began. I spent three hours trying to get to the wire. I fished for it with a curved tool. Removed the convection fan and heating element but I could not find the wire. I then pulled the oven way from the counter, but it could only move forward about 8 - 10 inches because of the down-draft fan. I had to call in a repairman to retrieve the wire. That took about an hour, and $60, two days later! I was glad that I had the part to fix it, once the connection wire was freed. It had been taped to the back of the oven along with other wires.
Read less
1 person
found this instruction helpful.
Was this instruction helpful to you?
Thank you for voting!
- Customer:
- Terry from Mesa, AZ
- Parts Used:
- WPW10310274
- Difficulty Level:
- Really Easy
- Total Repair Time:
- Less than 15 mins
- Tools:
- Pliers, Screw drivers
Bottom heating element burned out.
Remove oven racks to get more room. Remove one screw on each side that hold the element in place. Pull one side of the element out past the end, the electrical terminal, & to the insulated wire. Use the pliers if needed to help you unplug the electrical terminal. Do the same process on the other side of the element. They don't just pull o
... Read more
ut, you have to pull pretty hard. Now remove the old element. Install the new element in the reverse order. Replace the racks & turn the oven on to make sure you solved the problem. If the problem is solved, show the other members of your house hold so you can rave about your skill & expertise.
Read less
0 of 1 people
found this instruction helpful.
Was this instruction helpful to you?
Thank you for voting!
- Customer:
- Walter from Maple Valley, WA
- Parts Used:
- WPW10310274
- Difficulty Level:
- Very Easy
- Total Repair Time:
- Less than 15 mins
- Tools:
- Screw drivers
Baking element located in bottom of the oven was not heating up
Unscrewed the old heating element from the oven then detached the connection, attached new heating element and screwed it back into the oven.
0 of 1 people
found this instruction helpful.
Was this instruction helpful to you?
Thank you for voting!
- Customer:
- Patrick from Azusa, CA
- Parts Used:
- WPW10310274
- Difficulty Level:
- Really Easy
- Total Repair Time:
- Less than 15 mins
- Tools:
- Screw drivers
Bake element broken in 2 places
1. Turned off the circuit breaker. 2. Removed the oven racks. 3. unscrewed the Phillips head screws (2) at the back of the oven. 4. Carefully pulled each side of the old element away from the back wall of the oven about 6-8 inches, being careful not to harm the electrical connections or wire loom. 5. Removed the electrical clips from each
... Read more
end of the old element. 6. Fastened the electrical clips to each end of the new element and carefully pushed the wiring back through the oven wall. 7. Replaced and tightened the 2 Phillips head screws, replaced the oven racks and turned on the circuit breaker. My wife is pleased!!
Read less
0 of 1 people
found this instruction helpful.
Was this instruction helpful to you?
Thank you for voting!
- Customer:
- Allen from Agawam, MA
- Parts Used:
- WPW10310274
- Difficulty Level:
- Really Easy
- Total Repair Time:
- 15 - 30 mins
- Tools:
- Screw drivers
No heat to oven on bake selected not getting full red
Shut power off to stove..slid up front door over off for easy installation if bake element. ..removing no screws on door..then with a screw driver or 1/4 bit unscrewed 1 screw from each side of the bake element from inside the stove...then slowly pulling the bake towards me only about 2 in..I then used my needle nose plyers To hold the wi
... Read more
re to pry it off each side of the old bake then take the new bake element and install it the same way as you took the old one out..
Read less
0 of 1 people
found this instruction helpful.
Was this instruction helpful to you?
Thank you for voting!
- Customer:
- Derrick from STAFFORD, VA
- Parts Used:
- WPW10310274
- Difficulty Level:
- Really Easy
- Total Repair Time:
- Less than 15 mins
- Tools:
- Screw drivers
Low heat when baking
Remover door, removed two screws, pull out and removed old baking element, replaced baking element, put screws back and door.
0 of 1 people
found this instruction helpful.
Was this instruction helpful to you?
Thank you for voting!
- < Prev
- 1
- Next >
Model Compatibility
This part works with the following models:
Fix Number: FIX11752540
Manufacturer Part Number: WPW10310274
Manufacturer Part Number: WPW10310274
Brand
Model Number
Description
✖
Mail-In Recycling Rebate


