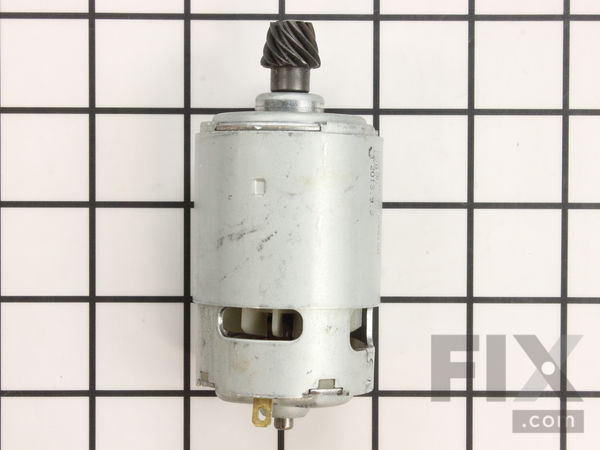
Part Location Diagram of 099988002029 Ryobi Motor Assembly
See part B-10 in the diagram
( Grid squares measure 1x1 inch )

Motor Assembly

Works With Model P4360!

Rated by 2 customers 

?

Easy 

1- 2 hours 

Ratings submitted by customers like you who bought this part.

?
$37.16
Special Order
Fix Number:
FIX9873452
Manufacturer #:
099988002029
Manufactured by:
Ryobi
Works With Model P4360!

Product Description

Questions and Answers

We're sorry, but our Q&A experts are temporarily unavailable.
Please check back later if you still haven't found the answer you need.

Installation Instructions Provided by Fix customers like you.

Average Repair Rating: 2.6 / 5.0, 2 reviews.
  • 1
Sort by:
Sorry, we couldn't find any existing installation instruction that matched.
Customer:
Andreas from TUCSON, AZ
Parts Used:
099988002029
Difficulty Level:
A Bit Difficult
Total Repair Time:
30 - 60 mins
Tools:
Pliers, Screw drivers, Wrench (Adjustable)
Motor burned out, need to replace the motor.
Step 1 - remove chain cover, chain guide plate and chain.
Step 2- Remove all screws holding the casing together. Pay particular attention to the screws hidden under the Ryobi label (2 of them) - Use phillips head screwdriver.
Step 3 - Take photographs of how things are supposed to be when assembled with attention to the wire c onnectors on the motor to ensure polarity when reconnecting. (*super important otherwise you may be running the chain in the wrong direction and injury will occur.) Also take photo of chain side so that you re-stack the chain cog and washer correctly during reassembly.
Step 4 - Pull oil pump assembly off of inner case
Step 5 - flip over and remove snap ring on the axle using the snap ring pliers.
Step 6 - flip back over and pull the axle assembly apart so that the motor can be removed.
Step 7 - Once the motor is removed, remove the front bezel bracket from the motor. You will need this for the new motor. Make note of how it is mounted and remove the two screws. Immediately mount this bracket in the same position on the new motor while observing the polarity of the wire connections.
Step 8 - re-seat the new motor into it's place.
Step 9 - connect the terminals making sure the poles are correct. Use photos for reference.
Step 10 - re-insert the main axle with all wheels stacked and flip over to re-stack or re-insert the chain cog and washer as per photo.
Step 11 - Re-attach the snap ring using the snap ring pliers. Caution: make sure the the ring is properly held by pliers as it could spring off and cause eye damage and or just get lost.
Step 12 - Re-install the oil assembly using photo as reference for the pumping mechanism to be installed correctly against the ceramic off center wheel.
Step 13 - Fit cover on while making sure the bearing fits correctly. Don't force, just wiggle until the covers come together and seal nicely.
Step 14 - while holding the covers together, flip entire unit over and insert and screw in the screws.
Step 15 - Replace the chain guide plate, the chain and the chain cover.
Step 16 - add chainsaw oil
Step 17 - do some quick tests to make sure the chain is moving in the correct direction. It should be coming towards the saw head on the bottom side of the chain guide plate so that what you are cutting gets pulled towards you.
Step 18 - Go get you some cutting done!
5 of 5 people found this instruction helpful.
Was this instruction helpful to you?
Thank you for voting!
Customer:
Brad from AMBOY, WA
Parts Used:
099988002029
Difficulty Level:
Really Easy
Total Repair Time:
More than 2 hours
Tools:
Pliers, Screw drivers, Wrench set
would not start
The auto-diagnose, went only to the motor being bad. After much trouble shooting I discovered a inline fuse that's non- replaceable in the upper portion of the pole ,so game over for this saw. The motors, new and old worked perfectly fine. Do a complete trouble shoot before ordering a motor.
4 of 4 people found this instruction helpful.
Was this instruction helpful to you?
Thank you for voting!
  • 1

Model Compatibility

This part works with the following models:
Fix Number: FIX9873452
Manufacturer Part Number: 099988002029
Brand
Model Number
Description
Ryobi
P4360
Pole Saw - 18 Volt Pole Saw
Ryobi
RY4360
Saw - Ry4360 - Everything Else (Saws)