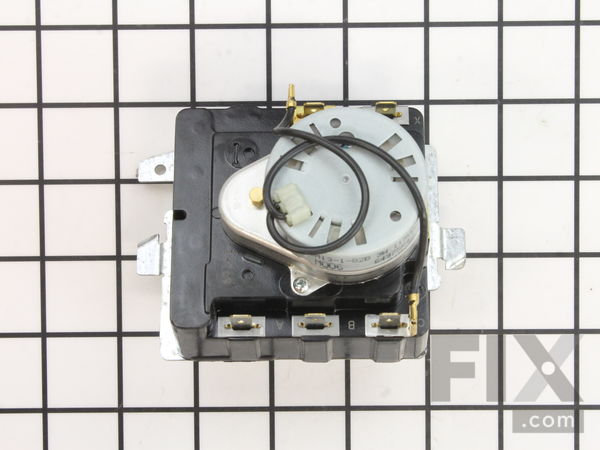
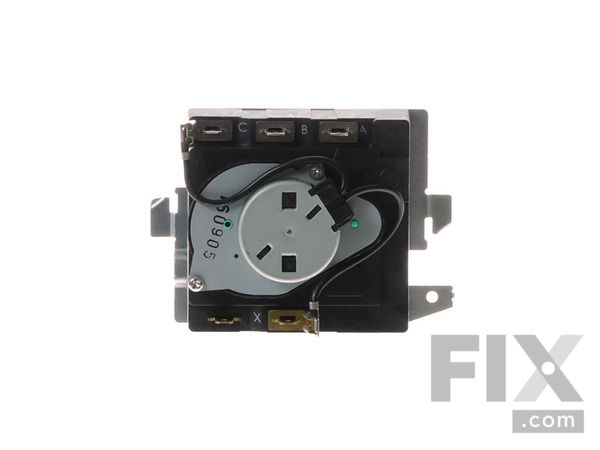
Part Location Diagram of WE4M532 GE Dryer Timer
See part 100 in the diagram
( Grid squares measure 1x1 inch )

Dryer Timer

Works With Model HTDX100EM8WW!

Rated by 12 customers 

?

Really Easy 

15 - 30 mins 

Ratings submitted by customers like you who bought this part.

?
$105.68
In Stock
Fix Number:
FIX8746223
Manufacturer #:
WE4M532
Manufactured by:
GE
Works With Model HTDX100EM8WW!

Product Description

This is a genuine OEM replacement timer for your dryer. It is used to control the dry cycle by regulating the length of time depicted by the different settings. If your dryer will not start or the timer will not advance you may need to replace the timer. Over time the timer shaft can become stripped and will not turn. Please note that the knob to adjust the timer is not included with this part but can be purchased separately if necessary. Please be sure to disconnect the power supply to your dryer before beginning this repair.

Questions and Answers

We're sorry, but our Q&A experts are temporarily unavailable.
Please check back later if you still haven't found the answer you need.

1 question answered by our experts.
  • 1
Sort by:
Sorry, we couldn't find any existing answers that matched.
Try using some different or simpler keywords, or submit your new question by using the "Ask a Question" button above!
Maegen
July 19, 2022
I bought this same part about 6 months ago and was wondering if there is a part warranty at all?
For model number HTDX100EM8WW
Fix.com logo
Hi Maegan, Thank you for your question. We provide all of our parts with a one year warranty. We have included a link, where you may view information on it. If you have any questions, please let us know. We are open 7 days a week. We look forward to hearing from you!

Was this helpful?
Thank you for voting!
Additional Links:

Installation Instructions Provided by Fix customers like you.

Average Repair Rating: 4.6 / 5.0, 12 reviews.
  • 1
  • 2
Sort by:
Sorry, we couldn't find any existing installation instruction that matched.
Customer:
Gena from Braselton, GA
Parts Used:
WE4M532
Difficulty Level:
Very Easy
Total Repair Time:
Less than 15 mins
Tools:
Screw drivers
Bad timer
Unplugged the dryer.Move the dryer out so I could get to the back. Used a screwdriver to remove the top metal plate that was covering the area where the timer is located. Unplugged the clips holding in the timer. Plugged the new timer in to the clips. Plugged the dyer in to see that it worked. Replaced the metal cover. And moved the dr yer back into place. I am.a 60 yr. old woman and it was easy breezy to do.
4 of 4 people found this instruction helpful.
Was this instruction helpful to you?
Thank you for voting!
Customer:
Louis from Tampa, FL
Parts Used:
WE4M532, WE1M652, WH01X10106
Difficulty Level:
Really Easy
Total Repair Time:
15 - 30 mins
Tools:
Pliers, Screw drivers
Broken Timer
originally the know broke, then we used pliers to twist the timer until it broke. Fix was simple, removed 2 screws, tilted the control face forward, removed the old timer, pulled off the wires and replaced in exact position on new timer switch, replaced new timer, put back in the screws and put on the new knob. Like new.
2 of 2 people found this instruction helpful.
Was this instruction helpful to you?
Thank you for voting!
Customer:
Jeffery from Harmony, NC
Parts Used:
WE4M532
Difficulty Level:
Really Easy
Total Repair Time:
15 - 30 mins
Tools:
Pliers, Screw drivers
Timer stripped out internally
Removed front and rear panel, and installed new timer. Received part in 2 days and dryer works fine. Easy job, anyone can do.
0 of 1 people found this instruction helpful.
Was this instruction helpful to you?
Thank you for voting!
Customer:
Jerry from Indianapolis, IN
Parts Used:
WE4M532
Difficulty Level:
Really Easy
Total Repair Time:
30 - 60 mins
Tools:
Socket set
Timer went out
My boyfriend is blind and he put the part in very easily only took 10 minutes! He did it by hisself!
0 of 1 people found this instruction helpful.
Was this instruction helpful to you?
Thank you for voting!
Customer:
Daniel from Ledyard, CT
Parts Used:
WE4M532
Difficulty Level:
Really Easy
Total Repair Time:
30 - 60 mins
Tools:
Screw drivers
Dryer Would Not Start - Timer Switch Rotated Freely
Replaced timer - pulled off plastic timer knob, removed panel from back top of dryer, turned timer assembly to detach it from clips, used a screwdriver to remove electrical connectors, installed electrical connectors on new switch, twisted timer back into place and reinstalled cover. I replaced the timer knob and it still rotated freely and dryer would not start. Upon further investigation, the plastic sleeve that went on the D-shaft was broken and was not engaging the D-shaft. I ordered a new knob and dryer worked fine. Broken know was likely the original problem and I didn't need to replace the timer.
0 of 1 people found this instruction helpful.
Was this instruction helpful to you?
Thank you for voting!
Customer:
Mike from Winter haven, FL
Parts Used:
WE4M532, WE1M652
Difficulty Level:
Very Easy
Total Repair Time:
Less than 15 mins
Tools:
Screw drivers
Knob cracked at spindle slot, stripped timer spindle
Took a course long ago in refrigerators and major appliances. Common sense and experience.
0 of 1 people found this instruction helpful.
Was this instruction helpful to you?
Thank you for voting!
Customer:
Leon from Colorado Springs, CO
Parts Used:
WE4M532
Difficulty Level:
Really Easy
Total Repair Time:
Less than 15 mins
timer wouldn't advance
Removed 6 screws from back panel, unplugged wires from timer{6 w wires} slipped timer from holding points and reversed removal procedure very easy.
0 of 1 people found this instruction helpful.
Was this instruction helpful to you?
Thank you for voting!
Customer:
Robert from Katy, TX
Parts Used:
WE4M532
Difficulty Level:
Really Easy
Total Repair Time:
Less than 15 mins
Tools:
Screw drivers
Timer knob broke and then timer front tip cracked off
With screw drivers removed top panel screws. Removed old timer from electric connections and inserted new. Reset top and replaced screws.
0 of 1 people found this instruction helpful.
Was this instruction helpful to you?
Thank you for voting!
Customer:
Jeffrey from Pinckney, MI
Parts Used:
WE4M532, WH01X10313
Difficulty Level:
Really Easy
Total Repair Time:
15 - 30 mins
Tools:
Screw drivers
timer broken,
removed 3 screws from rear of access panel, turn old timer counter clockwise to remove, transfer 5 plugs from old to new timer, replace new timer and put 3 screws back in
0 of 1 people found this instruction helpful.
Was this instruction helpful to you?
Thank you for voting!
Customer:
Dorothy from Jonesboro, GA
Parts Used:
WE4M532, WE1M652
Difficulty Level:
Easy
Total Repair Time:
15 - 30 mins
Tools:
Screw drivers
Knob broke and then we broke off the timer thing trying to turn it with pliers.
I unscrewed the back of the top panel and raised up the front top panel. Took out the old timer and unhooked all the wires making note of where the colors were. Installed the wires on the new timer making sure to put right color wires on the right letters. Set the timer in the slots made for it and turned clockwise. Screwed the back panel back on and put the front panel back into the slots. Put the new knob on the new timer thing sticking out. Works great, like it did before we broke the knob and thing coming out of the timer. It is a shame you have to replace the whole timer when you only break the part that the knob goes on but that was the only way I could see to fix it right. I am in no way an expert and this turned out to be pretty easy. I may not have the used the right terms for the different parts of the dryer either but hopefully you can understand what I meant. If I can do this anybody can. I am a female with no appliance repair experience. The only thing that might have helped me though is the fact that I am the daughter of a long time appliance repairman. Maybe I picked up a little knowledge from my Daddy. Thanks Daddy and rest in peace! The most important thing to remember is to unplug the appliance before you work on it. Watch videos and read up on it to help you before you start if you are new at this. I am glad I was able to fix this but I also think if they had made a better quality knob and the part that the knob goes on in the first place I wouldn't of had to replace this so soon after purchase. Remember to only turn timer knob clockwise and if the knob breaks, get a new one and don't use pliers to try and turn the timer because it will completely break off and then you have to buy a whole new timer. I know I rambled on but I wanted to try and help other females out there who have no clue about appliances like me.
0 of 1 people found this instruction helpful.
Was this instruction helpful to you?
Thank you for voting!
  • 1
  • 2

Model Compatibility

This part works with the following models:
Fix Number: FIX8746223
Manufacturer Part Number: WE4M532
Brand
Model Number
Description
General Electric
DBLR333EG1CC
Dryer - Electric
General Electric
DBLR333EG1WW
Dryer - Electric
General Electric
DBLR333EG2CC
Dryer - Electric
General Electric
DBLR333EG2WW
Dryer - Electric
General Electric
DBLR333EG3CC
Dryer
General Electric
DBLR333EG3WW
Dryer
General Electric
DBLR333EG4CC
Dryer
General Electric
DBLR333EG4WW
Dryer
General Electric
DBLR333EG5CC
Dryer
General Electric
DBLR333EG5WW
Dryer
General Electric
DBLR333EG6CC
Dryer
General Electric
DBLR333EG6WW
Dryer
General Electric
DBLR333EG7WW
Dryer
General Electric
DLLLR33EJ0WW
Dryer
General Electric
DLLLR33EJ1WW
Dryer
General Electric
GHDX100EM0WW
Dryer
General Electric
GNSR465EBAWW
Dryer
General Electric
GNSR465EBBWW
Dryer
General Electric
GNSR465EBCWW
Dryer
General Electric
GNSR465EBWW
Dryer
General Electric
GTDX100EM0WW
Dryer
General Electric
GTDX100EM1WW
Dryer
General Electric
GTDX100EM2WW
Dryer
General Electric
GTMX100EM0WW
Dryer
General Electric
GTMX100EM1WW
Dryer
General Electric
GTMX100EM2WW
Dryer
General Electric
GUSR465EBAWW
Dryer
General Electric
GUSR465EBBWW
Dryer
General Electric
GUSR465EBCWW
Dryer
General Electric
HBXR333EJ1WW
Dryer