Some of the parts we sell are eligible for mail-in rebates since we can recycle them. We will display any applicable rebates in your shopping cart. To redeem your rebate, contact Customer Service after you have received your part.
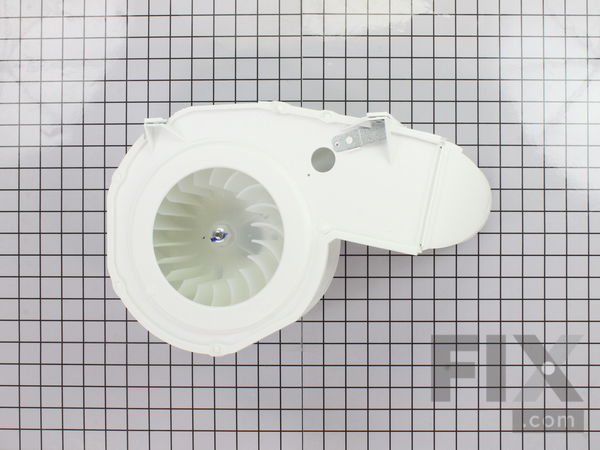
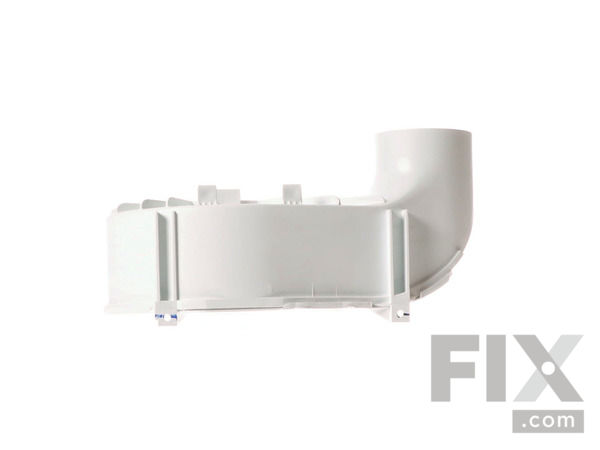
Blower Housing with Blower Wheel
Works With Model AGQ7000CES0!
$116.35
In Stock
- Fix Number:
- FIX418726
- Manufacturer #:
- 131775600
- Manufactured by:
- Frigidaire
Works With Model AGQ7000CES0!
- Product Description
- ***Please Note: This part is a substituted part by the manufacturer. It may appear different, but should still work with your appliance.
- Works with the following brands:
- Frigidaire, Kenmore, Westinghouse, Crosley
- Works with the following products
- Dryer
- Fixes the following symptoms
- Noisy
- Part# 131775600 replaces these:
- AP2107606, 823074, 131775600, 131775610
Part Number Cross Reference
Product Description
***Please Note: This part is a substituted part by the manufacturer. It may appear different, but should still work with your appliance.
-
Works with the following brands:Frigidaire, Kenmore, Westinghouse, Crosley
-
Works with the following products:Dryer
-
Fixes the following symptoms:Noisy
-
Part# 131775600 replaces these:AP2107606, 823074, 131775600, 131775610
Videos For installing this part.
Replacing your Blower Housing with Blower Wheel

Questions and Answers
We're sorry, but our Q&A experts are temporarily unavailable.
Please check back later if you still haven't found the answer you need.
Installation Instructions Provided by Fix customers like you.
- < Prev
- 1
- Next >
Sort by:
Search filter:
Clear Filter
Your search term must have 3 or more characters.
Keep searches simple. Use keywords, e.g. "leaking", "pump", "broken" or "fit".
Sorry, we couldn't find any existing installation instruction that matched.
- Customer:
- lawrence from greensburg, KY
- Parts Used:
- 131775600
- Difficulty Level:
- Very Easy
- Total Repair Time:
- 15 - 30 mins
- Tools:
- Screw drivers, Socket set
NOISY
was very easy. but have had a lot of them apart. remove top .take panel off back to reach the belt. remove the frount. remove the drum, removed vent hose. remove the old blower. and then put everything back just like it come apart. it's not bad.just take's time.
6 of 6 people
found this instruction helpful.
Was this instruction helpful to you?
Thank you for voting!
- Customer:
- Dominick from STATEN ISLAND, NY
- Parts Used:
- 131775600
- Difficulty Level:
- A Bit Difficult
- Total Repair Time:
- 1- 2 hours
- Tools:
- Pliers, Screw drivers, Socket set
Dryer was making a clunking noise.
It wasn't the drum rollers, which was my first suspect. It was a loose blower wheel. Plastic was worn just enough. I hate plastic, it is toxic, and it has infiltrated every aspect of our lives.
Thank goodness for YouTube! All in all, it took me more than 2 hours, but I do tend to waste a lot of time.
Thank goodness for YouTube! All in all, it took me more than 2 hours, but I do tend to waste a lot of time.
2 of 2 people
found this instruction helpful.
Was this instruction helpful to you?
Thank you for voting!
- Customer:
- Troy from ROSSFORD, OH
- Parts Used:
- 131775600
- Difficulty Level:
- Difficult
- Total Repair Time:
- More than 2 hours
- Tools:
- Screw drivers, Socket set, Wrench (Adjustable), Wrench set
Blower wheel cracked off
Disassemble all gas ,electric, take off connectors about 3, install a new bulb is you have one, take off all guards vent screen, don't forget to use tabs when reassembling helps in holding front panels, 2 screws underneath are the hardest, n always a lil rusty, take off blower box and motor, YouTube that part I did, was easy , you gotta g
... Read more
rind a somewhat hex on steel hud left from wheel breaking off put a 15mm turn clockwise ?? If you round it off going wrong way grins down a hex to 14mm try again YouTube make sure you going correct way itll come loose. I purchased new part thru fix.com $120 , reinstall motor n blower box 3/4" socket to rescrew blower wheel on don't over tighten it ain't going nowhere, reassemble connectors, n panels n those 2 hard to get at screws on bottom, then button everything up reconnect gas line n plug in, make your belt is centered and correct on the pulley oh yeah I had to use 2 hands to put belt on, put one hand over blower box, other(right) hand along right side panel. you'll get it. Test it out with top cover off check belt is not wavy, correct with slight of your fingers if so, put cover on top slide back connect to outside vet pipe, reattach hose clamp. Presto gets some laundry done I know my wife was standing there waiting throw a load in ,jeees!!!
Read less
1 person
found this instruction helpful.
Was this instruction helpful to you?
Thank you for voting!
- Customer:
- Howard from Sebring, FL
- Parts Used:
- 131775600
- Difficulty Level:
- A Bit Difficult
- Total Repair Time:
- 1- 2 hours
- Tools:
- Nutdriver, Pliers, Screw drivers
Dryer made a groaning sound when stopped, and dried poorly. I finally found the blower wheel loose on the motor shaft.
UNPLUG DRYER !!! Using a putty knife I opened the top of the dryer and leaned it back against the wall. I then removed the wires to the door open stop switch. (necessary to remove the front) Then remove the screws holding the front on. Remove the front. Then reach under the drum and remove the drive belt from the spring belt
... Read more
tightener. Then remove the plastic drum support from the top front. Remove the drum by lifting the back of the drum to remove it from the ball support bearing. Then remove the drum and set aside. Then remove the mounting screws for the motor & blower assembly . Remove motor & blower assembly from dryer. Now the hard part, I had to cut away the plastic center from the blower wheel to gain access to the aluminum center that is threaded on to the end of the motor shaft (left hand thread, backward to normal). Once I had the blower removed from the center and remembered that the thread was backward the rest was easy. Remove the old aluminum center. Then screw on the new blower wheel and tighten on the motor shaft with a 1" deep socket. Then reinstall the blower and motor in the dryer. Reinstall the drum. Put drive belt on tightener. Install front drum support. Put the front back on the case. Reconnect the door open stop switch. Plug in dryer and test drum. Close top of dryer, pushing down until it is secure.
Read less
1 person
found this instruction helpful.
Was this instruction helpful to you?
Thank you for voting!
- Customer:
- Earl from Equality, IL
- Parts Used:
- 131775600
- Difficulty Level:
- Easy
- Total Repair Time:
- 15 - 30 mins
- Tools:
- Nutdriver, Screw drivers
Ceased blowing air. Incredibly noisy.
The blower had stripped it splines from the motor shaft, creating a large amount of noise. Having no service manual, had to rely on "autopsy-ing" the bad part. At first glance, it would appear the plastic squirrel-cage fan is simply pressed onto the shaft. Not so. It has an aluminum, splined bushing pressed into the plastic fan which in t
... Read more
urn left-hand threads onto the motor shaft. Removing the bad blower assembly from the motor was a bit of chore, as there was no way to get a solid grip on the bad fan to unscrew it from the motor. The old saying "get a bigger hammer" applied here. Ended up smashing the housing apart and the squirrel cage to get to the aluminum bushing that threaded onto the motor. Despite this, the bushing would not turn - suspect the use of Loc-Tite or something similar was used. Ended up using a Dremel to cut the aluminum collar lightly in two places to where it simply fell off the shaft with a twist of a screwdriver in the cut channels. Reassembly was straightforward and uneventful with the exception of using a larger self-tapping screw in one hole that was loose. No kind of thread lock was used on the blower as the motor/fan turns clockwise on a left-hand thread and will "self tighten".
Read less
1 person
found this instruction helpful.
Was this instruction helpful to you?
Thank you for voting!
- Customer:
- Ryan from sidney, OH
- Parts Used:
- 131775600
- Difficulty Level:
- Really Easy
- Total Repair Time:
- 15 - 30 mins
- Tools:
- Screw drivers
Blower wheel stripped off metal nut. made grinding noise
Took off dryer hood. Removed screws for door panel and panel control. Blower located in front of motor. Removed clip in rear blower connecting to motor. Replaced fan turning fan counter clockwise onto spindle. Replace clip and put back together. Runs like new.
0 of 1 people
found this instruction helpful.
Was this instruction helpful to you?
Thank you for voting!
- Customer:
- John from Columbus, OH
- Parts Used:
- 131775600
- Difficulty Level:
- A Bit Difficult
- Total Repair Time:
- 30 - 60 mins
- Tools:
- Screw drivers, Wrench set
Terrible Noise When Running; Worse When Starting/Stopping
Removed the access panel on the rear of the dryer (two Philips screws). Removed the belt by rocking the idler pulley. Opened the top of the dryer - there are two clips on the front of the dryer that I pushed in with a flat blade screw driver that hold the whole top section down. The top section rotates back. Removed the front panel -
... Read more
there is a Philips screw on either side and the panel pops off. I removed the wiring for the door sensor. Removed the plastic spacer at the center of the front frame (single Philips screw). At this point, remove the drum and set aside. It should come out the front (tight fit!). On mine, the fan assembly was completely destroyed (made diagnosis easy), but if yours is intact, loosen the fan (the fan bolt is reverse thread). Remove the motor - there are two clips, one on the back which is metal (idler pulley) and one on the front (fan housing) that is plastic. Both can be popped free with a flat screw driver. Once the motor is out, there are two screws at the front and a sensor (all Philips screws) removed. The blower housing should come right out. Installation is the reverse of removal.
Read less
0 of 1 people
found this instruction helpful.
Was this instruction helpful to you?
Thank you for voting!
- < Prev
- 1
- Next >
★
Customer Reviews
Filter By Rating:
- < Prev
- 1
- Next >
Sort by:
Search filter:
Clear Filter
Your search term must have 3 or more characters.
Keep searches simple. Use keywords, e.g. "leaking", "pump", "broken" or "fit".
Sorry, we couldn't find any existing reviews that matched. Try using some different or simpler keywords.
Jerome A - October 3, 2022
Verified Purchase
Dryer Blower Housing
The part was an exact fit.
Took two weeks to deliver.
Model Compatibility
This part works with the following models:
Fix Number: FIX418726
Manufacturer Part Number: 131775600
Manufacturer Part Number: 131775600
Brand
Model Number
Description
✖
Mail-In Recycling Rebate


