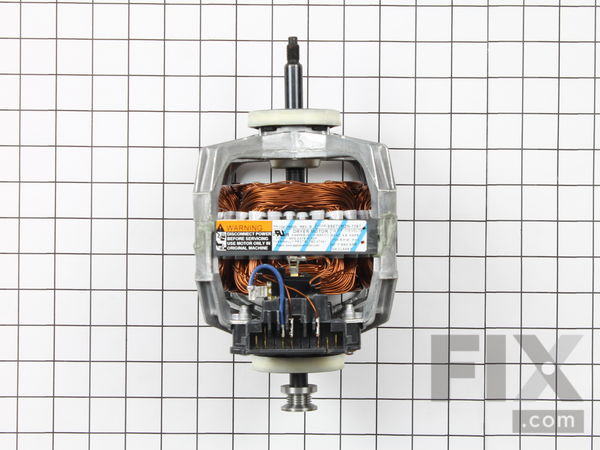
Part Location Diagram of 131560100 Frigidaire Drive Motor with Pulley
See part 28 in the diagram
Replacing your Frigidaire Dryer Drive Motor with Pulley
( Grid squares measure 1x1 inch )

Drive Motor with Pulley

Works With Model FCED3000ES0!

Rated by 3 customers 

?

A Bit Difficult 

1- 2 hours 

Ratings submitted by customers like you who bought this part.

?
$228.17
In Stock
Fix Number:
FIX418132
Manufacturer #:
131560100
Manufactured by:
Frigidaire
Works With Model FCED3000ES0!

Product Description

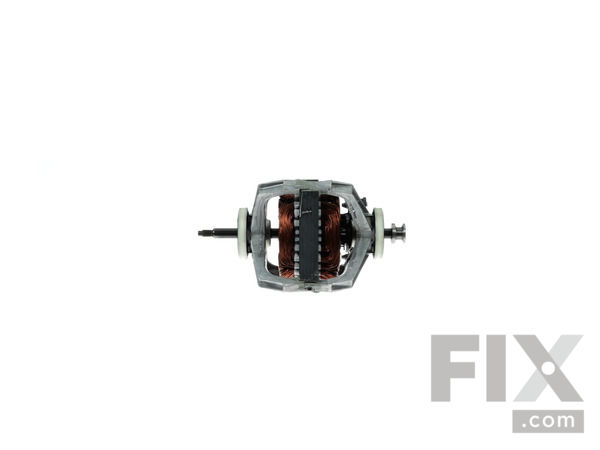
This motor has a double shaft.

Videos For installing this part.

Replacing your Drive Motor with Pulley

Replacing your Drive Motor with Pulley

Questions and Answers

We're sorry, but our Q&A experts are temporarily unavailable.
Please check back later if you still haven't found the answer you need.

Installation Instructions Provided by Fix customers like you.

Average Repair Rating: 2.2 / 5.0, 3 reviews.
  • 1
Sort by:
Sorry, we couldn't find any existing installation instruction that matched.
Customer:
Timothy from York, PA
Parts Used:
134503600, 5303937139, 131560100
Difficulty Level:
Easy
Total Repair Time:
30 - 60 mins
Tools:
Pliers, Screw drivers, Socket set
motor buzzing and not turning the drum
Before I started the repair, I found the dryer nonoperative. The motor would just buzz. Being that the dryer is 19 years old I figured the bearings seized up. I pulled the small back access panel, took off the belt from the tensioner. And tried to turn the motor shaft. It wasnt budging. So, before ordering parts, I took the dryer apart, t o make sure the rest of the dryer was ok. With a flat head screw driver, I popped the two clips that hold the top to the front of the dryer. Then I laid the top against the wall(its sorta hinged at the back). Then undid to screws, one on each side, where the front attaches to both sides. Then, undid the wiring to the door closed switch, and cut the ziptie to get the wires out of the way. Then, I just pulled up the front a lil, to get it off the side clips, and laid it flat on the ground to undo the clips at the bottom. The upper drum guide was shot, so i knew i needed another one of those. The drum, came out easy. A quick firm tug of the belt upwards unseated the spindle from the bushing in the back, and the drum came out threw the front of the dryer. The belt was ok, but, being so old I figured i might as well replace it. The motor was down at the bottom. One half circular clip holds the back bearing in place, you pop that from the left hand side. One the back of the blower housing is a plastic slider pieced that snugs up against the front motor bearing. Pull that up and out. The blower wheel is left hand threads,(theres an arrow showing direction for off) so make sure you turn the ratchet the correct way Its either a 7/8 or 22 mm, I just used used a 22 mm(its all i had handy) with a extension(and a pair of plyers to hold the other end of the shaft). Youll have to move the motor backwards while unscrewing the blower wheel because there isnt much room in the housing. Once thats detached(you leave the blower wheel in the housing) I unplugged the motor, and lifted it out. There bearings were seized bad. So i ordered a motor, belt and upper drum guide. While waiting, I cleaned ALL the lint buildup inside the dryer.The parts came within 3 days. First i scrapped off the old upper drum guide from the front piece, and glued the new one in. I also used clothes pin sorta clips to to hold it in place while it dried. I let it dry overnight. The following day, i put the motor back in, getting the shaft inside the blower wheel, and turning the wheel on the shaft while positioning the motor where its suppose to sit. Then tightened up the blower wheel with the 22mm socket. It doesnt need to be super tight. You'll have to hold the other end of the motor shaft while tighting it up with a pair a plyers. Then plugged the plug bck into the motor. Once that was done, i took the old belt off the drum, and put the new one on. Make sure the ribs on the belt are facing the same way as the old one. Then it was pretty straight forward really, put the drum back in(i greased up the spindle that sits inside that bushing/bracket). Seated the spindle in the bushing. Put the front panel back on.in reverse order,laid the top back down and seated it to the clips sticking up from the front panel.Then, got into the access panel, and put the belt back on the motor, and tensioner. then put the access cover back on Then it was done and ready to test. Plugged it back into the wall, hooked the duct work back up, and viola, she runs and purrs like a kitten, good as new!
1 person found this instruction helpful.
Was this instruction helpful to you?
Thank you for voting!
Customer:
Kathleen from New York, NY
Parts Used:
131560100
Difficulty Level:
A Bit Difficult
Total Repair Time:
More than 2 hours
Tools:
Screw drivers, Socket set
Drum wouldn't rotate
Followed other repair instructions. Most annoying part was getting the dryer out of the tiny closet where it's stacked on the washer! Take a look at the video posted for replacing the drum pulley for a great how-to on getting the drum out. After that, I removed the old motor, used a 7/8" socket wrench to remove the fan from the motor. Be careful with this step as the fan is easily breakable. Used a vise grips to stabilize the motor shaft on one side of the fan, then used the socket wrench to turn CLOCKWISE to loosen the fan from the motor. Once I got that off the rest of the repair was easy. If you haven't replaced the drum belt recently I'd recommend replacing that and the felt glides in the front. I did those a couple of years ago so I didn't bother this time. Once I had it all back together it's working like a dream. 17 years and counting!
0 of 1 people found this instruction helpful.
Was this instruction helpful to you?
Thank you for voting!
Customer:
Marco from San Francisco, CA
Parts Used:
5303281153, 131560100
Difficulty Level:
Difficult
Total Repair Time:
1- 2 hours
Tools:
Nutdriver, Pliers, Socket set, Wrench (Adjustable)
Machine would run for about 20min, than stop (drum stop and motor shutdown)
0- Unplug power cord. 1- Opened top using putty knife close to both top front corners to release holders. Then rotated the top to the back and leaned it against the wall. 2- unplug light and front door sensor wires. 3- Unscrew front panel from inside. one screw from each side. And removed front panel. 4- pull pulley from underneath th e drum (left to behind the motor) and with the other hand unassembled extender spring from the right. 5- dismounted belt from the motor pulley. 6- removed front yellow plastic from the top of machine structure. 7- removed drum holding the belt and pulling it up and out through the front passage. 8- layed the top panel on top of the structure leaving space to work on both sides of the back panel from the top. 9- unscrewed half way both screws to get the drum support and the bearing. I took the plate holder, the support, the bearing and the back plate out. 10- cleaned up the back and removed old grease. 11- assemble the pieces by putting the drum support on the plate and passing the screws. 12- with one hand from the top and the other from the back, I holded the plate on the back and screwed the assembled pieces fixing the screws by hand, than tight them half way. 13- with narrow space for the bearing ball, slide it from the back to nest between the plastic piece and the back plate. Still holding it, tighted screws all the way. 14- put included grease into the support and a bit from the back to seal the bearing. 15- To change the motor. I removed the wires from the sensor on the fan (front bottom) 16- removed both screws of the fan assembly that attaches it to the bottom panel. 17- Unattached the motor electric connector and the metal pressure holder on its support (towards the back of the motor). 18- Slide the rubber band on the fan assembly to remove it with the motor. 19- To remove the fan from the motor, I used a big piece of cloth to hold the fan while rotating the motor pulley with a wrench. Careful to not break the fan. On the front of the fan, there is an arrow showing rotation direction to release (clockwise from the front). There is a plastic one-inch bolt to hold the fan, if you have the tool. 20- removed the plastic piece that hold the motor to the fan case and pull the motor axle out. 21- clean up the fan and assembled the new motor with the cloth and wrench. 22- Mount fan case on the bottom by sliding in the two plate holders on the back bottom of the case. 23- Applied the two screws to the bottom panel. 24- put the rubber band back to connect fan case to exhaust tube. 25- put metal brace to secure motor back and connected Electric bundle. 26- unscrew the back of the drum (from inside it) to remove its support. and attache the new one the same way, first putting the support in place by attaching screws by hand, than tightened them. 27- reassemble the drum through the front and holding the belt to attach it to the support on the back. 28- Reattached the belt to the motor pulley and reassembled the extender pulley by pulling it from the left and attaching the spring from the right (one hand on each side through the bottom of the tumble). 29- reattached the front panel to the machine by supporting it on the bottom metal supports and attaching the mounters midway, while lifting the tumble a little until it fit on the front panel sliders. 30- screwed the front panel on both sides from inside (2 screws) 31- put top panel back in place. 32- plug power cord back and ran a test cycle.
0 of 1 people found this instruction helpful.
Was this instruction helpful to you?
Thank you for voting!
  • 1

Model Compatibility

This part works with the following models:
Fix Number: FIX418132
Manufacturer Part Number: 131560100
Brand
Model Number
Description
Frigidaire
41749012890
Dryer - Residential, Electric
Frigidaire
41749022890
Dryer - Residential, Electric
Kenmore
41759012890
Dryer - Kemore Dryer 41759012890
Frigidaire
41759022890
Dryer - Gas
Kenmore
41764182300
Dryer
Kenmore
41769042990
Dryer
Kenmore
41769042991
Dryer
Kenmore
41769052990
Dryer
Kenmore
41769052991
Dryer
Kenmore
41774182300
Dryer
Kenmore
41774182301
Dryer
Kenmore
41779042900
Dryer - Kenmore Dryer Model 417.79042900 (41779042900, 417 79042900) Parts
Kenmore
41779042990
Dryer
Kenmore
41779042991
Dryer
Kenmore
41779052990
Dryer
Kenmore
41779052991
Dryer
Kenmore
41780032990
Dryer
Kenmore
41780042990
Dryer
Kenmore
41780042991
Dryer
Kenmore
4178005291
Dryer - Kenmore Dryer Model 417.8005291 (4178005291, 417 8005291) Parts
Kenmore
41780052990
Dryer
Kenmore
41780052991
Dryer
Kenmore
41780142000
Dryer
Kenmore
41780412700
Dryer
Kenmore
41781042000
Dryer
Kenmore
41781042001
Dryer
Kenmore
41781052000
Dryer
Kenmore
41781052001
Dryer
Kenmore
41781142000
Dryer
Kenmore
41781142001
Dryer