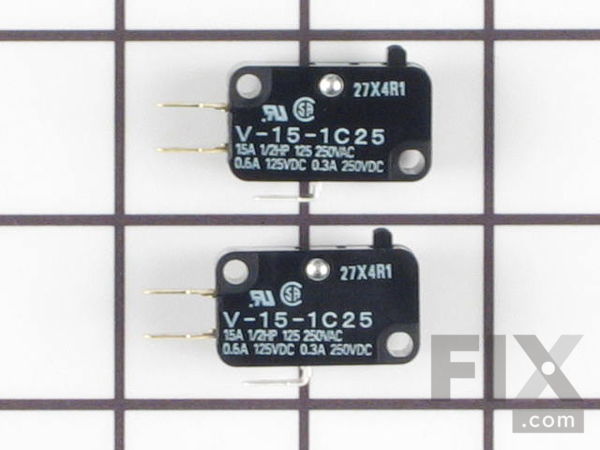
Part Location Diagram of 4392027 Whirlpool Door Interlock Switch Kit
See part 31 in the diagram
( Grid squares measure 1x1 inch )

Door Interlock Switch Kit

Works With Model MMC5086AAB!

Rated by 3 customers 

?

Really Easy 

30 - 60 mins 

Ratings submitted by customers like you who bought this part.

?
$85.78
In Stock
Fix Number:
FIX373050
Manufacturer #:
4392027
Manufactured by:
Whirlpool
Works With Model MMC5086AAB!

Product Description

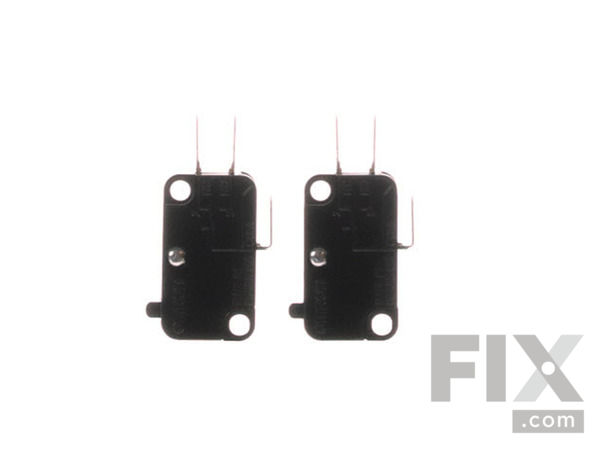
This kit contains 2 switches - 15 Amp - 125/250 Volt with 3/16" terminals.

Questions and Answers

We're sorry, but our Q&A experts are temporarily unavailable.
Please check back later if you still haven't found the answer you need.

Installation Instructions Provided by Fix customers like you.

Average Repair Rating: 3.9 / 5.0, 3 reviews.
  • 1
Sort by:
Sorry, we couldn't find any existing installation instruction that matched.
Customer:
Robin from Grants Pass, OR
Parts Used:
WP8205529, WP4365565, 4392027
Difficulty Level:
Easy
Total Repair Time:
30 - 60 mins
Tools:
Pliers, Screw drivers
The microwave of this built-in oven/ microwave combo would stop working depending on how the door switch was held.
Read Robert of Bainbridge Island WA instructions to troubleshoot and order parts and then carefully followed them with some additional points noted. Started by turning off power at the breaker. There were 4 Phillips screws holding the decorator grill to the unit. 2 on each side. The two closest to the frig next to it were blocked by t he freezer door, but my brilliant brother simply opened the door wide and was able to access those screws through the open space between the door and frig. No need to pull the oven out or get at it from the rear. One Phillips screw at the bottom edge of the control panel is removed and the control panel pulled up in its slot and outward. This reveals the connector wires and the "flapper" plastic part that is used to transfer the button pressure to the micro-switch. The flapper has to be removed to access the horizontal micro-switch. We disconnected the control wires from the mother-board to give more visibility. (This might not have been necessary). We used Duct Tape to tape the control board to the unit out of the way, so that we did not stress some thin, fragile looking wires. The flapper switch is removed through moving it to the left to unclip it from the fragile plastic support and it's right side post nub. That revealed the lower horizontal micro-switch. The pliers were used to pull the flat connector off the micro-switch. The original had only one prong. The replacement had two, but it was easily to identify the NO (normally Open) and NC (Normally Closed) connection configuration. The micros switch slipped easily into its location... Like a cassette tape with the white spindle slipping into place. Then the flat electronic connector reattached. Flapper plastic piece put back by sliding it to the right and clipping it back together carefully. This unit has three micro- switches - two vertical for the door and one for the button. Neither the button or the spring needed to be replaced, so I stored them and the spare micro-switch (with their installation instructions) in the top of the unit at the left for later use. Control wires reattached to motherboard, control panel slipped back into place. Single screw reinserted. Grill reattached with the four screws. Power turned on at breaker. Tested heating abilitywith a coffee cup of water. Worked great! Most of the repair time was spent trying to recognize what we were seeing. The task was easy and quick. Thank you for your website, sharing of repair stories and parts! I couldn't get any repairman to even look at it. The salespeople offered to sell me a new $3200 combo. When all it took was a $48 part. I am so relieved and happy.
2 of 4 people found this instruction helpful.
Was this instruction helpful to you?
Thank you for voting!
Customer:
Robert from Boynton Beach, FL
Parts Used:
4392027
Difficulty Level:
Easy
Total Repair Time:
30 - 60 mins
Tools:
Screw drivers
Microwave would start, but would not heat.
I took off the screws on the Control Panel--one on the top and two on the bottom. Since the Control Panel was attached to several wires, I supported it on a box--that I placed on the stove top--so as not to stretch the wires. Here is where I got a little nervous. The next thing I saw was a plastic divider that covered everything behind th e Control Panel. Removed the screw (on the left side of the Microwave opening) that was holding the panel. Once this panel was removed I was able to see the plastic housing that held the door switches. I removed the two screws holding the housing in place, and maneuvered it out of the "niche" it was in behind the door frame. Got really nervous here. The switches were tightly housed in the plastic unit.The plastic elements around the switches CAN be manipulated-- TAKE YOUR TIME--allowing you to eventually slide the switch out and disconnect it from the attached wires. When replacing the switches pay attention to where the wire connections are on the old switches so you can do the same with the new switches. In my case, the switches I removed had one post on each, and the new switches had two posts. Not a problem. Just use the same "post" that was used in the old switch. Since I didn't know which switch was bad, I replaced both the top and bottom switches. Once done, I simply backtracked everything I had done and reassembled the unit. And, YES, the Microwave is working again. The task looks more daunting then it really is . Take your time.
1 person found this instruction helpful.
Was this instruction helpful to you?
Thank you for voting!
Customer:
robert from Bakersfield, CA
Parts Used:
4392027
Difficulty Level:
Very Easy
Total Repair Time:
Less than 15 mins
Tools:
Screw drivers
microwave would not start
used volt ohm meter to find faulty switch.shipped next day, but FEDEX held part for 3 days in bloomington, ca. took 7 days to get part. part worked as expected.
0 of 1 people found this instruction helpful.
Was this instruction helpful to you?
Thank you for voting!
  • 1

Model Compatibility

This part works with the following models:
Fix Number: FIX373050
Manufacturer Part Number: 4392027
Brand
Model Number
Description
Kenmore
41515860
Grill - Gas Grill
Whirlpool
4361
Microwave - MICROWAVE
Kenmore
6654433450
Wall Oven
Kenmore
6654433451
Wall Oven
Kenmore
6654433452
Wall Oven
Kenmore
6654493310
Wall Oven
Kenmore
6654493390
Wall Oven
Kenmore
6654493392
Wall Oven
Kenmore
6654493393
Wall Oven
Whirlpool
7MT2140SJB0
Microwave - Whirlpool Microwave Model 7MT2140SJB0 Parts
Whirlpool
7MT2210SJB0
Microwave
Whirlpool
7MT2210SJQ0
Microwave
Amana
ACM0720AB
Microwave
Amana
ACM0720AB-PACM0720AB0
Microwave - Amana Microwave Model ACM0720AB-PACM0720AB0 (ACM0720ABPACM0720AB0, ACM0720AB PACM0720AB0) Parts
Amana
ACM0720AW
Microwave
Amana
ACM0720AW-PACM0720AW0
Microwave - Amana Microwave Model ACM0720AW-PACM0720AW0 (ACM0720AWPACM0720AW0, ACM0720AW PACM0720AW0) Parts
Amana
ACM0860AB
Microwave - Table Top
Amana
ACM0860AC
Microwave - Table Top
Amana
ACM0860AS
Microwave - Table Top
Amana
ACM0860AW
Microwave - Table Top
Amana
ACM1120AB
Microwave - Table Top
Amana
ACM1120AB-PACM1120AB0
Microwave - Amana Microwave Model ACM1120AB-PACM1120AB0 (ACM1120ABPACM1120AB0, ACM1120AB PACM1120AB0) Parts
Amana
ACM1120AS
Microwave - Table Top
Amana
ACM1120AW
Microwave - Table Top
Amana
ACM1120AW-PACM1120AW0
Microwave - Amana Microwave Model ACM1120AW-PACM1120AW0 (ACM1120AWPACM1120AW0, ACM1120AW PACM1120AW0) Parts
Amana
ACM1420AB
Microwave
Amana
ACM1420AW
Microwave
Amana
ACM1420AW-PACM1420AW0
Microwave - Amana Microwave Model ACM1420AW-PACM1420AW0 (ACM1420AWPACM1420AW0, ACM1420AW PACM1420AW0) Parts
Amana
ACM1460AB
Microwave
Amana
ACM1460AB-PACM1460AB0
Microwave - Amana Microwave Model ACM1460AB-PACM1460AB0 (ACM1460ABPACM1460AB0, ACM1460AB PACM1460AB0) Parts