Some of the parts we sell are eligible for mail-in rebates since we can recycle them. We will display any applicable rebates in your shopping cart. To redeem your rebate, contact Customer Service after you have received your part.
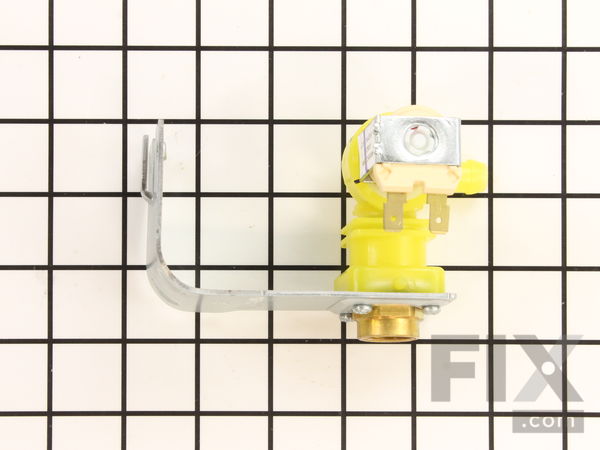
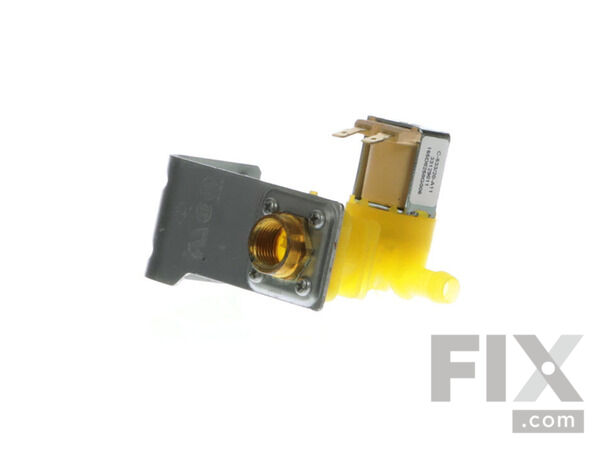
Water Inlet Valve
Works With Model HDA3600R20CC!
$43.82
In Stock
- Fix Number:
- FIX3654179
- Manufacturer #:
- WD15X10014
- Manufactured by:
- GE
Works With Model HDA3600R20CC!
- Product Description
- This water inlet valve is an authentic OEM part for your dishwasher. If can be found behind the lower kickplate panel in either the left or right corner. The valve has a solenoid that opens or closes in order to provide the required amount of water. If your dishwasher is leaking or will not fill with water, you may need to replace the water inlet valve.
- Works with the following brands:
- General Electric, Hotpoint
- Works with the following products
- Dishwasher
- Fixes the following symptoms
- Leaking, Will not fill with water, Not cleaning dishes properly
- Part# WD15X10014 replaces these:
- AP5632416, 2309993, WD15X10014, WD15X10011
Part Number Cross Reference
Product Description
This water inlet valve is an authentic OEM part for your dishwasher. If can be found behind the lower kickplate panel in either the left or right corner. The valve has a solenoid that opens or closes in order to provide the required amount of water. If your dishwasher is leaking or will not fill with water, you may need to replace the water inlet valve.
-
Works with the following brands:General Electric, Hotpoint
-
Works with the following products:Dishwasher
-
Fixes the following symptoms:Leaking, Will not fill with water, Not cleaning dishes properly
-
Part# WD15X10014 replaces these:AP5632416, 2309993, WD15X10014, WD15X10011
Videos For installing this part.
Replacing your Water Inlet Valve

Questions and Answers
We're sorry, but our Q&A experts are temporarily unavailable.
Please check back later if you still haven't found the answer you need.
Installation Instructions Provided by Fix customers like you.
- < Prev
- 1
- Next >
Sort by:
Search filter:
Clear Filter
Your search term must have 3 or more characters.
Keep searches simple. Use keywords, e.g. "leaking", "pump", "broken" or "fit".
Sorry, we couldn't find any existing installation instruction that matched.
- Customer:
- Walter from Rochester, NY
- Parts Used:
- WD15X10014
- Difficulty Level:
- A Bit Difficult
- Total Repair Time:
- 1- 2 hours
- Tools:
- Pliers, Socket set, Wrench set
Leaking valve
Turn off electrical power and water supply. 1. Remove floor access plate, 2.disconnect wire clip blocking right mounting screw being sure to depress release clip in the body of the clip, 3. remove 2 mounting screws using 5/16 open-end wrench, 4.Using needle nose pliers, move spring clip on water discharge hose away from valve body, 5. rem
... Read more
ove discharge hose, 6. pull valve assembly from under dishwasher, 7. disconnect second electrical contact from the side of the inlet valve,.8. remove water inlet hose from the valve and discard valve. Reverse this procedure for installation of new water inlet valve.
Read less
1 person
found this instruction helpful.
Was this instruction helpful to you?
Thank you for voting!
- Customer:
- Brian from Wyomissing, PA
- Parts Used:
- WD15X10014
- Difficulty Level:
- A Bit Difficult
- Total Repair Time:
- 30 - 60 mins
- Tools:
- Nutdriver, Pliers, Screw drivers, Wrench set
Water leak under dishwasher
Removed dishwasher kick panel after removing 2 screws. Removed 2 screws holding top of dishwasher in place (at top front of dishwasher in counter or top sides of dishwasher). Pulled dishwasher forward slightly to get better access. Using small wrench, removed 2 sheet metal screws holding inlet assembly to dishwasher. Disconnected elec
... Read more
tric connector to part. Disconnected water supply with wrench. Disconnected water outlet connection using pliers to move retaining band out of way and then pulled off connecting tube. In removed assembly, used wrench to remove 90 degree inlet adapter. Installed new Teflon tape on inlet adapter and installed in new part. Reversed disassembly procedure to complete installation of new part.
Read less
0 of 1 people
found this instruction helpful.
Was this instruction helpful to you?
Thank you for voting!
- Customer:
- C. J. from Morristown, AZ
- Parts Used:
- WD15X10014
- Difficulty Level:
- Very Easy
- Total Repair Time:
- 30 - 60 mins
- Tools:
- Nutdriver, Pliers, Wrench (Adjustable)
Machine was not filling with water
Your probability analysis was on the money. (75% of the time it is the water inlet valve). The fix was pretty easy - pull the machine from under the counter, find the valve, replace same, push it back under the counter, wash some dishes. I have some aptitude and some common sense, but this was really pretty easy and quick. Advice to t
... Read more
he less qualified: make sure you have all the right tools and take your time...... Call your brother in law as a last resort.
Read less
0 of 1 people
found this instruction helpful.
Was this instruction helpful to you?
Thank you for voting!
- Customer:
- Robert from Billings, MT
- Parts Used:
- WD15X10014
- Difficulty Level:
- Really Easy
- Total Repair Time:
- 30 - 60 mins
- Tools:
- Pliers, Screw drivers, Socket set
Slow leak. Dirty dishes.
Saw the leak. Looked up the part. Part came 3 days later. Fixed in time from Christmas
0 of 1 people
found this instruction helpful.
Was this instruction helpful to you?
Thank you for voting!
- Customer:
- Jack from Holland, PA
- Parts Used:
- WD15X10014
- Difficulty Level:
- Really Easy
- Total Repair Time:
- 30 - 60 mins
- Tools:
- Nutdriver, Pliers, Wrench (Adjustable)
LEAK UNDER THE DISHWASHER
UNSCREWED THE BOTTOM FRONT SKIRT OFF BY USING A NUT DRIVER. FOUND THE WATER INLET VALVE DRIPPING. PULLED THE SELONOID CONNECTION APART...A BIT HARD SO WIGGLE IT LOOSE. SHUT THE WATER VALVE OFF TO THE DISHWASHER. USED A NUT DRIVER TO UN-SCREW THE TWO SCREWS HOLDING THE ENTIRE WATER INLET VALVE / ASSEMBLY BRACKET. TRICKY TO GET THE RIG
... Read more
HT SCREW OUT. IT'S BEHIND ANOTHER SMALL ELECTRICAL CONNECTOR. BEST TO PULL THAT ONE APART AS WELL OR DO WHAT I DID, USE A NUT DRIVER HOLDER WITH A SMALL SOCKET AND DO NOT PUT THE SOCKET ALL THE WAY ONTO THE DRIVER. THIS WILL ALLOW THE SOCKET TO GO OVER THE HEX SCREW HEAD ON AN ANGLE SO YOU CAN LOOSEN THIS SCREW. THE ASSEMBLY WILL THEN DROP DOWN. USE A LONG (10" LONG) NEEDLE NOSE PLIER TO SQUEEZE THE RUBBER HOSE ATTACHEMENT CLIP APART THEN PUSH IT BACK OFF THE TIP OF THE HOSE NOZZLE ADAPTER. NOW GRAB THE HOSE AND VALVE ASSEMBLY AND GIVE IT A GOOD HARD PULL SEPERATE THE RUBBER HOSE OFF THE ASSEMBLY...VOILA YOU HAVE THE LEAKY VALVE OFF. RECONNECT THE NEW UNIT IN THE SAME WAY AS YOU TOOK OUT THE OLD. TIP...MARK THE OLD WITH A MARKER SO YOU DON'T ACCIDENTALLY PUT THE OLD ONE BACK...THEY LOOK THE SAME. THIS IS DONE WITHOUT PULLING THE MACHINE OUT FROM UNDER THE COUNTER TOP. NOT HARD TO DO, JUST TIGHT SPACE TO WORK WITH.
Read less
0 of 1 people
found this instruction helpful.
Was this instruction helpful to you?
Thank you for voting!
- Customer:
- Peter from Naples, FL
- Parts Used:
- WD15X10014
- Difficulty Level:
- Easy
- Total Repair Time:
- 30 - 60 mins
- Tools:
- Pliers, Socket set, Wrench (Adjustable)
water leak on floor
Remove bottom panel, remove 2 screws that hold valve that makes the parts to be removed easer to get at take off 2wires ,disconnect 3/8 water suply and with a small pair of channel lock pliers remove water outlet clamp. Install new water valve in reverse
0 of 1 people
found this instruction helpful.
Was this instruction helpful to you?
Thank you for voting!
- < Prev
- 1
- Next >
Model Compatibility
This part works with the following models:
Fix Number: FIX3654179
Manufacturer Part Number: WD15X10014
Manufacturer Part Number: WD15X10014
Brand
Model Number
Description
✖
Mail-In Recycling Rebate


