Some of the parts we sell are eligible for mail-in rebates since we can recycle them. We will display any applicable rebates in your shopping cart. To redeem your rebate, contact Customer Service after you have received your part.
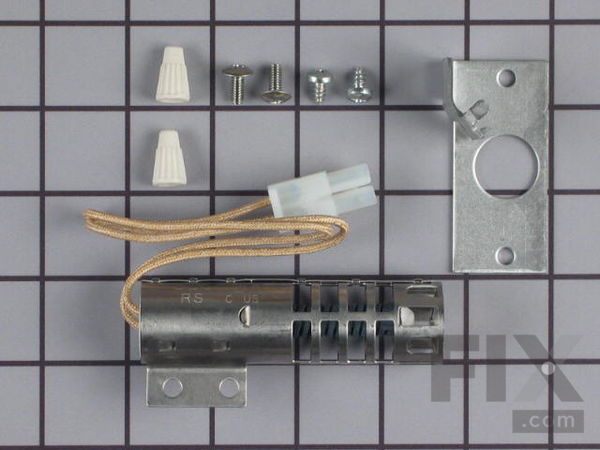
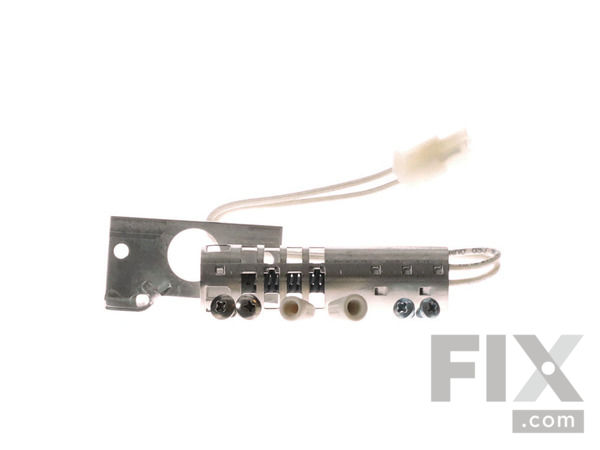
Round Carborundum Oven Igniter
$51.37
In Stock
- Fix Number:
- FIX360921
- Manufacturer #:
- 4342528
- Manufactured by:
- Whirlpool
- Product Description
- This round style carborundum gas oven igniter has 10 inch lead and amperage range between 2.5 and 3.0 amps. Be very careful when handling this igniter as it is very fragile. Please note - The bracket and screws are not included. This part will not replace the flat style igniters. Also known as bake and broil igniter.
- Works with the following brands:
- Whirlpool, Roper, Kenmore, Maytag
- Works with the following products
- Range, Refrigerator, Dryer
- Fixes the following symptoms
- Will Not Start, Little to no heat when baking, Gas igniter glows, but will not light
- Part# 4342528 replaces these:
- AP3104565, 3422, 4342528, 300259, 3196447, 337263, 4157446, 4322910, 4332948, 4338008, 4338037, 4342528, 4342528VP, 4389493, 8053999
Part Number Cross Reference
Product Description
This round style carborundum gas oven igniter has 10 inch lead and amperage range between 2.5 and 3.0 amps. Be very careful when handling this igniter as it is very fragile. Please note - The bracket and screws are not included. This part will not replace the flat style igniters. Also known as bake and broil igniter.
-
Works with the following brands:Whirlpool, Roper, Kenmore, Maytag
-
Works with the following products:Range, Refrigerator, Dryer
-
Fixes the following symptoms:Will Not Start, Little to no heat when baking, Gas igniter glows, but will not light
-
Part# 4342528 replaces these:AP3104565, 3422, 4342528, 300259, 3196447, 337263 ... Show more , 4157446, 4322910, 4332948, 4338008, 4338037, 4342528, 4342528VP, 4389493, 8053999 Show less
Questions and Answers
We're sorry, but our Q&A experts are temporarily unavailable.
Please check back later if you still haven't found the answer you need.
- < Prev
- 1
- Next >
Sort by:
Search filter:
Clear Filter
Your search term must have 3 or more characters.
Keep searches simple. Use keywords, e.g. "leaking", "pump", "broken" or "fit".
Sorry, we couldn't find any existing answers that matched.
Try using some different or simpler keywords, or submit your new question by using the "Ask a Question" button above!
Try using some different or simpler keywords, or submit your new question by using the "Ask a Question" button above!
Dan
November 16, 2021
Will this work on my stove for the oven?
For model number SF375PEEW0

Hello Dan, Thank you for contacting us. We have researched the model you have provided and can confirm the part you are looking for is Fix Number: FIX360921. If you need help placing an order, customer service is open 7 days a week. Please feel free to give us a call. We look forward to hearing from you!
Was this helpful?
Thank you for voting!
Installation Instructions Provided by Fix customers like you.
- < Prev
- 1
- Next >
Sort by:
Search filter:
Clear Filter
Your search term must have 3 or more characters.
Keep searches simple. Use keywords, e.g. "leaking", "pump", "broken" or "fit".
Sorry, we couldn't find any existing installation instruction that matched.
- Customer:
- Sara from Hudson, IA
- Parts Used:
- 4342528
- Difficulty Level:
- Easy
- Total Repair Time:
- 30 - 60 mins
- Tools:
- Nutdriver, Screw drivers
Oven would not light broiler and burners were working
I have removed the bottom floor of the oven before to clean after a major spill, so I knew I could do this. I removed the oven racks. Located the two screws in the back on the floor of the oven, removed them, I used a screw driver (could use a nut driver)remove these two screws (they are about 1.5 inches long). Slightly guide the floor
... Read more
forward to release the two front clips and "jimmy" the floor a bit to remove. (Also, a good time to clean the floor). Now you will see the burner cover remove the two short screws and there is the igniter. Find the wires that feed through the hole in the bottom. Remove the bottom oven drawer; get a flash light; find the clip release on the plastic connection squeeze and pull. Now remove the two nuts that attach the igniter to the bracket on the oven. (I did have a nut driver, but if a person was very careful not to strip the head of the nut -you could use pliers or vise grip). Put the new igniter in place (I used the existing bracket and screws) thread the new wires through the hole in the oven floor clip together. I tried the oven at this point and within 30 seconds oven ignited. Put burner cover and oven floor back in and bake a cake! Also a good time to clean under the stove when you have the drawer out. I found a receipt from 10 years ago when the igniter was replaced and that bill was $163 the igniter and shipping from this site was $55. I imagine it would have been well over $200 to have a repair man come out today.
Read less
0 of 1 people
found this instruction helpful.
Was this instruction helpful to you?
Thank you for voting!
- Customer:
- Edwin from Fulton, NY
- Parts Used:
- 4342528
- Difficulty Level:
- Really Easy
- Total Repair Time:
- 15 - 30 mins
- Tools:
- Nutdriver, Screw drivers
The oven burner would not light
Replace the ignition glowbar. Remove the drawer below the oven and disconnect the 2-wire plug near the back of the unit. Then open the oven and remove the racks. Release the 2 screws that hold the bottom plate of the oven in place and, lifting from the back of the oven, remove the bottom plate. You are now looking at the burner distrib
... Read more
utor. Remove the 2 retaining screws near the front of the oven and, with an upward motion, pull the distributor toward you to free it from the back of the oven. Then push it away from you and remove it . The ignitor is now in view at the back of the oven on the right side of the burner. Remove the 2 retaining screws and pull the wires up through the hole in the bottom of the oven. Installation is simply reverse of this procedure.
Read less
0 of 1 people
found this instruction helpful.
Was this instruction helpful to you?
Thank you for voting!
- Customer:
- Bradford from Coopersville, MI
- Parts Used:
- 4342528
- Difficulty Level:
- Very Difficult
- Total Repair Time:
- More than 2 hours
- Tools:
- Nutdriver, Wrench (Adjustable)
There was no slack to pull wire nuts out of the back of the oven so I had to remove the oven from built in.
The short aluminum tube was damaged in the removal. Tried to buy a new yellow flexible tube , nothing was compatible after five hardwares and home center visits. I then found brass fittings online to make the yellow tube work.. Wired in the igniter in the back. Piece of cake. If you have to move oven, be sure to bubble test the fittings.
0 of 1 people
found this instruction helpful.
Was this instruction helpful to you?
Thank you for voting!
- Customer:
- Jeanne from Tipton, IN
- Parts Used:
- 4342528
- Difficulty Level:
- Really Easy
- Total Repair Time:
- Less than 15 mins
- Tools:
- Screw drivers, Socket set
Oven would not light
Removed the oven bottom by removing two screw, removed the diffuser by removing two screws, removed two screws and unplugged the igniter. Ordered the part in the afternoon and received it the next morning. Replaced in opposite order as removal. Oven lit
0 of 1 people
found this instruction helpful.
Was this instruction helpful to you?
Thank you for voting!
- Customer:
- Karen from Glen Burnie, MD
- Parts Used:
- 4342528
- Difficulty Level:
- Easy
- Total Repair Time:
- 15 - 30 mins
- Tools:
- Screw drivers
Oven wouldn't ignite.
Remove all grates and side brackets, pull bottom of the oven out and lift out tray to get access to oven and burner. Remove old igniter and installed new igniter per instructions.
0 of 1 people
found this instruction helpful.
Was this instruction helpful to you?
Thank you for voting!
- Customer:
- David from Prescott Valley, AZ
- Parts Used:
- 4342528
- Difficulty Level:
- Really Easy
- Total Repair Time:
- Less than 15 mins
- Tools:
- Nutdriver, Screw drivers
oven igniter quit working
Remove oven racks, bottom oven plate, broiler drawer to get to existing igniter. Then unplugged the fit only-one -way igniter electrical connection, then remove igniter which is held in place with two 5/16 machine screws, obtained part number, checked local department store on price, checked internet pricing and selected this site for th
... Read more
e item.
When part arrived removed from package, installed the reverse of removal then tested by turning on oven and new part did what it was meant for -ignite the oven burner.
Works great!
When part arrived removed from package, installed the reverse of removal then tested by turning on oven and new part did what it was meant for -ignite the oven burner.
Works great!
Read less
0 of 1 people
found this instruction helpful.
Was this instruction helpful to you?
Thank you for voting!
- < Prev
- 1
- Next >
★
Customer Reviews
Filter By Rating:
- < Prev
- 1
- Next >
Sort by:
Search filter:
Clear Filter
Your search term must have 3 or more characters.
Keep searches simple. Use keywords, e.g. "leaking", "pump", "broken" or "fit".
Sorry, we couldn't find any existing reviews that matched. Try using some different or simpler keywords.
Allan L - March 20, 2021
Verified Purchase
Acceptable Part
Worked as expected.
Vicky And Douglas B - August 7, 2020
Verified Purchase
Getting here later then paid for
The part was just what we order but the delivery I was upset with. I paid extra money to get my part to me sooner since it was a oven part. I got it later then the normal rate wasted money to get it here sooner
Model Compatibility
This part works with the following models:
Fix Number: FIX360921
Manufacturer Part Number: 4342528
Manufacturer Part Number: 4342528
Brand
Model Number
Description
✖
Mail-In Recycling Rebate


