Some of the parts we sell are eligible for mail-in rebates since we can recycle them. We will display any applicable rebates in your shopping cart. To redeem your rebate, contact Customer Service after you have received your part.
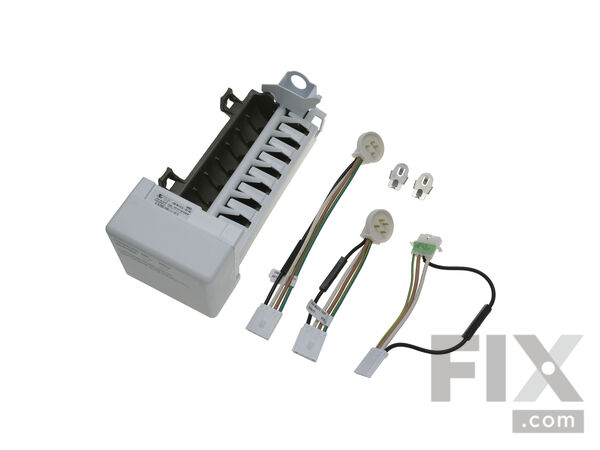
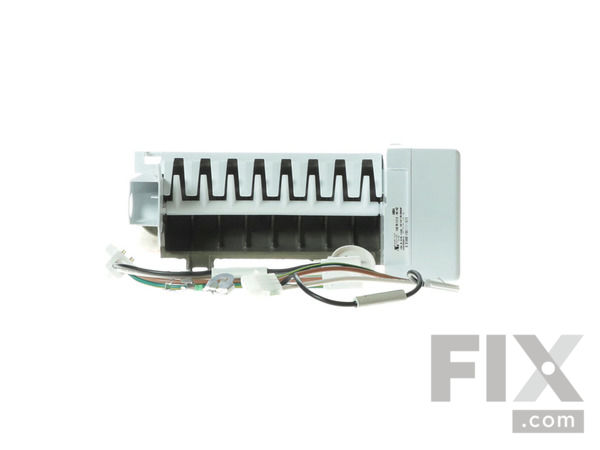
Replacement Ice Maker
- Fix Number:
- FIX358591
- Manufacturer #:
- 4317943
- Manufactured by:
- Whirlpool
- Product Description
- The ice maker works by filling with water from the inlet valve, freezing it into cubes, and then dispensing the cubes into the storage bucket. It will then refill with water and repeat this process until the ice storage bucket is full. If yours is not making ice or it is leaking, it may be time to replace the ice maker. Depending on usage and water quality, these should be replaced every three to ten years. Please note that this kit does not come with a new shut off arm (also known as a bail arm). You will need to reuse the arm from your old ice maker, or you can purchase a new one separately. This genuine OEM parts kit includes the replacement ice maker, wire harnesses (flat and round plug versions), and the mounting hardware. The wire harness from your old ice maker can also be reused if you choose. This model is approximately 11x5 inches in size, made of plastic and metal, and is black and silver in color. This model does not work with refrigerators that have the ice auger on the door, it is meant to sit in the upper left hand of the freezer. Please ensure that you disconnect the power and water supply before beginning this repair.
- Works with the following brands:
- Kenmore, Whirlpool, KitchenAid, Maytag
- Works with the following products
- Refrigerator, Ice Maker, Wine and Beverage Cooler
- Fixes the following symptoms
- Ice maker not making ice, Leaking, Ice maker won’t dispense ice, Ice maker dispenses too little ice
- Part# 4317943 replaces these:
- AP2984633, 1857, 4317943, 4210317, 4211173, 4317943, 4317943R, 4317943VP, 46000978556, 46004211173, 480616, 480617, 482014, 482015, 482016, 482017, 482018, 482019, 482020, 482394 ... Show more , 482433, 482990, 625601, 625603, 625610, 625611, 625622, 625625, 625653, 625656, 625660, 626002, 626201, 626237, 626366, 626461, 626489, 626608, 626609, 626626, 626636, 626640, 626670, 626687, 627572, 68972-4, 797991, 8114, 833701, 978552, 978553, 978556, 99989730, IC14B, M626687, W10122496, W10190952, W10281545, W10632400 Show less
Product Description
The ice maker works by filling with water from the inlet valve, freezing it into cubes, and then dispensing the cubes into the storage bucket. It will then refill with water and repeat this process until the ice storage bucket is full. If yours is not making ice or it is leaking, it may be time to replace the ice maker. Depending on usage and water quality, these should be replaced every three to ten years. Please note that this kit does not come with a new shut off arm (also known as a bail arm). You will need to reuse the arm from your old ice maker, or you can purchase a new one separately. This genuine OEM parts kit includes the replacement ice maker, wire harnesses (flat and round plug versions), and the mounting hardware. The wire harness from your old ice maker can also be reused if you choose. This model is approximately 11x5 inches in size, made of plastic and metal, and is black and silver in color. This model does not work with refrigerators that have the ice auger on the door, it is meant to sit in the upper left hand of the freezer. Please ensure that you disconnect the power and water supply before beginning this repair.
-
Works with the following brands:Kenmore, Whirlpool, KitchenAid, Maytag
-
Works with the following products:Refrigerator, Ice Maker, Wine and Beverage Cooler
-
Fixes the following symptoms:Ice maker not making ice, Leaking, Ice maker won’t dispense ice, Ice maker dispenses too little ice
-
Part# 4317943 replaces these:AP2984633, 1857, 4317943, 4210317, 4211173, 4317943 ... Show more , 4317943R, 4317943VP, 46000978556, 46004211173, 480616, 480617, 482014, 482015, 482016, 482017, 482018, 482019, 482020, 482394, 482433, 482990, 625601, 625603, 625610, 625611, 625622, 625625, 625653, 625656, 625660, 626002, 626201, 626237, 626366, 626461, 626489, 626608, 626609, 626626, 626636, 626640, 626670, 626687, 627572, 68972-4, 797991, 8114, 833701, 978552, 978553, 978556, 99989730, IC14B, M626687, W10122496, W10190952, W10281545, W10632400 Show less
Videos For installing this part.
Replacing your Replacement Ice Maker

Questions and Answers
We're sorry, but our Q&A experts are temporarily unavailable.
Please check back later if you still haven't found the answer you need.
Installation Instructions Provided by Fix customers like you.
- < Prev
- 1
- 2
- 3
- Next >
- Customer:
- Thomas from Chester Springs, PA
- Parts Used:
- 4317943
- Difficulty Level:
- Really Easy
- Total Repair Time:
- 15 - 30 mins
- Tools:
- Screw drivers
- Customer:
- Jerry from Corpus Christu, TX
- Parts Used:
- 4317943
- Difficulty Level:
- Very Easy
- Total Repair Time:
- 15 - 30 mins
- Tools:
- Nutdriver
- Customer:
- RONALD from Sanford, FL
- Parts Used:
- 4317943
- Difficulty Level:
- Very Easy
- Total Repair Time:
- Less than 15 mins
- Tools:
- Nutdriver
- Customer:
- Pedro from JACKSONVILLE, NC
- Parts Used:
- WP2218132K, 4317943
- Difficulty Level:
- Really Easy
- Total Repair Time:
- Less than 15 mins
- Tools:
- Nutdriver
Step 2: loosen two upper 5/16 screws from ice maker, might need flashlight.
step 3: locate lower mounting screw (might need small mirror) and remove ice maker from side wall of freezer, Do Not use Force!
step 4: with care disc ... Read more onnect electrical connection to remove old ice maker. check the type of connector and if needed, install proper type as per enclosed instructions and provided connectors (3). remove bail arm and install on new ice maker.
step 5: connect wiring to refrigerator, ensure water trough goes thru plastic arch of ice maker and hang it on upper mounting screws.
Step 6: locate lower mount screw hole and install screw, do not tighten.
step 7 : using torpedo level, ensure ice maker is level and tighten the two upper screws, DO NOT USE HEAVY FORCE.
and then the lower screw.
Step 8: plug refrigerator back up, place ice tray back under ice maker,ensure bail is in lower location and once ice is made, discard the ice made 3X before using for drinks. enjoy!
- Customer:
- Lucille from ELKO, NV
- Parts Used:
- 4317943
- Difficulty Level:
- Easy
- Total Repair Time:
- 15 - 30 mins
- Tools:
- Nutdriver, Pliers
- Customer:
- David from Joshua, TX
- Parts Used:
- 4317943
- Difficulty Level:
- A Bit Difficult
- Total Repair Time:
- 1- 2 hours
- Tools:
- Nutdriver
- Customer:
- robert from columbiaville, MI
- Parts Used:
- 4317943
- Difficulty Level:
- Really Easy
- Total Repair Time:
- 15 - 30 mins
- Tools:
- Nutdriver, Screw drivers
- Customer:
- Donnie from Frankfort, KY
- Parts Used:
- 4317943
- Difficulty Level:
- Really Easy
- Total Repair Time:
- Less than 15 mins
- Tools:
- Nutdriver
- < Prev
- 1
- 2
- 3
- Next >
- < Prev
- 1
- Next >
Model Compatibility
Manufacturer Part Number: 4317943


