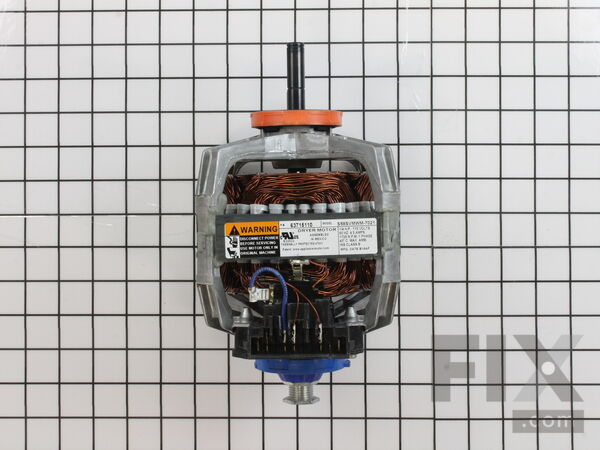
Part Location Diagram of W10410997 Whirlpool Drive Motor - 115V
See part 015 in the diagram
Replacing your Maytag Dryer Drive Motor - 115V
( Grid squares measure 1x1 inch )

Drive Motor - 115V

Works With Model MDE16MNAZW!
★★★★★
★★★★★
2 Reviews

Rated by 1 customers 

?

A Bit Difficult 

More than 2 hours 

Ratings submitted by customers like you who bought this part.

?
$159.21
In Stock
Fix Number:
FIX3500892
Manufacturer #:
W10410997
Manufactured by:
Whirlpool
Works With Model MDE16MNAZW!

Product Description

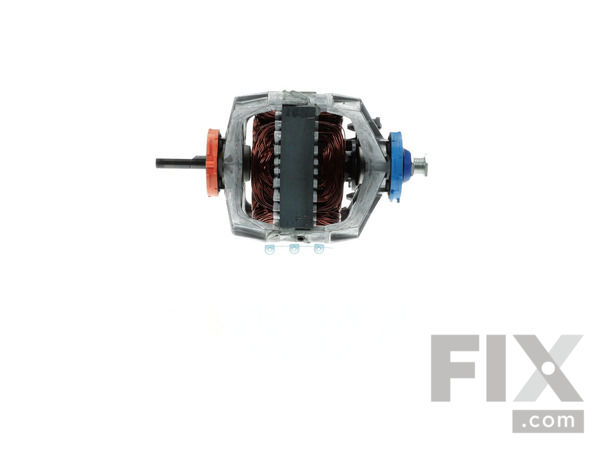
This part has a D-shaped motor shaft and this motor runs at 1/4 horsepower and carries 4.5 amps.

Videos For installing this part.

Replacing your Drive Motor - 115V

Replacing your Drive Motor - 115V

Questions and Answers

We're sorry, but our Q&A experts are temporarily unavailable.
Please check back later if you still haven't found the answer you need.

Installation Instructions Provided by Fix customers like you.

Average Repair Rating: 2.0 / 5.0, 1 reviews.
  • 1
Sort by:
Sorry, we couldn't find any existing installation instruction that matched.
Customer:
Edward from Sunnyvale, CA
Parts Used:
W10410997
Difficulty Level:
A Bit Difficult
Total Repair Time:
More than 2 hours
Tools:
Nutdriver, Pliers, Screw drivers, Socket set, Wrench (Adjustable)
Dryer stopped working suddenly due to motor failure.
Due to the sudden stop, we suspected the electrical system. The dryer was disassembled as we did several times before:1) Remove door at the hinges, 2) Remove the safety latches, 3) Lift the top, hinged at the rear, 4) Remove the front panel, a few screws on the left and right, clips at the bottom. 5) Note the drive belt path, (picture rec ommended.) Free the drive belt from the idler/tension pulley, then remove the drum carefully through the front opening. At this point we found the problem, the overload protector had broken off the motor near the electrical connector. 6) Found and ordered the drive motor, noting the serial number series. 7) Removed the front lint, air flow housing and cleaned the accumulated lint and dust. Removed the electrical connector from the motor with care not to damage the plastic clips. The drive motor arrived 5 days later by standard UPS shipment (from Michigan to California). 8) With the motor in hand, we compared it with the existing motor to be sure it was correct and to understand the mounting. 9) Removed the sheetmetal cover over the blower and cleaned more lint. 10) Removed the blower from the motor shaft. The blower is secured with a C-clip or snap ring around the motor shaft, use the proper clip puller to remove the clip ring. Remove the compression spring around the blower shaft using vice-grips to expand the spring. The blower did not release easily so we added some silicone lubricant and it came off. There is a second c-clip/snap ring behind the blower that must be removed. Save both clips for use on the replacement motor. 11) Removed the plastic fan housing from the motor support frame. Needed a small brush to clean out the lint and locate the screws. 12) Once we cleaned the motor and inspected the clips the secure the motor and having read the instructions from others, we then used a small pry bar and hammer to release the clips. Use the pry bar to put outward pressure on the bottom of one side of the clip near where it is hooked. Use the hammer to tap with force on the rounded knob spring area just above the end. The hammer force caused the bottom of the spring to move down while the pry bar then forces the end off the hook. The clips will fly off so watch for it. 13) Note the motor alignment. With both clips removed and the electrical connector pulled, the motor pops out of the support frame. 14) Mount the replacement drive motor carefully on the frame. 15) Secure with the spring clips. Hook one side and then use a flat blade screw driver or similar to force the clip over the other hook. 16) Reconnect the electrical plug. 17) Install the plastic blower housing, then the inner c-clip/snap ring, blower and outer c-clip/snap ring. Replace the compression spring around the blower shaft. 18) Reassemble the rest of the dryer in reverse order. Install the drum and drive belt. This is a bit tricky but get the path right, move the idler pulley toward the motor (hard push) and get the belt in place. Check the belt by turning the drum by hand and watching the belt. 19) Once the dryer was reassembled, it was plugged in to the electrical outlet and the start button pressed. 20) WooHoo, started right up! Note: we took pictures at several stages during dis-assembly and found them useful during reassembly, especially since 5 days passed and we did forget how some of the parts went together. Overall, it took about 30 minutes to dis-assemble enough to find the fault, then about 2 hours to finish the dis-assembly, replace the motor and re-assemble the dryer.
1 of 2 people found this instruction helpful.
Was this instruction helpful to you?
Thank you for voting!
  • 1
Customer Reviews
Average Rating: (2 Reviews)
4.5
★★★★★
★★★★★
Filter By Rating:
  • 5
    1
  • 4
    1
  • 3
    0
  • 2
    0
  • 1
    0
  • 1
Sort by:
Sorry, we couldn't find any existing reviews that matched. Try using some different or simpler keywords.

Model Compatibility

This part works with the following models:
Fix Number: FIX3500892
Manufacturer Part Number: W10410997
Brand
Model Number
Description
Maytag
MDB9206AWW
Dryer - Maytag Dryer Model MDB9206AWW Parts
Maytag
MDE14PDACL
Dryer - Electric
Maytag
MDE14PDACQ
Dryer - Electric
Maytag
MDE14PDACW
Dryer - Electric
Maytag
MDE14PDADL
Dryer - Electric
Maytag
MDE14PDADW
Dryer - Electric
Maytag
MDE14PDAGW
Dryer - Electric
Maytag
MDE14PNAYW
Dryer - Gas
Maytag
MDE14PNAZW
Dryer - Gas
Maytag
MDE14PRAYW
Dryer - Gas
Maytag
MDE16CSAGW
Dryer - Electric
Maytag
MDE16CSAYA
Dryer - Electric
Maytag
MDE16CSAYQ
Dryer - Commercial
Maytag
MDE16CSAYW
Dryer - Electric
Maytag
MDE16CSAZA
Dryer - Electric
Maytag
MDE16CSAZQ
Dryer - Commercial
Maytag
MDE16CSAZW
Dryer - Commercial
Maytag
MDE16MNAGW
Dryer - Electric
Maytag
MDE16MNAYW
Dryer - Electric
Maytag
MDE16MNAZW
Dryer - Electric
Maytag
MDE16PDAGW
Dryer - Commercial
Maytag
MDE16PDAUW
Dryer - Commercial
Maytag
MDE16PDAYA
Dryer - Commercial
Maytag
MDE16PDAYQ
Dryer - Commercial
Maytag
MDE16PDAYW
Dryer - Commercial
Maytag
MDE16PDCZW
Dryer - Electric
Maytag
MDE16PRAGW
Dryer - Residential
Maytag
MDE16PRAYW
Dryer - Residential
Maytag
MDE16PRAZW
Dryer - Residential
Maytag
MDE16PSAZW
Dryer - Gas