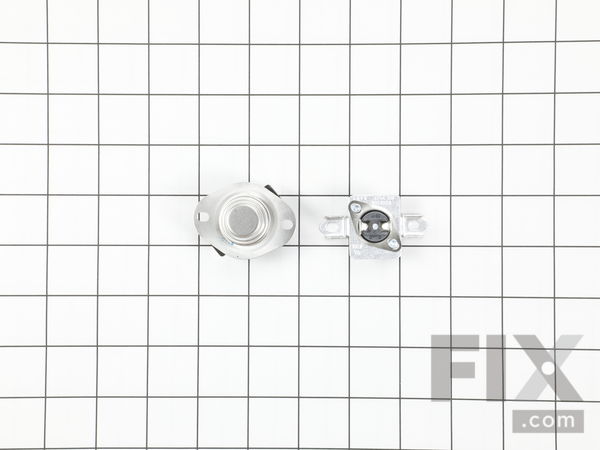
Part Location Diagram of 279973 Whirlpool High Limit Thermostat and Thermal Cut-Off Kit
See part 47 in the diagram
Replacing your Whirlpool Dryer High Limit Thermostat and Thermal Cut-Off Kit
( Grid squares measure 1x1 inch )

High Limit Thermostat and Thermal Cut-Off Kit

Works With Model 11068133413!

Rated by 6 customers 

?

Really Easy 

30 - 60 mins 

Ratings submitted by customers like you who bought this part.

?
$53.28
In Stock
Fix Number:
FIX334387
Manufacturer #:
279973
Manufactured by:
Whirlpool
Works With Model 11068133413!

Product Description

This thermal cut-off kit includes a genuine OEM replacement high limit thermostat and a fuse. The thermostat is a safety device used to prevent the dryer from overheating, and the fuse serves as a backup. If the temperature in your dryer gets above the thermostat, the fuse will blow. Once the fuse has tripped, it will need to be replaced. If your dryer will not start, gets too hot, shuts off too soon, or there is no heat, you may need to replace these components. Please be sure to disconnect the power supply to your dryer before beginning this repair, as you will be working with electrical components.

Videos For installing this part.

Replacing your High Limit Thermostat and Thermal Cut-Off Kit

Replacing your High Limit Thermostat and Thermal Cut-Off Kit

Questions and Answers

We're sorry, but our Q&A experts are temporarily unavailable.
Please check back later if you still haven't found the answer you need.

1 question answered by our experts.
  • 1
Sort by:
Sorry, we couldn't find any existing answers that matched.
Try using some different or simpler keywords, or submit your new question by using the "Ask a Question" button above!
Jerome
July 9, 2022
Do the wires plug in to thermostat like the first one
For model number Medb850wqo
Fix.com logo
Hello Jerome, thank you for your question. We have a video on how it attaches for you to view on the installation of the Thermal cut off Kit FIX334387. If you need help placing an order, customer service is open 7 days a week. Please feel free to give us a call. We look forward to hearing from you.

Was this helpful?
Thank you for voting!

Installation Instructions Provided by Fix customers like you.

Average Repair Rating: 3.7 / 5.0, 6 reviews.
  • 1
Sort by:
Sorry, we couldn't find any existing installation instruction that matched.
Customer:
dave from COLCHESTER, VT
Parts Used:
WP8577274, WP8544771, WP3392519, WP3391914, 279973, 279457
Difficulty Level:
Really Easy
Total Repair Time:
30 - 60 mins
Tools:
Nutdriver, Socket set
no heat
no owners manual fount, local service was weeks out & 100.00 to look at it.Pulled dry out,removed back cover & top, found technical repair manual inside ! found & retrieve codes.Looking for parts stumbled onto your great web site, ordered all possible parts you listed. spent 175.00 fixed,re assemble within 1 hr. HAPPY-HAPPY. HAPPY-WIFEY -HAPPY-LIFEY !!
13 of 13 people found this instruction helpful.
Was this instruction helpful to you?
Thank you for voting!
Customer:
steve from POPLAR GROVE, IL
Parts Used:
WP8559751, WP3387747, WP22002263, 279973
Difficulty Level:
Really Easy
Total Repair Time:
30 - 60 mins
Tools:
Socket set
Dryer would not heat
Watched YouTube videos on how to diagnose and execute the repair. Always unplug the unit prior to performING any work. Diagnosed the heating element was bad. Easy to remove using only a 1/4" socket or nut driver. Decided to replace the thermal fuse and thermostat while I had the unit apart. To reassemble just reverse the steps. Very easy repair to complete yourself with little/no appliance knowledge. Good luck.
3 of 3 people found this instruction helpful.
Was this instruction helpful to you?
Thank you for voting!
Customer:
Joseph from Cedar Park, TX
Parts Used:
279973
Difficulty Level:
Easy
Total Repair Time:
30 - 60 mins
Tools:
Screw drivers, Socket set
Dryer not heating up
First I checked the resistance of the heating element to ensure that it was not worn out. It was 10 ohms which told me that it was OK. The most likely problem therefore was the thermostat and/or thermal fuse. Partselect had the pair for a good price, so it was worth it to buy it even without being 100% sure those were the problematic components. The old parts were removed pretty easily with a socket wrench, although it was a bit difficult to reach the screws. After replacing the parts, the dryer worked perfectly and my wife was overjoyed. Probably saved $100 by not having to call a repairman.
2 of 2 people found this instruction helpful.
Was this instruction helpful to you?
Thank you for voting!
Customer:
Kelly from Weber City, VA
Parts Used:
279973
Difficulty Level:
Really Easy
Total Repair Time:
30 - 60 mins
Tools:
Nutdriver
Dryer getting extremely hot and blowing thermal fuse
Bought fuse and installed it. Bought another fuse along with high limit thermostat and thermistor. Finally figured out it was my control board and ended up buying a new dryer.Got tired of trying parts so bought a new dryer.Thank you very much.
1 person found this instruction helpful.
Was this instruction helpful to you?
Thank you for voting!
Customer:
Raul from Phoenix, AZ
Parts Used:
279973
Difficulty Level:
Easy
Total Repair Time:
30 - 60 mins
Tools:
Pliers, Socket set
Dryer generating very low heat output
My dryer was taking 2-3 cycles to finish drying each load. I replaced the heating element as that was the #1 recommended part to replace for this problem but it did not fix my problem. So I decided to replace the #2 recommended part (Thermostat & Thermal Fuse Kit) and this fixed my problem! Here are steps to replace the 2 parts/sensors. T hey are attached to the same housing that the heating element is attached to so installation instructions are almost identical. There are 2 different ways to do this install. (1) replacing only the 2 sensors/parts themselves while leaving the housing attached to the dryer or (2) removing the housing for the heating element and then replacing the 2 parts/sensors on a table. I chose method #2 and I would definitely recommend this method. To do this repair, you need the following tools: flash light, putty knife (or a butter knife if you don't have one), 1/4" socket, needle nose pliers (optional). STEP 1: UNPLUG YOUR DRYER!! THIS IS VERY IMPORTANT! STEP 2: Use a flash light to locate the clips holding the lower panel in place (they are approx 4" in from either side). One at a time, use a putty knife (or butter knife) to press down on the clip while pulling on the panel to release each side. The panel folds out and down. STEP 3: You will see the heat shield on the right, held in by one hex head screw. Use a 1/4" socket to remove the screw and heat shield. STEP 4: Use needle nose pliers (or your fingers) to disconnect the 6 wires connected to the left side of the housing. Make sure you remember which wires go on top and which ones go on bottom (take a pic or record short video if you have to). The wires on my dryer were easy to remember as the red wires with a white stripe went on top. STEP 5: The heating element is positioned in an open-front housing. This housing is held in place by 2 hex head screws. Use a 1/4" socket to remove the screws. Then, wiggle the housing and turn it 1/4 turn clockwise and pull it straight out from under the dryer. Place it on a table or work bench. STEP 6: Both parts/sensors are attached to the left side of the housing with 1 or 2 hex head screws. Use a 1/4" socket to remove the screw(s) holding either part in place (replace 1 part/sensor at a time). NOTE: TAKE A PICTURE OF HOW THE PART/SENSOR IS INSTALLED BEFORE YOU REMOVE IT TO MAKE SURE YOU INSTALL IT IN THE PROPER DIRECTION! Installation instructions are reverse of removal instructions.
1 person found this instruction helpful.
Was this instruction helpful to you?
Thank you for voting!
Customer:
RAFAEL from Gresham, OR
Parts Used:
279973
Difficulty Level:
Really Easy
Total Repair Time:
15 - 30 mins
Tools:
Socket set
Dryer has no heat at all
I take front panel of to get access to the heat element check for continuity on termostat fuse and element heater my element heater was done so l decided to replace all 3 pieces just to make sure they all brand new so I don't have to worried in the near future .Really easy task and is running like brand new. the parts were not expensive so was all good .special thanks to the guys at this site.
1 person found this instruction helpful.
Was this instruction helpful to you?
Thank you for voting!
  • 1

Model Compatibility

This part works with the following models:
Fix Number: FIX334387
Manufacturer Part Number: 279973
Brand
Model Number
Description
Kenmore
11060182000
Dryer
Kenmore
11060372710
Dryer - Dryer
Kenmore
11061062000
Dryer
Kenmore
11061064000
Dryer
Kenmore
11061066000
Dryer
Kenmore
11061082000
Dryer
Kenmore
11061084000
Dryer
Kenmore
11061086000
Dryer
Kenmore
11061092000
Dryer
Kenmore
11061112020
Dryer - Dryer
Kenmore
11061112021
Dryer - Dryer
Kenmore
11061112022
Dryer - Electric Dryer
Kenmore
11061632610
Dryer - ELECTRIC DRYER
Kenmore
11062182100
Dryer
Kenmore
11062182102
Dryer
Kenmore
11062182103
Dryer
Kenmore
11066002010
Dryer
Kenmore
11066152500
Dryer
Kenmore
11067022710
Dryer - COMMERCIAL
Kenmore
11067052600
Dryer
Kenmore
11067102310
Dryer - ELECTRIC DRYER
Kenmore
11068002010
Dryer
Kenmore
11068002011
Dryer - ELECTRIC DRYER
Kenmore
11068102310
Dryer - 27" ELECTRIC DRYER
Kenmore
11068103310
Dryer - ELECTRIC DRYER
Kenmore
11068132411
Dryer - ELECTRIC DRYER
Kenmore
11068132412
Dryer - ELECTRIC DRYER
Kenmore
11068133412
Dryer - ELECTRIC DRYER
Kenmore
11068133413
Dryer - ELECTRIC DRYER
Kenmore
11069082990
Dryer