Some of the parts we sell are eligible for mail-in rebates since we can recycle them. We will display any applicable rebates in your shopping cart. To redeem your rebate, contact Customer Service after you have received your part.
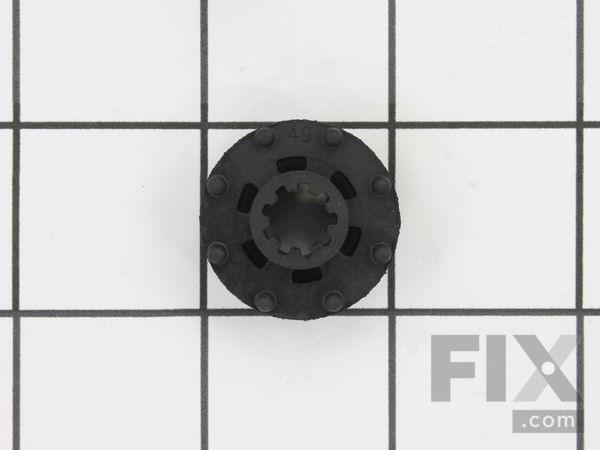
Evaporator/Condensor Fan Grommet
- Fix Number:
- FIX284555
- Manufacturer #:
- WR02X10098
- Manufactured by:
- GE
- Product Description
- This grommet is found on both the front and back of the fan motor assembly for the condenser and the evaporator in your fridge. It is used to provide a buffer between the fan motor and the mounting bracket, which helps to reduce noise. You may need to replace the grommets if you are getting excessive noise from either the condenser or evaporator fan motors, you may need to replace one or more grommets. This is an authentic OEM part, made of black plastic and measuring approximately 1 inch in diameter. They are sold individually, so if you need to replace more than one grommet be sure to order the correct quantity.
- Works with the following brands:
- General Electric, Hotpoint, Kenmore
- Works with the following products
- Refrigerator
- Fixes the following symptoms
- Noisy, Fridge too warm, Freezer section too warm, Clicking sound
- Part# WR02X10098 replaces these:
- AP3647189, 772715, WR02X10822, WR2X10098, WR2X10822
Product Description
This grommet is found on both the front and back of the fan motor assembly for the condenser and the evaporator in your fridge. It is used to provide a buffer between the fan motor and the mounting bracket, which helps to reduce noise. You may need to replace the grommets if you are getting excessive noise from either the condenser or evaporator fan motors, you may need to replace one or more grommets. This is an authentic OEM part, made of black plastic and measuring approximately 1 inch in diameter. They are sold individually, so if you need to replace more than one grommet be sure to order the correct quantity.
-
Works with the following brands:General Electric, Hotpoint, Kenmore
-
Works with the following products:Refrigerator
-
Fixes the following symptoms:Noisy, Fridge too warm, Freezer section too warm, Clicking sound
-
Part# WR02X10098 replaces these:AP3647189, 772715, WR02X10822, WR2X10098, WR2X10822
Questions and Answers
We're sorry, but our Q&A experts are temporarily unavailable.
Please check back later if you still haven't found the answer you need.
Related Parts Additional or alternate parts to consider.
Installation Instructions Provided by Fix customers like you.
- < Prev
- 1
- Next >
- Customer:
- Scott from Nampa, ID
- Parts Used:
- WR60X10220, WR02X10098
- Difficulty Level:
- Really Easy
- Total Repair Time:
- 15 - 30 mins
- Tools:
- Nutdriver
- Customer:
- Michael from Asheboro, NC
- Parts Used:
- WR60X10170, WR02X10098
- Difficulty Level:
- Easy
- Total Repair Time:
- 30 - 60 mins
- Tools:
- Nutdriver
- Customer:
- Alfred E. from Bloomfield, NJ
- Parts Used:
- WR02X10098
- Difficulty Level:
- A Bit Difficult
- Total Repair Time:
- 30 - 60 mins
- Tools:
- Screw drivers, Socket set
- < Prev
- 1
- Next >
Model Compatibility
Manufacturer Part Number: WR02X10098


