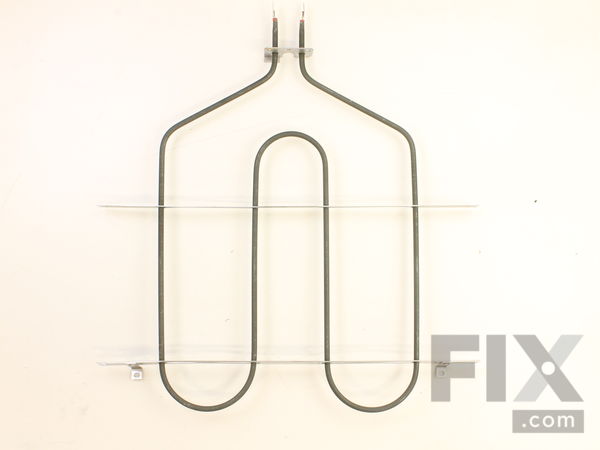
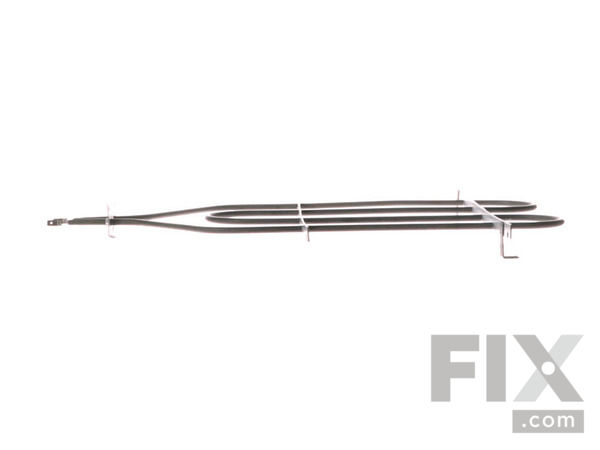
Part Location Diagram of WB44T10009 GE Broil Element
See part 252 in the diagram
( Grid squares measure 1x1 inch )

Broil Element

Works With Model JB620SR3SS!

Rated by 3 customers 

?

Easy 

30 - 60 mins 

Ratings submitted by customers like you who bought this part.

?
$97.66
In Stock
Fix Number:
FIX249284
Manufacturer #:
WB44T10009
Manufactured by:
GE
Works With Model JB620SR3SS!

Product Description

This broil element is found on the upper part of the oven cavity.

Questions and Answers

We're sorry, but our Q&A experts are temporarily unavailable.
Please check back later if you still haven't found the answer you need.

Installation Instructions Provided by Fix customers like you.

Average Repair Rating: 3.6 / 5.0, 3 reviews.
  • 1
Sort by:
Sorry, we couldn't find any existing installation instruction that matched.
Customer:
william from Creal Springs, IL
Parts Used:
WB44T10009
Difficulty Level:
Really Easy
Total Repair Time:
Less than 15 mins
Tools:
Socket set
Heating element broke in half and was sparking.
Disconnected power to the range. Removed the two nut screws in the rear. Pulled the heating element forward until the wire connectors were exposed. Detached the clips from wires and element. Removed old element. Reconnected wire connectors to new element and reinserted into back of range. Tightened two rear screws. Turned power bac k on and tested.
1 person found this instruction helpful.
Was this instruction helpful to you?
Thank you for voting!
Customer:
Lucinda from Ada, OH
Parts Used:
WB44T10009
Difficulty Level:
Easy
Total Repair Time:
15 - 30 mins
Tools:
Nutdriver, Screw drivers
Broiler element burnt out
Pretty easy to remove old old and install new element
0 of 1 people found this instruction helpful.
Was this instruction helpful to you?
Thank you for voting!
Customer:
Christopher from Chicago, IL
Parts Used:
WB44T10009
Difficulty Level:
Easy
Total Repair Time:
1- 2 hours
Tools:
Pliers, Screw drivers
Broiler Element Replacement
This is usually a very easy replacement, but I did have one complication that was not noted by others. The spade connectors (the power connectors) to the broiler element were loose and needed to be crimped. The procedures I used were: 1) Confirm that the range is disconnected from power. I did this by turning off the circuit breaker for the range. You could also unplug it. 2) Remove the oven racks. 3) Remove the two front bolts fastening the broiler element to the top of the oven. I used a nut driver to the remove the bolts. 3) Remove the three rear bolts fastening the broiler element to the back of the oven. The center bolt fastens the temperature sensor in place. Make note that the temp sensor bolt is a different size than the bolts fastening the broiler element. 4) While holding the electrical connectors in place, pull the element and wires out about six inches. 5) Wrap a twist tie around the two wires going to the broiler element, so they don't fall back into the oven. If the they fall back into the oven, you will have to remove the back of the oven and feed them back in. 6) Remove the spade connectors from the from the broiler element. You can now remove the element from the oven. 7) Reconnect the spade connectors to the new broiler element. Spade connectors stay fastened based on friction. The connectors in my oven were loose and kept falling off. If this happens, you need to lightly crimp the curled edges of the connector with pliers. BE CAREFUL! If you crimp the connector too much, it won't slide on to the broiler element. If this happens you will need to slide a small screwdriver to into the spade connector to pry it apart slightly. This is normally an easy operation, but with the oven door in the way, it is hard to get two hands on the the connector. I had to do it with one hand which took a few repetitions. 8) Feed the wires back into the oven 9) Hold the element in place and screw in both rear bolts by hand. It is important to leave them loose in order to leave wiggle room to get the temp sensor bolt in. 10)Screw in the front two bolts by hand 11) Screw in the temp sensor bolt by hand 12) Tighten all bolts with a nut driver or socket wrench. 13) Reconnect power to the oven and test.
0 of 1 people found this instruction helpful.
Was this instruction helpful to you?
Thank you for voting!
  • 1

Model Compatibility

This part works with the following models:
Fix Number: FIX249284
Manufacturer Part Number: WB44T10009
Brand
Model Number
Description
Kenmore
91192090300
Range
Kenmore
91192090301
Range
Kenmore
91192091300
Range
Kenmore
91192091301
Range
Kenmore
91192401990
Range
Kenmore
91192401991
Range
Kenmore
91192401992
Range
Kenmore
91192408990
Range
Kenmore
91192408991
Range
Kenmore
91192408992
Range
Kenmore
91192481990
Range
Kenmore
91192481991
Range
Kenmore
91192481992
Range
Kenmore
91192488990
Range
Kenmore
91192488991
Range
Kenmore
91192488992
Range
Kenmore
91192502990
Range
Kenmore
91192502991
Range
Kenmore
91192502992
Range
Kenmore
9119250799
Range - Kenmore Range/Stove/Oven Model 911.9250799 (9119250799, 911 9250799) Parts
Kenmore
91192507990
Range
Kenmore
91192507991
Range
Kenmore
91192507992
Range
Kenmore
91192712020
Range
Kenmore
91192714020
Range
Kenmore
91192812300
Range
Kenmore
91192812301
Range
Kenmore
91192814300
Range
Kenmore
91192814301
Range
Kenmore
91193090300
Range