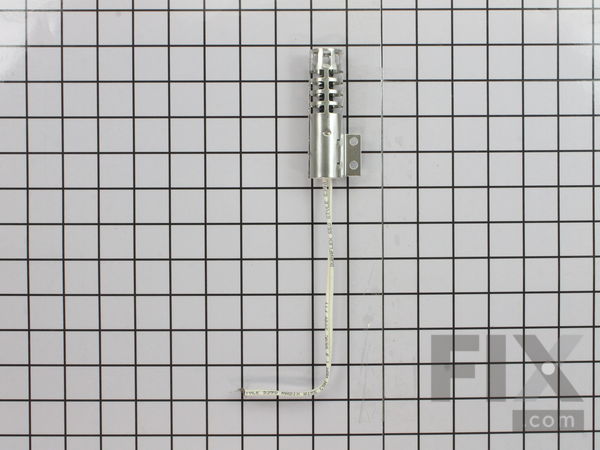
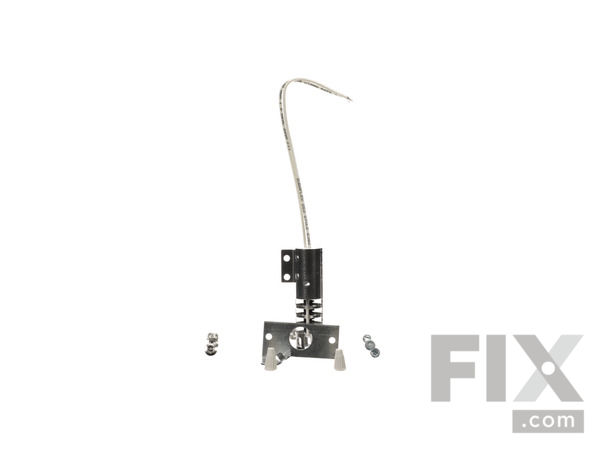
Part Location Diagram of WB2X9154 GE Round Style Oven Igniter
See part 750 in the diagram
( Grid squares measure 1x1 inch )

Round Style Oven Igniter

Works With Model JGRP17WEP1WW!
★★★★★
★★★★★
5 Reviews

Rated by 12 customers 

?

Really Easy 

30 - 60 mins 

Ratings submitted by customers like you who bought this part.

?
$117.20
In Stock
Fix Number:
FIX243425
Manufacturer #:
WB2X9154
Manufactured by:
GE
Works With Model JGRP17WEP1WW!

Product Description

This is a genuine OEM replacement round style igniter for your gas oven. Also known as a bake and broil igniter, this part is used to ignite the gas in order to light the oven burner and produce heat for cooking. If your oven will no longer start, there is little or no heat, or the igniter glows but will not light, then it likely needs to be replaced. Please note that the igniter is very fragile and should be handled with care, especially avoid touching the gray element portion. This igniter measures approximately 3 1/2 inches in length with an amperage of 2.5 to 3.0, with two high-temperature wire connectors. Be sure to disconnect the power and gas supply to your range before beginning this repair. This is a round style igniter, and will not work for models that require a flat style.

Questions and Answers

We're sorry, but our Q&A experts are temporarily unavailable.
Please check back later if you still haven't found the answer you need.

Installation Instructions Provided by Fix customers like you.

Average Repair Rating: 3.6 / 5.0, 12 reviews.
  • 1
  • 2
Sort by:
Sorry, we couldn't find any existing installation instruction that matched.
Customer:
Steven from Dayton, NV
Parts Used:
WB2X9154
Difficulty Level:
Easy
Total Repair Time:
30 - 60 mins
Tools:
Socket set, Wrench set
OVEN WOULD NOT COME AT ALL
I DETERMINED THAT THE OVEN IGNITER WAS NOT WORKING. I OPENED THE PANEL TO THE BOTTOM OF THE OVEN AND WATCHED TO SEE IF IT WAS LIGHTING.... I NOTICED THAT THE IGNITER WAS NOT COMING ON.... SO I WENT ONLINE THE BUY A NEW IGNITER..... FIRST UNPLUG THE OVEN. THEN UNSCREW THE TWO SCREWS HOLDING THE BURNER. UNPLUG THE TWO WIRES. PULL OUT THE BU RNER ASSEMBLY. NOW UNSCREW THE TWO SCREWS HOLDING THE IGNITER AND REPLACE WITH NEW ONE. NOW PUT THE BURNER ASSEMBLY BACK IN OVEN JUST LIKE YOU TOOK IT OUT. CUT THE TWO WIRE PLUGS AND USE THE TWO WIRE CAPS THAT COME WITH THE KIT... THERE YOUR ALL DONE. OVEN IS NOW FIXED AND WORKING LIKE NEW.
8 of 8 people found this instruction helpful.
Was this instruction helpful to you?
Thank you for voting!
Customer:
Benson from Tucker, GA
Parts Used:
WB2X9154
Difficulty Level:
Really Easy
Total Repair Time:
Less than 15 mins
Tools:
Nutdriver
Oven will not heat, stove and broiler work fine
Disconnected power to oven. Removed oven racks and bottom oven cover (moved the lever latch on the front.) Removed the oven burner cover, using nutdriver, to expose the oven igniter. Laid down paper towel to cover slots in oven bottom in case I dropped a screw. Disconnected igniter base from oven wall using nutdriver. Gently worked t he wiring out from the oven wall. Twisted off the connector caps. Untwisted the wires and freed up the old igniter. Connected the new igniter to the new igniter base provided in the replacement. Twisted on the new igniter. Using new white caps provided with the new part tightened down the caps. Worked the wiring back inside the oven wall. Connected the new base and igniter to the oven wall with the new self tapping screws provided. Powered on oven and tested new igniter. Dropped the burner cover back in and fasten with new self tapping screws. Replaced oven bottom and racks.
4 of 4 people found this instruction helpful.
Was this instruction helpful to you?
Thank you for voting!
Customer:
Kent from LAYTON, UT
Parts Used:
WB2X9154
Difficulty Level:
Really Easy
Total Repair Time:
30 - 60 mins
Tools:
Socket set
Igniter not working
Remove bolts holding igniter pull slack out of wires cut wires closest to old igniter wire nut wires push excess wire back remount igniter and tighten bolts
1 person found this instruction helpful.
Was this instruction helpful to you?
Thank you for voting!
Customer:
Joel from Mukwonago, WI
Parts Used:
WB2X9154, WB21X5301
Difficulty Level:
Really Easy
Total Repair Time:
30 - 60 mins
Tools:
Nutdriver, Screw drivers, Socket set
Oven would not lite or turn on. Temp control was off buy more than 50 degrees
I followed the instructions given and removed the igniter and replaced it with the new one. It was not hard at all.the temp control was even simpler. I have ms.and if I could do it. Anyone can.the oven now works like new. The cost to repair was low compared to a new stove.i ordered the parts and received them the next day, outstanding.
1 person found this instruction helpful.
Was this instruction helpful to you?
Thank you for voting!
Customer:
Wm T from Danvers, MA
Parts Used:
WB2X9154
Difficulty Level:
Really Easy
Total Repair Time:
30 - 60 mins
Tools:
Nutdriver
igniter died and had to be replaced to light gas oven
piece of cake with online instructions. saved valuable time and money not having to call a repair man.
1 person found this instruction helpful.
Was this instruction helpful to you?
Thank you for voting!
Customer:
Mark from Salem, OR
Parts Used:
8009, WB2X9154
Difficulty Level:
Very Easy
Total Repair Time:
15 - 30 mins
Tools:
Screw drivers, Socket set
Oven would not heat up
We looked online found this site. Looked up the part number for our oven. We received it within 3 days. We read the first set of instructions on how to install. Was fixed within 30 minutes. This Company is AWESOME, very reliable, excellent service! The person who submitted the instructions did a great job. Saved us a bundle!
1 of 2 people found this instruction helpful.
Was this instruction helpful to you?
Thank you for voting!
Customer:
James from Duxbury, MA
Parts Used:
WB2X9154
Difficulty Level:
Easy
Total Repair Time:
15 - 30 mins
Tools:
Nutdriver, Pliers, Screw drivers
Oven igniter burned out
TURN OFF POWER TO OVEN AT BREAKER, THEN: 1) Oven racks out; 2) remove oven bottom plate (two thumbscrews at rear); 3) flame spreader out (small nut at front - note how it is inserted in the rear for when you replace it); 4) close the oven door, and remove bottom trim from the oven itself (pull back on the top- you'll need a flashlight - n ote how the gas tube fits over the gas feed line, so you replace it properly); 5) go back inside the oven and gently pull out the gas tube with the igniter attached: 6) carefully note which of the two wires is attached to which connector under the oven, and look at your new ignitor, noting which wire will go to which connector; 7) back under the oven, unscrew and throw away the old wire nuts, and pull apart the wires; 8) You can now pull out the gas tube with the old ignitor attached, unscrew it, and replace it with the new one; 9) Lead the new wires down through the back of the oven to the correct connector below, and connect them with the new wire nuts; 10) reinstall the gas tube (making sure it is properly oriented under the oven). Before reinstalling the flame spreader and oven bottom, you can reconnect the power and try the new ignitor out. If it works, you're done, and can put the oven back together.
0 of 1 people found this instruction helpful.
Was this instruction helpful to you?
Thank you for voting!
Customer:
john from the villages, FL
Parts Used:
WB2X9154
Difficulty Level:
Easy
Total Repair Time:
15 - 30 mins
Tools:
Screw drivers, Socket set
no ignitor for the oven
Followed the instructions in the packet and it was relatively easy
0 of 1 people found this instruction helpful.
Was this instruction helpful to you?
Thank you for voting!
Customer:
Robert from Pahrump, NV
Parts Used:
WB2X9154
Difficulty Level:
Easy
Total Repair Time:
30 - 60 mins
Tools:
Nutdriver, Pliers
My igniter quit....
Mine was a wall oven and the lower burner for baking would no light. Remove oven racks and bottom cover... I used a nut driver to remove 4 screws in the bottom plate, then the screws & brackets holding the burner in place. I then removed the screw holding the igniter in the back wall.... Then a screw holding the igniter to the burner. . Pull the wires out of the back until you get to the wire nuts... Remove wire nuts... The brackets and wire nuts were a little different than what was included in the box, so I reused the old wire nuts and brackets... Every thing went back in opposite order and it lights now....
0 of 1 people found this instruction helpful.
Was this instruction helpful to you?
Thank you for voting!
Customer:
Richard from Bloomington, CA
Parts Used:
WB2X9154
Difficulty Level:
Easy
Total Repair Time:
1- 2 hours
Tools:
Nutdriver
Igniter would not glow. Oven would not lite.
Removed and replaced igniter.
0 of 1 people found this instruction helpful.
Was this instruction helpful to you?
Thank you for voting!
  • 1
  • 2
Customer Reviews
Average Rating: (5 Reviews)
5.0
★★★★★
★★★★★
Filter By Rating:
  • 5
    5
  • 4
    0
  • 3
    0
  • 2
    0
  • 1
    0
  • 1
Sort by:
Sorry, we couldn't find any existing reviews that matched. Try using some different or simpler keywords.

Model Compatibility

This part works with the following models:
Fix Number: FIX243425
Manufacturer Part Number: WB2X9154
Brand
Model Number
Description
Kenmore
1033247810
Range
Kenmore
1033247812
Range
Kenmore
1033247891
Range
Kenmore
1033248210
Range
Kenmore
1033248290
Range
Kenmore
1033248291
Range
Kenmore
1033658710
Range
Kenmore
1037258510
Range
Kenmore
1037267810
Range
Kenmore
1037278510
Range
Kenmore
1037287610
Range
Kenmore
1037287710
Range
Kenmore
1037287711
Range
Kenmore
1037287712
Range
Kenmore
1037287810
Range
Kenmore
1037287811
Range
Kenmore
1037297810
Range
Kenmore
1037297811
Range
Kenmore
1037297812
Range
Kenmore
1037358210
Range
Kenmore
1037387810
Range
Kenmore
1037857710
Range
Kenmore
1037857711
Range
Kenmore
1037857810
Range
Kenmore
1037857811
Range
Kenmore
1037858012
Range
Kenmore
1037867710
Range
Kenmore
1037867810
Range
Kenmore
1037897810
Range
Kenmore
1037897811
Range