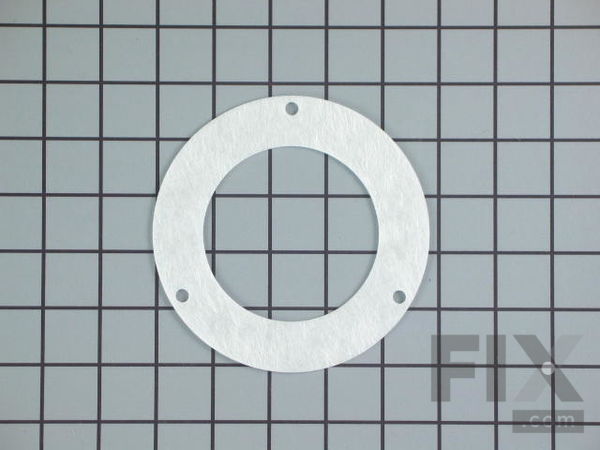
Part Location Diagram of WB2X9151 GE Light Lens Gasket
See part 81 in the diagram
( Grid squares measure 1x1 inch )

Light Lens Gasket

Works With Model L3K335GL1!

Rated by 1 customers 

?

A Bit Difficult 

30 - 60 mins 

Ratings submitted by customers like you who bought this part.

?
$11.00
On Order
Fix Number:
FIX243422
Manufacturer #:
WB2X9151
Manufactured by:
GE
Works With Model L3K335GL1!

Product Description

Questions and Answers

We're sorry, but our Q&A experts are temporarily unavailable.
Please check back later if you still haven't found the answer you need.

Installation Instructions Provided by Fix customers like you.

Average Repair Rating: 2.8 / 5.0, 1 reviews.
  • 1
Sort by:
Sorry, we couldn't find any existing installation instruction that matched.
Customer:
Gregory from Titusville, FL
Parts Used:
WB2X9151, WB27M10
Difficulty Level:
A Bit Difficult
Total Repair Time:
30 - 60 mins
Tools:
Screw drivers
Faceplate for Controls & Gasket for Light needed Replacement
Range oven control face-plate Part #: 344120 deteriorated, probably from detergents,
and split over up arrow.
Pull range out from wall 6 inches.
Remove 2 screws on bottom front corners of Control Panel and flip it up and let lean on wall.
Using scrapper or putty knife to peel off old Face-plate and old adhesive taking care not to
damage rubber coverings of controls.
Use alcohol to fully remove all adhesive residue prepping control surface for re-installation of
new Face-plate. Suggest cotton rags for this.
After removing sticky side's covering, carefully, squarely align and press onto control.
Peel away protective film on face-plate.
Flip Control Panel down and re-install 2 screws and push back to wall.

Gasket for Interior Light can pull apart during replacement of bulb due to grease residues.
It is best to lift off oven door to make reaching into oven easier.
Careful to not let lens fall when removing 3 screws holding lens cover.
You could use masking tape to to secure it to ring.
Use vacuum to clean up old fiberglass gasket rather than trying to handle by hand.
I suggest holding gasket and lens in place during re-installation by using masking tape on
exterior of lens ring, first place glass in ring and tape to outside of ring, insert 2 screws in ring
and tape over their heads, put gasket over screws, align screws in ring to bottom 2 holes,
tighten screws but not fully, install top screw and finish tightening all screws.
Remove tape and re-install door.
0 of 1 people found this instruction helpful.
Was this instruction helpful to you?
Thank you for voting!
  • 1

Model Compatibility

This part works with the following models:
Fix Number: FIX243422
Manufacturer Part Number: WB2X9151
Brand
Model Number
Description
Kenmore
1033658710
Range
Kenmore
1034688610
Range
Kenmore
1036408710
Range
Kenmore
1036417610
Range
Kenmore
1036427510
Range
Kenmore
1036427540
Range
Kenmore
1036427560
Range
Kenmore
1036427610
Range
Kenmore
1036437710
Range
Kenmore
1036447710
Range
Kenmore
1037337000
Range
Kenmore
1037337020
Range
Kenmore
1037337040
Range
Kenmore
1037337100
Range
Kenmore
1037337101
Range
Kenmore
1037337120
Range
Kenmore
1037337121
Range
Kenmore
1037337140
Range
Kenmore
1037337141
Range
Kenmore
1037337160
Range
Kenmore
1037337161
Range
Kenmore
1037337210
Range
Kenmore
1037337211
Range
Kenmore
1037337212
Range
Kenmore
1037337220
Range
Kenmore
1037337221
Range
Kenmore
1037337222
Range
Kenmore
1037337240
Range
Kenmore
1037337241
Range
Kenmore
1037337242
Range