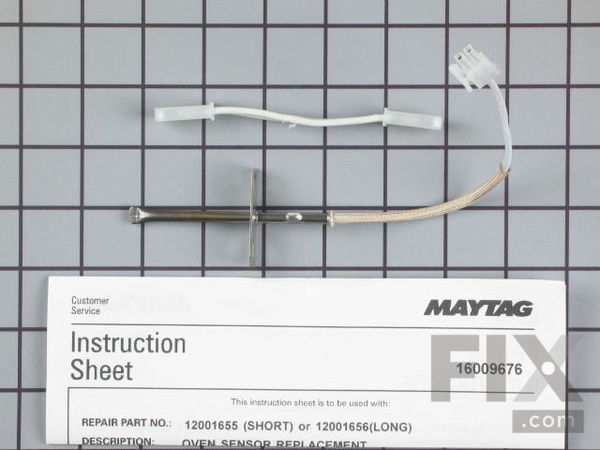
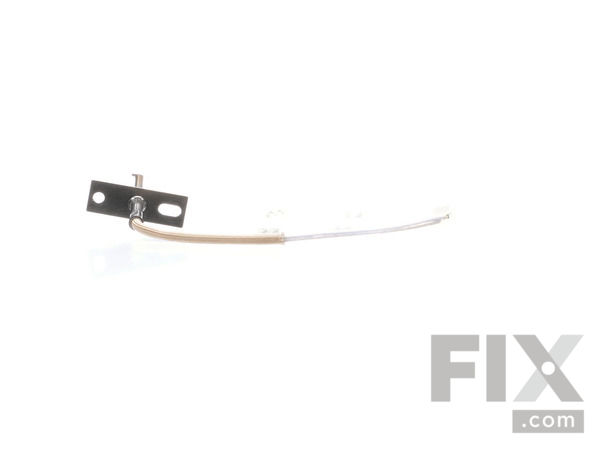
Part Location Diagram of 12001655 Whirlpool Short Oven Sensor Kit
See part 10 in the diagram
Replacing your Maytag Range Short Oven Sensor Kit
( Grid squares measure 1x1 inch )

Short Oven Sensor Kit

Works With Model CG34700ADV!
★★★★★
★★★★★
1 Review

Rated by 9 customers 

?

Really Easy 

15 - 30 mins 

Ratings submitted by customers like you who bought this part.

?
$46.33
In Stock
Fix Number:
FIX2003225
Manufacturer #:
12001655
Manufactured by:
Whirlpool
Works With Model CG34700ADV!

Product Description

This temperature sensor detects the temperature within the oven cavity.

Videos For installing this part.

Replacing your Short Oven Sensor Kit

Replacing your Short Oven Sensor Kit

Questions and Answers

We're sorry, but our Q&A experts are temporarily unavailable.
Please check back later if you still haven't found the answer you need.

Installation Instructions Provided by Fix customers like you.

Average Repair Rating: 4.4 / 5.0, 9 reviews.
  • 1
Sort by:
Sorry, we couldn't find any existing installation instruction that matched.
Customer:
Donna from SALEM, NH
Parts Used:
12001655
Difficulty Level:
Very Easy
Total Repair Time:
Less than 15 mins
Tools:
Screw drivers
Oven not reaching temperature
Unplugged oven..inside upper left in oven removed 2 screws pulled out oven temp sensor.unplugged plugged in New one replace 2 screws done
4 of 4 people found this instruction helpful.
Was this instruction helpful to you?
Thank you for voting!
Customer:
D'Anne from Clarksville, TX
Parts Used:
12001655
Difficulty Level:
Easy
Total Repair Time:
15 - 30 mins
Tools:
Nutdriver, Wrench set
The oven would not reach set temp and would just stay low always saying preheating.
We removed the back panel of range- very easy to do. The sensor was inside the oven -upper left hand corner. We unscrewed it and pulled it out from the back-inserted new one and put everything back in reverse order. Saved major dollars. The part was the right one. But if I could rate the service of this site as better than the part then that is what I am doing. Will be my go to for all appliance parts..
3 of 3 people found this instruction helpful.
Was this instruction helpful to you?
Thank you for voting!
Customer:
bob from WOODSTOCK, GA
Parts Used:
12001655
Difficulty Level:
Easy
Total Repair Time:
30 - 60 mins
Tools:
Screw drivers
replace old sensor
empty oven, remove door (see youtube), put out range to limit of gas line, remove back cover screws on left side facing range,
pull back cover until you see 2 wires coming out of range -
disconnect coupling.
remove sensor upper left 2 screws. install new,connect, put in screws, replace range.
1 person found this instruction helpful.
Was this instruction helpful to you?
Thank you for voting!
Customer:
GLEN from College Station, TX
Parts Used:
12001655
Difficulty Level:
Really Easy
Total Repair Time:
Less than 15 mins
Tools:
Screw drivers
OVEN WOULDNT HEAT TO CORRECT TENPERATURE
CHANGE THE TEMPERATURE SENSOR AND THAT FIXED THE PROBLEM
0 of 1 people found this instruction helpful.
Was this instruction helpful to you?
Thank you for voting!
Customer:
Clarence from Creal Springs, IL
Parts Used:
12001655
Difficulty Level:
Really Easy
Total Repair Time:
15 - 30 mins
Tools:
Nutdriver, Screw drivers
Did not reach temperature set on control board
had to take back panel off to disconnect wire but it was easy after that replace sensor and put back panel back on watch how to video here, just followed instructions Had to replace the ignitor also that was the problem. it would not light the oven burner it turn red but it was not hot enough ignit oven
0 of 1 people found this instruction helpful.
Was this instruction helpful to you?
Thank you for voting!
Customer:
frederick from silver creek, NY
Parts Used:
12001655
Difficulty Level:
Easy
Total Repair Time:
15 - 30 mins
Tools:
Pliers, Screw drivers
glow coil would not come on
checked out the glow coil with meter and found out it was ok. When I went on line they stated it could be the glow coil or the short oven sensor I ordered the sensor on line within three days received part. It comes with different adapters and I had to use one and it went in very nicely. hardest problem was just getting the wiring out of the hole once I came to the connector. Installed in minutes great video on line to help you through it.
0 of 1 people found this instruction helpful.
Was this instruction helpful to you?
Thank you for voting!
Customer:
Bernice from Houston, TX
Parts Used:
12001655
Difficulty Level:
Really Easy
Total Repair Time:
15 - 30 mins
Tools:
Screw drivers
Oven taking long time to reach baking temperature and baking unevenly.
Hardest part was the wait for help to pull my drop-in range out for repair, then only took about 30 minutes. Still noticing it over 20 minutes to reach the proper temp but noticed that when I pushed the over door to close tighter that the heat increased quicker so I am ordering the door gasket now as that must have been part of the uneve n heat. Thank you so much for your help.
0 of 1 people found this instruction helpful.
Was this instruction helpful to you?
Thank you for voting!
Customer:
judy from GRANVILLE, NY
Parts Used:
74007498, 12001655
Difficulty Level:
Really Easy
Total Repair Time:
Less than 15 mins
Tools:
Screw drivers
Oven would not heat to temperature.
We had problems with the stove for along time we kept having to replace the igniter ,I found online and watched the video's and learned more on troubleshooting problems Thank you very much., it was very easy.Thank you so much for selling these parts you definitely have the best price also Thank you again . WATCH THE VIDEOS
0 of 1 people found this instruction helpful.
Was this instruction helpful to you?
Thank you for voting!
Customer:
Martha from Macedon, NY
Parts Used:
12001655
Difficulty Level:
Really Easy
Total Repair Time:
Less than 15 mins
Tools:
Screw drivers
Intermittent error codes (F2, F3)
This was so easy! On this model, the oven sensor is attached inside the oven. I removed two screws to release it - and had to remove the back panel of the oven to release the electrical connection. The oven sensor then was easily removed in the oven along with the wire and connector. I then fed the new connector and wire through the h ole in the oven, secured the new oven sensor with the two screws, connected the wires in the back, replaced the back panel and finished! It works great now. This is a great range - was purchased 22 years ago and has had no problems until this.
0 of 1 people found this instruction helpful.
Was this instruction helpful to you?
Thank you for voting!
  • 1
Customer Reviews
Average Rating: (1 Review)
5.0
★★★★★
★★★★★
Filter By Rating:
  • 5
    1
  • 4
    0
  • 3
    0
  • 2
    0
  • 1
    0
  • 1
Sort by:
Sorry, we couldn't find any existing reviews that matched. Try using some different or simpler keywords.

Model Compatibility

This part works with the following models:
Fix Number: FIX2003225
Manufacturer Part Number: 12001655
Brand
Model Number
Description
Magic Chef
31315VBM
Range - Gas
Magic Chef
31315VBV
Range - Gas
Magic Chef
31315XBA
Range - Gas
Magic Chef
31315XBW
Range - Gas
Magic Chef
3167XYA
Range - Freestanding, Gas
Magic Chef
3167XYW
Range - Freestanding, Gas
Magic Chef
3448SRA
Range - Gas
Magic Chef
3448SRW
Range - Gas
Magic Chef
3448XPA
Range - Gas
Magic Chef
3448XPW
Range - Gas
Magic Chef
3448XRA
Range - Gas
Magic Chef
3448XRW
Range - Gas
Magic Chef
3468VRV
Range - Gas
Magic Chef
3468VTV
Range - Gas
Magic Chef
3468VVD
Range - Gas
Magic Chef
3468VVV
Range - Gas
Magic Chef
3468XRA
Range - Gas
Magic Chef
3468XRW
Range - Gas
Magic Chef
3468XTA
Range - Gas
Magic Chef
3468XTA-X
Range - Gas
Magic Chef
3468XTW
Range - Gas
Magic Chef
3468XTW-X
Range - Gas
Magic Chef
3468XVA
Range - Gas
Magic Chef
3468XVA-X
Range - Gas
Magic Chef
3468XVB
Range - Gas
Magic Chef
3468XVW
Range - Gas
Magic Chef
3468XVW-X
Range - Gas
Magic Chef
3488VRA
Range - Gas
Magic Chef
3488VRV
Range - Gas
Magic Chef
3488VTA
Range - Gas