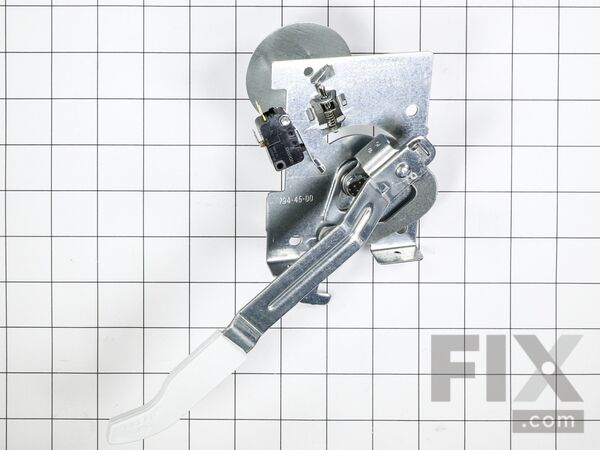
Part Location Diagram of WB14T10040 GE LATCH AND HANDLE Assembly
See part 151 in the diagram
( Grid squares measure 1x1 inch )

LATCH AND HANDLE Assembly

Rated by 1 customers 

?

Easy 

15 - 30 mins 

Ratings submitted by customers like you who bought this part.

?
$66.27
In Stock
Fix Number:
FIX1480960
Manufacturer #:
WB14T10040
Manufactured by:
GE

Product Description

Questions and Answers

We're sorry, but our Q&A experts are temporarily unavailable.
Please check back later if you still haven't found the answer you need.

Installation Instructions Provided by Fix customers like you.

Average Repair Rating: 3.9 / 5.0, 1 reviews.
  • 1
Sort by:
Sorry, we couldn't find any existing installation instruction that matched.
Customer:
John from Myrtle Beach, SC
Parts Used:
WB14T10040
Difficulty Level:
Easy
Total Repair Time:
15 - 30 mins
Tools:
Nutdriver, Screw drivers
Damaged oven door latch trying to halt self-cleaning routine
Note--Turn power off in fuse box to the range. Now raise the top assembly of the stove until the springs engage below to hold it up. Remove single screw from cover over latch mechanism (6-point screwdriver) and set them aside. Remove screw in latch handle(phillips screwdriver). Remove 2 screws in front of oven that hold the latch mechanis m in place (1/4" nutdriver). When loose, you can remove the latch handle. Ease mechanism up thru the opening and disengage the 2 plugs/wires from the latch switch. Now the old latch mechanism can be discarded. Remove the screw from the handle of the new part. Plug the wires onto the new switch assy. Gently move assembly down into the opening clearing a small space in the insulation for the extension part on the bottom to rest in. With switch assembly in near the mounting position, move the handle assembly to the lock position. Now you can insert the handle thru the slot in the front panel and position and engage it properly on the assembly. Install the screw for the handle and tighten it. Using the handle for assistance, position the assembly to the front and install the 2 screws in the front of the oven ( I used an ice pick in one screw hole so I knew where both holes would be.) You can now tighten both screws. Activate the handle to see that it works properly. Put the top plate back down over the lock mechanism and insert screw. Tighten it down. Lower the top assembly by pushing back carefully on the spring latches. Restore power to the stove. lose oven door and again make sure it will lock/unlock. Final proof will be at your next self-cleaning operation.
0 of 1 people found this instruction helpful.
Was this instruction helpful to you?
Thank you for voting!
  • 1

Model Compatibility

This part works with the following models:
Fix Number: FIX1480960
Manufacturer Part Number: WB14T10040
Brand
Model Number
Description
General Electric
EER2000M01WW
Range - Electric
General Electric
EER2000M02WW
Range - Electric
General Electric
EER3000L01TW
Range - Electric
General Electric
EER3000L02TW
Range - Electric
General Electric
EER4000N01WW
Range
General Electric
JB3000R1WW
Range
General Electric
JB3000R2WW
Range
General Electric
JB3000R3WW
Range
General Electric
JB620DR2WW
Range
General Electric
JB620DR3WW
Range
General Electric
JB640DIR1WW
Range
General Electric
JB640DIR2WW
Range
General Electric
JB640DIR4WW
Range
General Electric
JB640DN1WW
Range
General Electric
JB640DP1WW
Range
General Electric
JB640DR1WW
Range
General Electric
JB640DR2WW
Range
General Electric
JB640DR4WW
Range
General Electric
JB645CP1WW
Range
General Electric
JB645CP2WW
Range
General Electric
JB645DT1WW
Range
General Electric
JB650DN1WW
Range
General Electric
JB650DP2WW
Range
General Electric
JB650DT1WW
Range
General Electric
JB655DT1WW
Range
General Electric
JB660DM1WW
Range - Electric
General Electric
JB660DM2WW
Range - Electric
General Electric
JB660DP1WW
Range
General Electric
JB660DR1WW
Range
General Electric
JB660DR2WW
Range