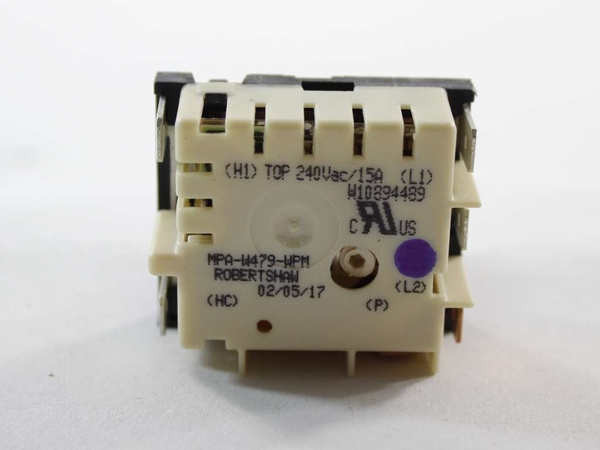
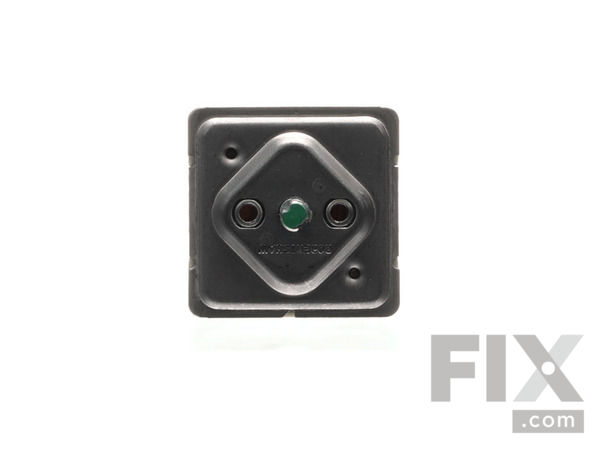
Part Location Diagram of W11088181 Whirlpool Surface Burner Switch
See part 4 in the diagram
( Grid squares measure 1x1 inch )

Surface Burner Switch

Works With Model CVE3401B!

Rated by 3 customers 

?

A Bit Difficult 

1- 2 hours 

Ratings submitted by customers like you who bought this part.

?
$83.91
In Stock
Fix Number:
FIX12070671
Manufacturer #:
W11088181
Manufactured by:
Whirlpool
Works With Model CVE3401B!

Product Description

This is the replacement surface burner switch for your range. It measures approximately 1.5 inches by 1.5 inches, with a shaft that is approximately 1 inch long. The surface burner switch turns the surface element on and off and allows you to control how much heat the element produces. The main reason to change the infinite switch is if the switch has shorted out inside, and is not allowing power to the burner, or if the contacts inside are stuck together and the element is stuck on high. Ensure that the burner is off, and the range has been disconnected from the power source before you begin this repair. This part is sold individually and is an OEM part.

Questions and Answers

We're sorry, but our Q&A experts are temporarily unavailable.
Please check back later if you still haven't found the answer you need.

1 question answered by our experts.
  • 1
Sort by:
Sorry, we couldn't find any existing answers that matched.
Try using some different or simpler keywords, or submit your new question by using the "Ask a Question" button above!
Guy
April 25, 2022
Could you please give me the color codes for the right double burner switch. I believe the part number is W11088181 for P 1, L1, L2. etc
For model number JED8430ADB
Fix.com logo
Hello Guy, Thank you for the question. The wire on 2 will connect to P1 along with one end of the black jumper lead. The other end of the jumper lead will connect to S1. The wire on 3 will connect to 4. The wire on 4 will connect to 4a, the wire on 5 will connect to S2. The wire to L2 will connect to P2. We hope this helps, good luck with this repair!

Was this helpful?
Thank you for voting!

Installation Instructions Provided by Fix customers like you.

Average Repair Rating: 2.4 / 5.0, 3 reviews.
  • 1
Sort by:
Sorry, we couldn't find any existing installation instruction that matched.
Customer:
Ludwig from Pleasantville, NY
Parts Used:
W11088181
Difficulty Level:
Difficult
Total Repair Time:
More than 2 hours
Tools:
Nutdriver, Pliers, Screw drivers, Socket set
Non-working under-Surface burner
This is not a job for novices. It might also be helpful to have someone else to assist in lifting the unit. Disassembly and re-assembly requires a bit of skill and experience. You will not know for certain which parts are required for the repair until you take the unit apart and test the circuits. You most likely will need the switch (P S2077123 for most burners except dual element which requires Hi-Lo switch) and may need a new burner element (4", 6" or dual). BEFORE DISASSEMBLING, make sure you have shut the correct breaker as this is serious 220V current. Because this electric cooktop is mounted in a granite or other composite countertop, it has to first be lifted up 3-4 inches to access the side screws that hold the glass top on. If the unit was properly installed, the seal between the glass top and the countertop should come apart without too much issue by just pushing up from underneath. If they have put any type of sealer between the glass and countertop, your job will be difficult to break the adhesion without breaking the glass. I was able to lift the unit 3 inches without disconnecting the power supply cable or the downdraft fan as both had enough slack. Because of the downdraft fan, the unit is somewhat heavy and needs to be supported from underneath once lifted. I trimmed a couple of 2x4 studs propped under the fan housing to hold it at the right height. Once the unit is lifted above the countertop, you will see multiple hex head sheet metal screws all around the side. ONLY the TOP row of screws should be removed from all four sides. The two Philips head screws in the center of the downdraft must also be removed. These are more difficult as you cannot use a standard screwdriver. You will need a 90 degree ratchet head driver (or alternatively you could use a vice-grips on a Philips head driver bit.) Once all these top row of screws are removed AND the burner handles have been removed (carefully), the glass top should lift out without too much difficulty This will reveal the burners and switches and all the connecting wiring. At this point, and as you progress, I strongly suggest that you take pictures of all the connecting wiring , etc with your digital camera or smartphone as there are many wires which could easily be crossed. The most likely reason for a non-working burner is the switch but before you replace that, do a resistance/continuity test on the coils in the burner to see if it is simply a broken element. If you don't know how to test continuity, there are some excellent tutorials on line for this but make sure you disconnect the burner wiring before testing or you will not get correct results. Power to the unit remains off during all of these tests. The burner is easier to replace than the switch as it is more accessible. You will need some of the clips from the old burner so carefully remove those and attach them tot he new burner in the same holes on the new unit using the old Philips head sheet metal screws. To remove the wires from their connections you may wish to use a needle nose pliers to gently coax the clips off the tabs by rocking the clips slightly and pulling. Once the burner is tested and/or replaced, you can now test to see if the related switch is working as you will get continuity on the other side of the circuit when the burner is turned on (no power required to test). Assuming the switch is the culprit, you will need to remove the two small screws holding the switch in place but you will need a small square head driver usually found in most bit kits. Once these are loosened, you will need to remove the sheet metal screws holding the switch bracket in place and then lift out the entire assembly. A reminder here to take pictures of the wiring again as you can now see all the connections. Carefully swap the old switch with the new and reattach wiring. Check all your wiring 3 times as an error could result in a short or worse. Retest continuity to the burner and then
3 of 3 people found this instruction helpful.
Was this instruction helpful to you?
Thank you for voting!
Customer:
Homer from Dallas, TX
Parts Used:
W11088181
Difficulty Level:
Really Easy
Total Repair Time:
15 - 30 mins
Tools:
Nutdriver, Pliers
two of the knobs that controll the burners came apart and caused an electrial short.
When I received the parts I removed the bad switches with a phillips screw driver and removed the electrical wires from the bad switches to the matching contacts on the new switches. Problem solved. Works like a charm.
1 person found this instruction helpful.
Was this instruction helpful to you?
Thank you for voting!
Customer:
Bob from CARTHAGE, MO
Parts Used:
74005790, W11088181
Difficulty Level:
A Bit Difficult
Total Repair Time:
1- 2 hours
Tools:
Pliers, Screw drivers
Burners would heat up but when a pot of water was set on them the burner would go off. Customer thought it was the weight of the pot and water but it was the extra current draw through the switch whose contacts were bad.
The design of this JennAir was such that about 18 screws had to be removed to get the top plate off to access the switches. After getting the old switches out I noticed they had more terminals than the new ones so it required using some terminal multipliers to accommodate all the wiring needed. Not a hard fix overall but it does take time considering all the screws that have to be removed and replaced.
0 of 1 people found this instruction helpful.
Was this instruction helpful to you?
Thank you for voting!
  • 1

Model Compatibility

This part works with the following models:
Fix Number: FIX12070671
Manufacturer Part Number: W11088181
Brand
Model Number
Description
Kenmore
62942975
Cooktop
Kenmore
62942975790
Cooktop
Kenmore
62942979
Cooktop
Kenmore
62942979790
Cooktop
Jenn-Air
CCE3400B
Cooktop - Electric
Jenn-Air
CCE3400W
Cooktop - Electric
Jenn-Air
CCE3401B
Cooktop - Electric
Jenn-Air
CCE3401Q
Cooktop - Electric
Jenn-Air
CCE3401W
Cooktop - Electric
Jenn-Air
CCE3530B
Cooktop - Electric
Jenn-Air
CCE3530W
Cooktop - Electric
Jenn-Air
CCE3531B
Cooktop - Electric
Jenn-Air
CCE3531W
Cooktop - Electric
Jenn-Air
CCE9300BF
Cooktop - Electric
Jenn-Air
CCE9300BG
Cooktop - Electric
Jenn-Air
CCE9300GG
Cooktop - Electric
Jenn-Air
CCE9300JD
Cooktop - Electric
Jenn-Air
CCE9300PL
Cooktop - Electric
Jenn-Air
CCE9300SL
Cooktop - Electric
Jenn-Air
CCE9300SS
Cooktop - Electric
Jenn-Air
CCE9300TG
Cooktop - Electric
Jenn-Air
CCR467B
Cooktop
Jenn-Air
CCR467B-C
Cooktop
Jenn-Air
CCR467W
Cooktop
Jenn-Air
CCR467W-C
Cooktop
Jenn-Air
CCR567B
Cooktop - Electric
Jenn-Air
CCR567B-C
Cooktop - Electric
Jenn-Air
CCR567W
Cooktop - Electric
Jenn-Air
CCR567W-C
Cooktop - Electric
Maytag
CSE9600ACB
Cooktop - Electric