Some of the parts we sell are eligible for mail-in rebates since we can recycle them. We will display any applicable rebates in your shopping cart. To redeem your rebate, contact Customer Service after you have received your part.
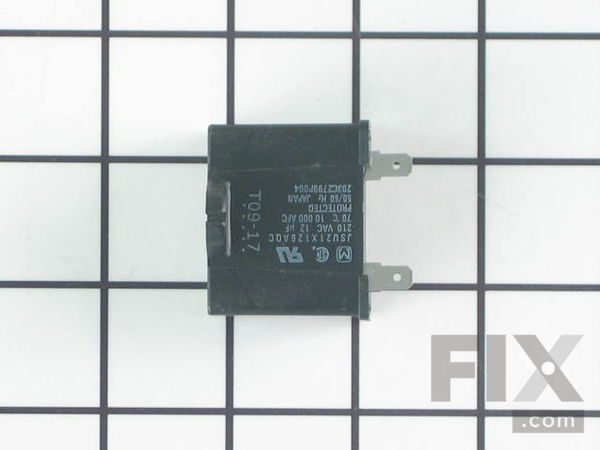
Run Capacitor
Works With Model CTH17RBT2RWW!
$108.60
In Stock
- Fix Number:
- FIX11764031
- Manufacturer #:
- WR55X24064
- Manufactured by:
- GE
Works With Model CTH17RBT2RWW!
- Product Description
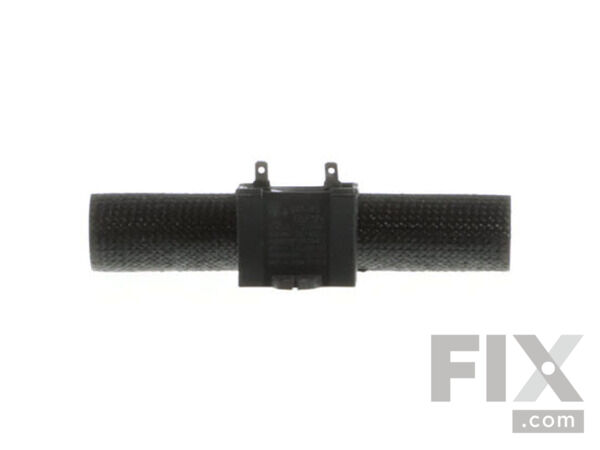
- This part helps the compressor kick on and off while maintaining a constant temperature to keep things frozen in your freezer. This part has been updated by the manufacturer and may appear different than the original, but should function the same.
- Works with the following brands:
- General Electric, Haier, Hotpoint, Kenmore
- Works with the following products
- Refrigerator, Freezer, Range
- Fixes the following symptoms
- Will Not Start, Fridge too warm, Freezer section too warm, Fridge and Freezer are too warm
- Part# WR55X24064 replaces these:
- AP6031641, RF-1400-022, RF-1400-07, RF-1400-17, WB38X10104, WB38X10106, WR55X20800, WR55X23731, WR55X30629, WR62X055, WR62X10018, WR62X10040, WR62X10048, WR62X79, WR87X27279
Part Number Cross Reference
Product Description
This part helps the compressor kick on and off while maintaining a constant temperature to keep things frozen in your freezer. This part has been updated by the manufacturer and may appear different than the original, but should function the same.
-
Works with the following brands:General Electric, Haier, Hotpoint, Kenmore
-
Works with the following products:Refrigerator, Freezer, Range
-
Fixes the following symptoms:Will Not Start, Fridge too warm, Freezer section too warm, Fridge and Freezer are too warm
-
Part# WR55X24064 replaces these:AP6031641, RF-1400-022, RF-1400-07, RF-1400-17, WB38X10104, WB38X10106 ... Show more , WR55X20800, WR55X23731, WR55X30629, WR62X055, WR62X10018, WR62X10040, WR62X10048, WR62X79, WR87X27279 Show less
Videos For installing this part.
Replacing your Run Capacitor

Questions and Answers
We're sorry, but our Q&A experts are temporarily unavailable.
Please check back later if you still haven't found the answer you need.
- < Prev
- 1
- Next >
Sort by:
Search filter:
Clear Filter
Your search term must have 3 or more characters.
Keep searches simple. Use keywords, e.g. "leaking", "pump", "broken" or "fit".
Sorry, we couldn't find any existing answers that matched.
Try using some different or simpler keywords, or submit your new question by using the "Ask a Question" button above!
Try using some different or simpler keywords, or submit your new question by using the "Ask a Question" button above!
Robert
January 3, 2023
My refrigerator is constantly running but the freezer will only stay at 20deg and the frig compartment will stay around 45deg.
I have cleaned all the coils and fans, all fans are running but it still won't cool down.
For model number GTS21FMKES

Hi Robert,
Thank you for your question. If your refrigerator is running too long, there are some parts that you will need to check to see which one is causing the issue. You will need to check the run capacitor, the defrost heater, the defrost control board, the temperature control thermostat, the door gaskets, the evaporator fan motor, the condenser fan motor and the sealed system. We have included a link that you may reference on how to check these parts. Once you have determined the part you need, please feel free to call customer service. We are open 7 days a week and anyone will be happy to assist you. We look forward to hearing from you!
1 person found this helpful.
Was this helpful?
Thank you for voting!
Related Parts:
Additional Links:
Installation Instructions Provided by Fix customers like you.
- < Prev
- 1
- Next >
Sort by:
Search filter:
Clear Filter
Your search term must have 3 or more characters.
Keep searches simple. Use keywords, e.g. "leaking", "pump", "broken" or "fit".
Sorry, we couldn't find any existing installation instruction that matched.
- Customer:
- Peter from Larkspur, CA
- Parts Used:
- WR55X24064, WR07X10031
- Difficulty Level:
- Easy
- Total Repair Time:
- 1- 2 hours
- Tools:
- Screw drivers
The compressor would start/stop intermittently at times.
Removed heavy items in refrigerator, protected wood floor with rosin paper, rolled out refrigerator. Unplug the refrigerator. Removed the fan and unplugged it, replaced the capacitor located behind fan (discharged it first using a resistor and wire leads), removed the plastic relay cover off the side of compressor (was tough since it is l
... Read more
ocated in a tight space), unplugged and replaced the relay. To reinstall the plastic cover, I cut a couple small slits in the sides of the plastic cover so it would easily slide down. Reconnected all wires, reinstalled the fan. Plugged in and rolled back into the wall. Was an easy job except getting the plastic cover out. So far the refrigerator is working good!
Read less
2 of 2 people
found this instruction helpful.
Was this instruction helpful to you?
Thank you for voting!
- Customer:
- Paul from Collinwood, TN
- Parts Used:
- WR60X31522, WR55X24064
- Difficulty Level:
- Really Easy
- Total Repair Time:
- 30 - 60 mins
- Tools:
- Screw drivers, Wrench (Adjustable), Wrench set
Refrigerator Not Cooling
1) Run Capacitor. Disconnected electrical power plug from the wall socket. Located the Run Capacitor in bottom rear of refrigerator, disconnected the retainer spring, pulled the wasted run capacitor off and plugged the new one into the slot and replaced the retainer spring. 2) Motor AC/DC Evaporator Fan. Opened top freezer door. Removed t
... Read more
he shelving by carefully sliding the shelving pins upward and into the recessed slots for easy removal. Used Phillip's head screw driver to remove two screws holding the face guard in place and the 6" Crescent wrench to remove the bracket holding the fan motor to the bracket and the Phillip's head screw driver to remove two screws holding the bracket to the inside rear of the freezer. Unplugged the wasted motor AC/DC Evaporator Fan and plugged the new one into its place. Reinstalled all hardware as it came out. Refrigerator is now working like new. Simple and easy project saved me $100s of dollars fro having to purchase a new Refrigerator. My significant other was happy that it worked so well and saved $$. She was happy and went to Walmart shopping with the savings and brought me a pizza home. Everyone was a winner. Paul and Kimberly Juliana
Read less
2 of 2 people
found this instruction helpful.
Was this instruction helpful to you?
Thank you for voting!
- Customer:
- Tom from MANSFIELD, OH
- Parts Used:
- WR9X489, WR55X24064
- Difficulty Level:
- Easy
- Total Repair Time:
- 30 - 60 mins
- Tools:
- Nutdriver, Screw drivers
Neither the freezer or refridgerator keeping temperature
First I found the closest model number to our unit. After it brought up the parts and possible problems I started checking out what mine was doing. The freezer was all frozen at the back which meant the defrost timer was not kicking on the defrost cycle and letting the coils freeze up and not letting anything work properly. I changed t
... Read more
he defrost timer and manually melted the ice off the coils and everything started working great. I did buy a run capacitor to help the compressor kick on just in case it needed it. I spent $65.00 on the whole repair. I recommend watching the video's on this site. I was very happy with this site as they saved me a bunch as we were going to start looking for a new refridgerator but now we don't need to. Tom...........
Read less
1 person
found this instruction helpful.
Was this instruction helpful to you?
Thank you for voting!
- Customer:
- Elaine from Octavia, NE
- Parts Used:
- WR55X24064
- Difficulty Level:
- Really Easy
- Total Repair Time:
- Less than 15 mins
- Tools:
- Pliers, Screw drivers
freezer to warm
Took back cover off, moved some wires out of the way, found capaciter, removed wires to it, removed bolt, took part out, put new one in, secured with bolt, attached wires, moved other wires in place replaced back cover , done Piece of cake. T y.
0 of 1 people
found this instruction helpful.
Was this instruction helpful to you?
Thank you for voting!
- Customer:
- Alan from Saratoga, WY
- Parts Used:
- WR55X10942C, WR55X24064
- Difficulty Level:
- Really Easy
- Total Repair Time:
- 15 - 30 mins
- Tools:
- Nutdriver, Socket set
My refrigerator/freezer stopped functioning.
The ice maker/water dispenser also stopped functioning. Replacing the main control board was very easy. I simply removed the back cover, disconnected the wiring harness, pulled the board off, then installed the new control board and reconnected the wiring. The run capacitor was located in a hard to reach area. It took a little time, with
... Read more
a small socket, to remove the one screw that holds it in place. Everything is functioning perfectly now. Thanks.
Read less
0 of 1 people
found this instruction helpful.
Was this instruction helpful to you?
Thank you for voting!
- Customer:
- anthony from contoocook, NH
- Parts Used:
- WR55X24064
- Difficulty Level:
- Really Easy
- Total Repair Time:
- Less than 15 mins
- Tools:
- Screw drivers
compressor not runing
took off back panel unplugged capacitor plugged in new unit. Did need to replace overload replaced back panel done 5 min to replace all items. Runs like new
0 of 1 people
found this instruction helpful.
Was this instruction helpful to you?
Thank you for voting!
- Customer:
- John from Chesterfield, MI
- Parts Used:
- WR55X24064, WR08X10025
- Difficulty Level:
- Really Easy
- Total Repair Time:
- Less than 15 mins
- Tools:
- Socket set, Wrench (Adjustable)
Fridge kept clicking and not powering on fully
Fridge whined semi-loudly for the last five years. Finally, I came home to the fridge clicking over and over (every 2 seconds or so it would click). Upon opening the door I noticed it was warm inside and the clicking was the unit actually 'shorting out' and attempting to restart itself over and over. I purchased the run capacitor, the ove
... Read more
rload switch, and the new motherboard. It took literally 2 minutes to install since I had the covers off and bad parts already removed. Once I buttoned it back up it ran perfectly and does not even hum or whine anymore. ~$200 in parts and a little time for troubleshooting saved me over a thousand dollars in replacement costs - YaY!
Read less
0 of 4 people
found this instruction helpful.
Was this instruction helpful to you?
Thank you for voting!
- < Prev
- 1
- Next >
Model Compatibility
This part works with the following models:
Fix Number: FIX11764031
Manufacturer Part Number: WR55X24064
Manufacturer Part Number: WR55X24064
Brand
Model Number
Description
✖
Mail-In Recycling Rebate


