Ratings submitted by customers like you who bought this part.
?
$94.68
In Stock
Fix Number:
FIX11749737
Manufacturer #:
WPW10181986
Manufactured by:
Whirlpool
Works With Model ACR2303MFW3!
Product Description
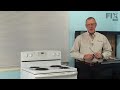
This genuine OEM part is a replacement sensor for your oven. The sensor works with the control board to measure and regulate the temperature in your oven. If the sensor has become defective, the temperature in the oven can fluctuate and read inaccurately. Other symptoms you may experience are little to no heat, or the oven getting too hot. The displayed temperature and the actual temperature can be off by over 50 degrees if the sensor is not working properly. You can use a multimeter to test if the oven sensor is faulty, and if so, it should be replaced. Please be sure to disconnect the power supply to your range before beginning this repair.
Works with the following brands:
Whirlpool, Maytag, Kenmore, Amana
Works with the following products
Range
Fixes the following symptoms
Little to no heat when baking, Oven is too hot, Oven not heating evenly, Will Not Start
This genuine OEM part is a replacement sensor for your oven. The sensor works with the control board to measure and regulate the temperature in your oven. If the sensor has become defective, the temperature in the oven can fluctuate and read inaccurately. Other symptoms you may experience are little to no heat, or the oven getting too hot. The displayed temperature and the actual temperature can be off by over 50 degrees if the sensor is not working properly. You can use a multimeter to test if the oven sensor is faulty, and if so, it should be replaced. Please be sure to disconnect the power supply to your range before beginning this repair.
Works with the following brands:
Whirlpool, Maytag, Kenmore, Amana
Works with the following products:
Range
Fixes the following symptoms:
Little to no heat when baking, Oven is too hot, Oven not heating evenly, Will Not Start
We're sorry, but our Q&A experts are temporarily unavailable.
Please check back later if you still haven't found the answer you need.
1 question answered by our experts.
< Prev
1
Next >
Sort by:
Search filter:
Clear Filter
Your search term must have 3 or more characters.
Keep searches simple. Use keywords, e.g. "leaking", "pump", "broken" or "fit".
Sorry, we couldn't find any existing answers that matched. Try using some different or simpler keywords, or submit your new question by using the "Ask a Question" button above!
Ross
February 23, 2023
bake element burned out and small fire, after excitement, replaced bake element, no joy. Checked power, no breakers popped, surface and control works fine. Replaced thermostat still no bake, broil element heats fine. Checked thermal fuse, not blown. At wits end. Convection fan works fine.
For model number Matag MER8775AS0
Hi Ross, thank you for reaching out. We would recommend checking to see if you have installed the bake element correctly or not. If this is not the issue, then you may need to check the following parts: oven sensor, part number FIX11749737, terminal block, part number FIX11750972, and wire harness, part number FIX12578055. We hope this sorts out your problem!
THE OVEN WAS 10 DEGREES OFF,NOT REACHING PROPER TEMPRETURE.
THE PROBLEM I HAD COULD HAVE BEEN TWO THINGS.SO AT THE PRICE OF THE TWO THINGS WAS A GREAT PRICE.SO I INSTALLED THE TWO PARTS. PULL THE STOVE AWAY FROM THE WALL.MAKE SURE TO UNPLUG THE CORD FROM THE WALL OUTLET.ONLY TOOL YOU NEED IS A PHILLIPS SCREW DRIVER.UNCREW THE TWO SCREW.MAKE SURE TO HOLD THE WIRE LEADS BECAUSE THEY CAN FALL INTO T
... Read moreHE INSTULATION.PULL THE TWO LEADS OFF AND THEN REPLACE THE NEW LEADS OF THE NEW ELEMENT.PUT THE TWO SCREWS BACK IN AND THATS IT FOR THE ELEMENT.WITH THE SENSOR IS EASY.THE BACK OF THE STOVE HAS ABOUT 10 SCREWS ON THE BACK OF THE STOVE.UNSCREW ALL THE SCREWS,REMOVE THE BACK COVER AND UNSCREW THE TWO SCREW,THEN UNPLUG THE SENSOR CONNECTING LEAD.REPLACE THE NEW SENSOR,AN THEN REPLACE THE SCREWS,REPLACE THE BACK COVER,REPLACE THE SCREWS.PLUG THE STOVE INTO THE WALL SOCKET.TURN THE STOVE ON,THEN SET THE TEMPRETURE AND YOU REPAIRED YOUR STOVE WITH THE PROPER OVEN TEMPRETURE. THANK YOU.
my oven did not kept the temperature it kept getting colder
My husband did the work first he replaced the sensor it was really easy we both watch the how to videos and after that he started removing screws, two screws to be exact pull the sensor out unplugged it put the new sensor plugged it in put screws back about 10 minutes or less. After that he started in the oven he removed the bottom pan re
... Read moremoved some screws removed the old igniter he did have a hard time removing one screw it was underneath the igniter but once he got out the rest was really easy thanks to the videos and your help my stove now works better than before thank you for your help
I watched the install video, gathered up basic tools (#2 + screwdriver, flashlight, and cleaning rags. Turned off circuit breaker, placed some heavy cardboard under front base feet (no floor scratches) and slowly slid range out enough to gain access to rear panel cover. Removed all necessary screws and slid panel away to gain access to
... Read morethermistor. Detached wiring connector, removed the two screws slid old thermistor out, new one in, tighten thermistor mounting screws and attached wiring connector. Slide oven back in place, turn on circuit breaker, set clock, and bake test batch of muffins. Worked like new. Celebrated with muffins and coffee - easy peasy!
Read less
0 of 1 peoplefound this instruction helpful.
Was this instruction helpful to you?
Thank you for voting!
< Prev
1
Next >
★
Customer Reviews
Average Rating:
(1 Review)
5.0
★★★★★
★★★★★
Filter By Rating:
5★
1
4★
0
3★
0
2★
0
1★
0
< Prev
1
Next >
Sort by:
Search filter:
Clear Filter
Your search term must have 3 or more characters.
Keep searches simple. Use keywords, e.g. "leaking", "pump", "broken" or "fit".
Sorry, we couldn't find any existing reviews that matched. Try using some different or simpler keywords.
★★★★★
★★★★★
Maggie W - July 11, 2021
Verified Purchase
Easy fix it
Easy fix: I recieved the part within four days only took about ten minutes to get it installed. Directions was right on point Thanks fix.com
Model Compatibility
This part works with the following models:
Fix Number: FIX11749737
Manufacturer Part Number: WPW10181986
Some of the parts we sell are eligible for mail-in rebates since we can recycle them. We will display any applicable rebates in your shopping cart. To redeem your rebate, contact Customer Service after you have received your part.