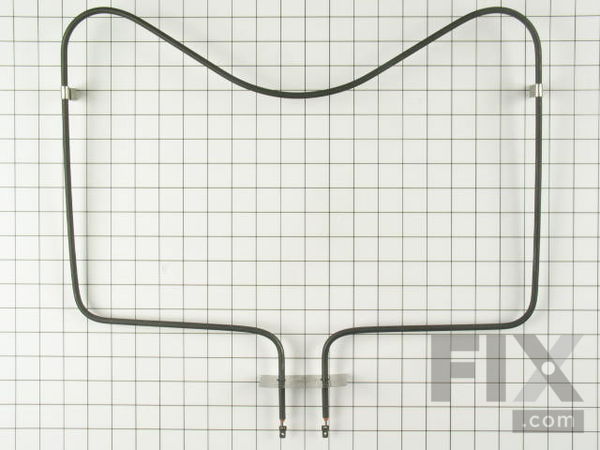
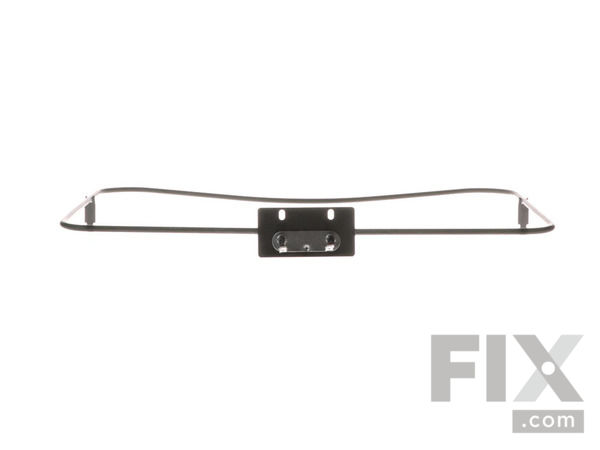
Part Location Diagram of WP9750213 Whirlpool Bake Element
See part 2 in the diagram
Replacing your KitchenAid Range Bake Element
( Grid squares measure 1x1 inch )

Bake Element

Works With Model IHE33301!

Rated by 5 customers 

?

Really Easy 

15 - 30 mins 

Ratings submitted by customers like you who bought this part.

?
$205.90
In Stock
Fix Number:
FIX11747109
Manufacturer #:
WP9750213
Manufactured by:
Whirlpool
Works With Model IHE33301!

Product Description

This bake element has push-on wire terminals and is found at the bottom of your oven cavity.

Videos For installing this part.

Replacing your Bake Element

Replacing your Bake Element

Questions and Answers

We're sorry, but our Q&A experts are temporarily unavailable.
Please check back later if you still haven't found the answer you need.

Installation Instructions Provided by Fix customers like you.

Average Repair Rating: 4.2 / 5.0, 5 reviews.
  • 1
Sort by:
Sorry, we couldn't find any existing installation instruction that matched.
Customer:
Gary from BALTIMORE, MD
Parts Used:
WP9750213, WP8053344
Difficulty Level:
Really Easy
Total Repair Time:
30 - 60 mins
Tools:
Screw drivers
The oven temperature was low. An oven thermometer showed 50 to 75 degrees lower than the temp. set on the control.
step 1: Remove 2 screws holding the bake element and 2 screws holding the temperature sensor to the oven. Be careful not to
strip the head of the screw. Use a screwdriver that fits properly (not too loose, and not rounded off, excessively worn, or
otherwise not in good condition.) Put plenty of pressure directly onto the screw with the screwdriver and turn slowly. If
the screw does not release immediately try short turns until it turns freely. Do not allow the screwdriver to slip in the
head of the screw as this could strip the head of the screw. If that fails, tap lightly on the screwdriver with a light
hammer
to loosen any corrosion that may be there. Avoid excessive force as this could damage your oven.
step 2: Carefully pull the element and the sensor to expose the connecting wires. Be careful not to damage the wire insulation.
step3: Unplug the old elements and plug in the new parts.
step4: Push the wires back into place and install the screws. They only need to be snug. Over tightening the screws may strip
the sheet metal and the screw will not hold. In that event, use a slightly larger sheet metal screw.
2 of 3 people found this instruction helpful.
Was this instruction helpful to you?
Thank you for voting!
Customer:
Arnold from Midway, AR
Parts Used:
WP9750213
Difficulty Level:
Really Easy
Total Repair Time:
Less than 15 mins
Tools:
Screw drivers
Bottom coil burned out in oven
Took old coil out and replaced it with a new one. Seems to work great!
0 of 1 people found this instruction helpful.
Was this instruction helpful to you?
Thank you for voting!
Customer:
Sandy from Pagosa Spgs, CO
Parts Used:
WP9750213
Difficulty Level:
Very Easy
Total Repair Time:
15 - 30 mins
Tools:
Screw drivers
oven bake element died
Disconnect stove from power plug.The new part was identical to original so remove 2 screws in back of oven, remove dead element, reverse the above process , plug in , turn on to test , 100% working.!!
0 of 1 people found this instruction helpful.
Was this instruction helpful to you?
Thank you for voting!
Customer:
George Barnes from Ida Grove, IA
Parts Used:
WP9750213
Difficulty Level:
Really Easy
Total Repair Time:
Less than 15 mins
Tools:
Screw drivers
Lower bake element failed, physically broken.
Phillips screw driver removed the two screws holding the element to the rear wall of the oven. Pull element out to access the two wires with the push on tabs. Remove the wires from the two ends of the failed element, place the tabs over the respective tabs on the new element. Put it back into position, re-install the two phillips head screws. Get back to baking!! The oven failed on a Thursday evening. Placed order with this site that evening. New element arrived Saturday morning. Excellent service/shipping/order process and all that goes with that. This was my first experience with this site, definitely will be a repeat customer.
0 of 1 people found this instruction helpful.
Was this instruction helpful to you?
Thank you for voting!
Customer:
Edward from Wilmington, OH
Parts Used:
WP9750213
Difficulty Level:
A Bit Difficult
Total Repair Time:
30 - 60 mins
Tools:
Pliers, Screw drivers
Bake element opened up, had not continuity in unit.
Because our Range is old (1996), say allot for "Kitchen Aid brand) the two screws mounting the element to back of oven would not come out easily. The threads stripped off of them in the metal back. So, to confirm the element was REALLY defective, I shut off the main breaker to the range in our house breaker box, I then pulled the range ou t from wall and removed the panel on middle back of range, giving me access to the element wires, etc. Using pliers I removed one lead off the element and then using a Volt/Ohm meter I ran a continuity check on it. The element was "open". So, I went ahead and remove the second wire on element, and verified that there was just two screws holding it in place, but were stripped. I reinstalled the back panel, put stove back in place. Going back in the oven area, I then took a large flat blade screwdriver and wedged it in behind EACH screw holding the element in place, and by pulling out on the big screwdriver applying pressure outwards,while using a "Phillips screwdriver on the two screws I was able to get them out. I did have to go thru my stash of old metal screws and find two screws that were larger in diameter, to reinstall the new element. I did that before element arrived. Once it arrive, I had it back in the range in 15 minutes, and back on the air. Working fine!!
0 of 1 people found this instruction helpful.
Was this instruction helpful to you?
Thank you for voting!
  • 1

Model Compatibility

This part works with the following models:
Fix Number: FIX11747109
Manufacturer Part Number: WP9750213
Brand
Model Number
Description
Kenmore
664KERH507YAL0
Range
Kenmore
664KERH507YAL1
Range
Kenmore
664KERH507YBL0
Range
Kenmore
664KERH507YBL1
Range
Kenmore
664KERH507YWH0
Range
Kenmore
664KERH507YWH1
Range
Whirlpool
GGP84800
Range - 36" ELECTRIC RANGE
Whirlpool
GHSP84900
Range - ELECTRIC RANGE
Whirlpool
GR450LXHB0
Range - Freestanding, Electric
Whirlpool
GR450LXHB1
Range - ELECTRIC FREESTANDING RANGE
Whirlpool
GR450LXHB2
Range - Freestanding, Electric
Whirlpool
GR450LXHQ0
Range - Freestanding, Electric
Whirlpool
GR450LXHQ1
Range - ELECTRIC FREESTANDING RANGE
Whirlpool
GR450LXHQ2
Range - Freestanding, Electric
Whirlpool
GR450LXHT2
Range - Freestanding, Electric
Whirlpool
GR450LXLB0
Range - Freestanding, Electric
Whirlpool
GR450LXLQ0
Range - Freestanding, Electric
Whirlpool
GR450LXLS0
Range - Freestanding, Electric
Whirlpool
GR450LXLT0
Range - Freestanding, Electric
Whirlpool
GY395LXGB0
Range - Freestanding, Electric
Whirlpool
GY395LXGB1
Range - Freestanding, Electric
Whirlpool
GY395LXGB2
Range - Freestanding, Electric
Whirlpool
GY395LXGB3
Range - Freestanding, Electric
Whirlpool
GY395LXGB4
Range - Freestanding, Electric
Whirlpool
GY395LXGQ0
Range - Freestanding, Electric
Whirlpool
GY395LXGQ1
Range - Freestanding, Electric
Whirlpool
GY395LXGQ2
Range - Freestanding, Electric
Whirlpool
GY395LXGQ3
Range - Freestanding, Electric
Whirlpool
GY395LXGQ4
Range - Freestanding, Electric
Whirlpool
GY395LXGZ0
Range - Freestanding, Electric