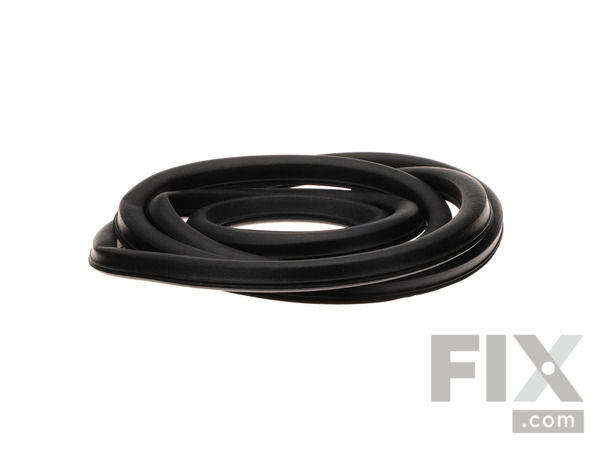
Part Location Diagram of WP902894 Whirlpool Door Gasket
See part 1 in the diagram
Replacing your Maytag Dishwasher Door Gasket
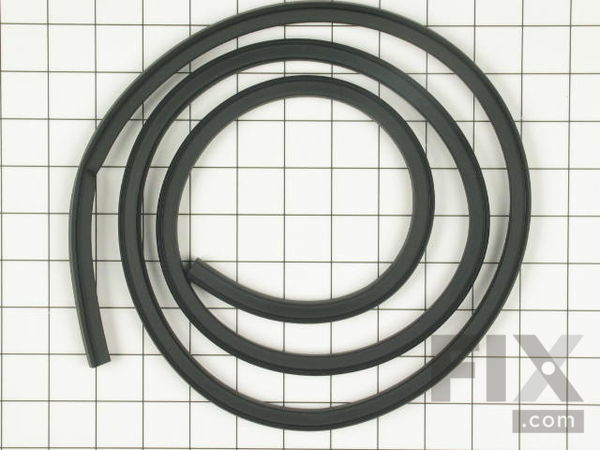
( Grid squares measure 1x1 inch )

Door Gasket

Works With Model NDU2J-CAN!
★★★★★
★★★★★
1 Review

Rated by 15 customers 

?

Really Easy 

15 - 30 mins 

Ratings submitted by customers like you who bought this part.

?
$69.78
In Stock
Fix Number:
FIX11746830
Manufacturer #:
WP902894
Manufactured by:
Whirlpool
Works With Model NDU2J-CAN!

Product Description

This door gasket can be installed by simply pressing it into the channel around the door. This dishwasher door gasket, or door seal, allows the dishwasher door to have an airtight seal when closing the door. No tools are required for this installation, simply remove the existing gasket and press the replacement gasket into the channel around the door. It is recommended to clean the channel while the gasket is removed. This part may need to be replaced if the existing one is cracked, broken, or hardened, possibly causing water to leak through the door while it is running. This part is sold individually, and is sourced from the original manufacturer.

Videos For installing this part.

Replacing your Door Gasket

Replacing your Door Gasket

Questions and Answers

We're sorry, but our Q&A experts are temporarily unavailable.
Please check back later if you still haven't found the answer you need.

1 question answered by our experts.
  • 1
Sort by:
Sorry, we couldn't find any existing answers that matched.
Try using some different or simpler keywords, or submit your new question by using the "Ask a Question" button above!
Pat
October 18, 2021
Unfortunately I paid a repairman $200 to replace the seal around my dishwasher door. It stopped the leak, but now the only way I can close the door is by slamming it several times. Is there something I can do? He used part # wp902894
For model number MDB5000AWW
Fix.com logo
Hello Pat, Thank you for the question. The correct Gasket was used for the repair. It could have bene installed incorrectly or the Door Handle could have been damaged or has come loose. We suggest watching the How to Video linked under the Gasket to check to make sure it was properly installed. We hope this helps!

6 people found this helpful.

Was this helpful?
Thank you for voting!
Related Parts:

Installation Instructions Provided by Fix customers like you.

Average Repair Rating: 4.4 / 5.0, 15 reviews.
  • 1
  • 2
Sort by:
Sorry, we couldn't find any existing installation instruction that matched.
Customer:
Carolyn from Benbrook, TX
Parts Used:
WP902894
Difficulty Level:
Really Easy
Total Repair Time:
Less than 15 mins
leak on left side at the bottom when washer in use; old gasket dirty and soft at the end
Simply removed the old gasket, cleaned the area, and pushed in the new one. I was very pleased that that was all it needed. Hasn't leaked since.
3 of 3 people found this instruction helpful.
Was this instruction helpful to you?
Thank you for voting!
Customer:
William from Pell City, AL
Parts Used:
WP902894
Difficulty Level:
Really Easy
Total Repair Time:
30 - 60 mins
Leaking
I suggest you put both ends in place, then the rest of the gasket in the channel. Otherwise, you'll end up short on the opposet side you started on.
2 of 2 people found this instruction helpful.
Was this instruction helpful to you?
Thank you for voting!
Customer:
John from NEW CASTLE, PA
Parts Used:
WP902894
Difficulty Level:
Very Easy
Total Repair Time:
Less than 15 mins
Tools:
Pliers
Dishwasher was leaking
Removed old door seal,replaced with new
2 of 3 people found this instruction helpful.
Was this instruction helpful to you?
Thank you for voting!
Customer:
Herb from Tallmadge, OH
Parts Used:
WP902894
Difficulty Level:
Really Easy
Total Repair Time:
30 - 60 mins
Dishwasher leaked on lower left side and occasionally on right
Used a knife to grab end of door gasket and pulled it out ( 1minute) cleaned out chanel with wet cloth and pressed the new one in making sure it was seated firmly. End of repair! The washer door was hard to close for a few times till the gasket formed to the door seat. Only a slight problem.
1 person found this instruction helpful.
Was this instruction helpful to you?
Thank you for voting!
Customer:
david from saint charles, MO
Parts Used:
WP902894
Difficulty Level:
Very Easy
Total Repair Time:
Less than 15 mins
Door seal was leaking at lower right side.
Removed old seal by pulling from one end. Cleaned seal channel with soft toothbrush. Centered the seal directly below the door lock and pushed into the channel with my fingers working from the top and down both sides. Closed and locked the door to verify the seal was aligned correctly. The door will take a little effort to close until the seal takes a set but in a couple days it becomes easier to close.
1 person found this instruction helpful.
Was this instruction helpful to you?
Thank you for voting!
Customer:
Sherri from OSKALOOSA, IA
Parts Used:
WP902894
Difficulty Level:
Really Easy
Total Repair Time:
Less than 15 mins
Door gasket was worn causing it to leak.
Pulled out the old gasket. Used wet rag to clean out the groove then allowed it to dry. Started the new gasket into the groove at the bottom of one side, pushing into place with fingers. Insert all the way up and around ending at the bottom of opposite side. I then ran my fingers back around the entire gasket to make sure it was secure ly in place. Very quick & simple & no more leaking!
1 person found this instruction helpful.
Was this instruction helpful to you?
Thank you for voting!
Customer:
philip from portage, IN
Parts Used:
WPW10117748, WP99001885, WP902894
Difficulty Level:
A Bit Difficult
Total Repair Time:
1- 2 hours
Tools:
Screw drivers
water leaking from door
Watched video how to install. Removed old door gasket. Installed new gasket just like video said but it was 1/2" short. removed from short side to corner then streched gasket while installing. door still leaked. removed gasket and reinstalled leaving 1/4" short on both sides and not streaching it. No leak at door gasket. Went on to replac e inner door insulation strip because water leaking from inside door. watched video on how to change. Still leaking. read comments and some one said they had same problem so they installed old strip ontop of new. Thought I would try this and it worked. thanks for the on line comments.
1 person found this instruction helpful.
Was this instruction helpful to you?
Thank you for voting!
Customer:
cliff from Santa fe, NM
Parts Used:
WP902894
Difficulty Level:
Really Easy
Total Repair Time:
15 - 30 mins
Wate leak at right front of unit when turned on
I went online and found this great site offering parts and videos showing installation and common problem sources. Literal gold mine of otherwise not readily available information. Went to install the door gasket and placed the new one in the slot for it and it was an inch or so too short. Hmmm - Well a bit of stretching should fix this. And so it did. I then turned on the unit as water agin poured out the bottom in the same place. At leas replacing that gasket was a good thing anyway - so as I waited to receive the other part I thought it would be worth further observation and troubleshooting, even though visual information is well hidden. On the 2nd time starting the dishwasher no water leak. Wow! Maybe the gasket just needed seating of some sort - bottom line is no water has leaked since. Good lesson there. Don't assume the worst!! Thank you so much for spectrum of info and service you offer. I needed it and very much benefited from it. Cliff
0 of 1 people found this instruction helpful.
Was this instruction helpful to you?
Thank you for voting!
Customer:
Rachel from Franklin Square, NY
Parts Used:
WP902894
Difficulty Level:
Very Easy
Total Repair Time:
Less than 15 mins
Dishwasher leaked
Used a fork to get tip of gasket. Pulled it out gently. Put in the gasket. I ran dishwasher. It leaked a little at first but the next day I ran it again. It stopped leaking. Watch video. Very easy to install.
0 of 1 people found this instruction helpful.
Was this instruction helpful to you?
Thank you for voting!
Customer:
Orville from Farmington, MN
Parts Used:
WP902894
Difficulty Level:
Really Easy
Total Repair Time:
Less than 15 mins
Tools:
Screw drivers
Water was leaking from the door
Pulled out old gasket and put in the new one.
0 of 1 people found this instruction helpful.
Was this instruction helpful to you?
Thank you for voting!
  • 1
  • 2
Customer Reviews
Average Rating: (1 Review)
5.0
★★★★★
★★★★★
Filter By Rating:
  • 5
    1
  • 4
    0
  • 3
    0
  • 2
    0
  • 1
    0
  • 1
Sort by:
Sorry, we couldn't find any existing reviews that matched. Try using some different or simpler keywords.

Model Compatibility

This part works with the following models:
Fix Number: FIX11746830
Manufacturer Part Number: WP902894
Brand
Model Number
Description
Amana
ADW662EAB
Dishwasher
Amana
ADW662EAB-PADW662EAB0
Dishwasher - Amana Dishwasher Model ADW662EAB-PADW662EAB0 (ADW662EABPADW662EAB0, ADW662EAB PADW662EAB0) Parts
Amana
ADW662EAC
Dishwasher
Amana
ADW662EAC-PADW662EAC0
Dishwasher - Amana Dishwasher Model ADW662EAC-PADW662EAC0 (ADW662EACPADW662EAC0, ADW662EAC PADW662EAC0) Parts
Amana
ADW662EAS
Dishwasher
Amana
ADW662EAW
Dishwasher
Amana
ADW662EAW-PADW662EAW0
Dishwasher - Amana Dishwasher Model ADW662EAW-PADW662EAW0 (ADW662EAWPADW662EAW0, ADW662EAW PADW662EAW0) Parts
Amana
ADW862EAB
Dishwasher
Amana
ADW862EAC
Dishwasher
Amana
ADW862EAS
Dishwasher
Amana
ADW862EAW
Dishwasher
Magic Chef
CDB3100AWE
Dishwasher
Magic Chef
CDB3100AWT
Dishwasher
Magic Chef
CDB3100AWX
Dishwasher
Magic Chef
CDB6100AWE
Dishwasher
Magic Chef
CDB6100AWN
Dishwasher
Magic Chef
CDB6100AWX
Dishwasher
Crosley
CDC400B
Dishwasher
Crosley
CDC450B
Dishwasher
Crosley
CDC5J
Dishwasher
Crosley
CDC610B
Dishwasher
Crosley
CDU20J
Dishwasher
Crosley
CDU250B
Dishwasher
Crosley
CDU250V
Dishwasher
Crosley
CDU2J
Dishwasher
Crosley
CDU2J3
Dishwasher
Crosley
CDU400B
Dishwasher - Undercounter
Crosley
CDU450B
Dishwasher
Crosley
CDU450V
Dishwasher
Crosley
CDU510B
Dishwasher