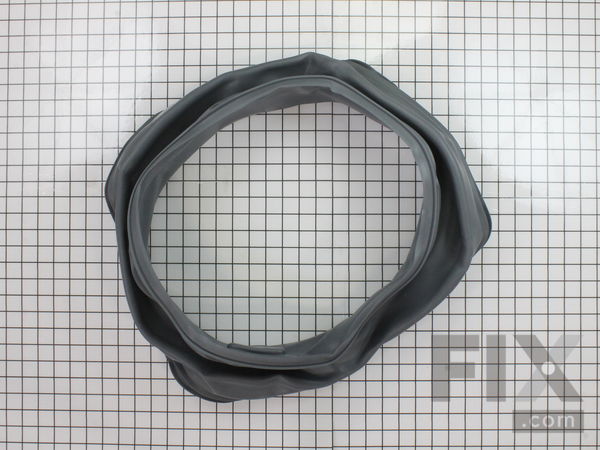
Part Location Diagram of WP8182119 Whirlpool Washer Door Bellow
See part 5 in the diagram
Replacing your Kenmore Washer Washer Door Bellow
( Grid squares measure 1x1 inch )

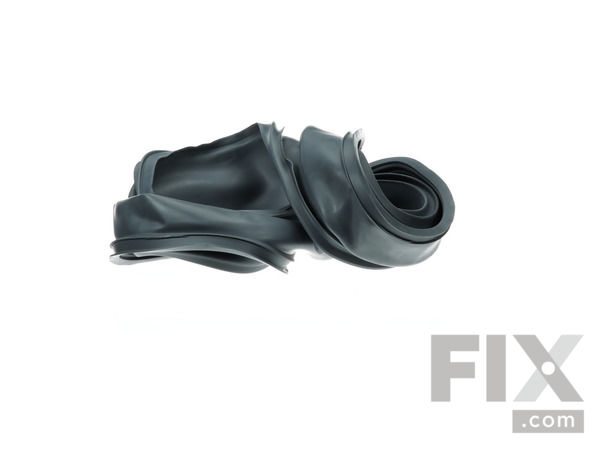
Washer Door Bellow

Works With Model MHWE550WJ00!

Rated by 6 customers 

?

Easy 

30 - 60 mins 

Ratings submitted by customers like you who bought this part.

?
$215.33
In Stock
Fix Number:
FIX11744957
Manufacturer #:
WP8182119
Manufactured by:
Whirlpool
Works With Model MHWE550WJ00!

Product Description

Videos For installing this part.

Replacing your Washer Door Bellow

Replacing your Washer Door Bellow

Questions and Answers

We're sorry, but our Q&A experts are temporarily unavailable.
Please check back later if you still haven't found the answer you need.

Installation Instructions Provided by Fix customers like you.

Average Repair Rating: 3.1 / 5.0, 6 reviews.
  • 1
Sort by:
Sorry, we couldn't find any existing installation instruction that matched.
Customer:
Sherry from Lamar, SC
Parts Used:
WP8182119
Difficulty Level:
Very Easy
Total Repair Time:
30 - 60 mins
Tools:
Nutdriver, Screw drivers
Boot between drun and door was leaking
Take top off. Take face and door off . Remove boot . Reinstall new boot replace face then top . Video of repair made it easy
3 of 4 people found this instruction helpful.
Was this instruction helpful to you?
Thank you for voting!
Customer:
Steve from Oak Ridge, TN
Parts Used:
W10902779, WP8182210, WP8182119
Difficulty Level:
Difficult
Total Repair Time:
1- 2 hours
Tools:
Nutdriver, Pliers, Screw drivers, Socket set
Replaced Outside Rubber Bellows
Rubber bellows was approximately 8-9 years old with lots and lots of mold on the outside and more inside where water drains out. Removing all the necessary parts to remove and install the replacement bellows was not difficult. The most difficult step was replacing the bellow to outer tube clamp. It is spring loaded and virtually imposs ible for one person to replace. Holding the bellow in place while trying to stretch the spring clamp is frustrating. I am sure, at the factory they have specialized tools that allows assembly of the clamp instantly. The do-it-yourselfer is in trouble unless a second person is available to help. In order to get the spring clamp installed around the outside of the bellow, it was necessary to undo the spring from the clamp and then place the loose clamp around the bellows. Have one person hold the end of the clamp with pliers while the other person stretches the spring to connect to the loop in the clamp. It took quite a bit of strength and several tries to complete. Other than that, not a difficult job.
3 of 4 people found this instruction helpful.
Was this instruction helpful to you?
Thank you for voting!
Customer:
Michael from Redding, CA
Parts Used:
WP8182119
Difficulty Level:
A Bit Difficult
Total Repair Time:
30 - 60 mins
Tools:
Nutdriver, Pliers, Screw drivers
Edge of seal leaking taking out clothes with metal clasps.
My Kenmore Elite front loading washer is different than the one in the video instructions, in that it has a plastic chrome decorative ring which surrounds the door opening. This chrome ring prevents removal of the top front electrical panel (the panel with all the controls and buttons). You cannot remove the middle door section until th e top panel section is removed. So it was necessary to grip the chrome ring at the top and pull it away. Doing this, destroyed a number of plastic tabs that hold it in place. Fortunately, only the top part of this ring needs to be pulled out so that you can then remove the top panel. Complete removal of the ring would have meant having to buy new brackets that hold it in. After the top/front section was removed, the rest of the procedure went easily, using the t video as a guide.
0 of 1 people found this instruction helpful.
Was this instruction helpful to you?
Thank you for voting!
Customer:
Kenneth from Floral Park, NY
Parts Used:
WP8182119
Difficulty Level:
Really Easy
Total Repair Time:
30 - 60 mins
Tools:
Screw drivers, Socket set
Small Bellow Tear
Unplug the machine. 1. Reach over the rear and remove the (3) 1/4 inch hex screws across the top edge. Slide the lid back a few inches. 2. Remove the (2) door retaining screw. Unhook the door. 3. Remove the (2) T-20 door latch screws. 4. Remove the bottom access panels (3) screws. 5. Remove the (2) T-20 dispenser housing screws (after rem oving the dispenser). 6. Put a slotted screwdriver into one end of the rigid part of the spring loaded outer bellow clamp and pry out. Release the bellow from the dispenser lead and release the bellow. 7. From the top of the circular trim ring, lightly pry up the snaps and remove. 8. Remove the last (2) screws holding the control assembly which also holds the door frame. Start on the top left side unsnapping the tabs. Place the assembly on top of the machine. 9. Remove the door frame by removing the bottom (2) screws. 10. Loosen the outer tub clamp to remove the bellow.
0 of 1 people found this instruction helpful.
Was this instruction helpful to you?
Thank you for voting!
Customer:
Wayne from CHEYENNE, WY
Parts Used:
WP8182119
Difficulty Level:
A Bit Difficult
Total Repair Time:
30 - 60 mins
Tools:
Screw drivers
Leaking seal at the front door of washer.
Pulled the outer lip of the seal and found the spring with the wire on the outer rim of the door. Carefully remove the spring and wire all together and placed it inside the washer for safe keeping. Once the ring is removed you can pull on the lip and push it into the washer. In the upper right you will find the screw band. Similar to a hose clamp only bigger. You will need a small flathead screw driver. This was the hardest part of the whole operation. It is hard to get the screwdriver aligned and fit your hand in there as well. Make sure you loosen the screw carefully and ensure it is loose enough for the next step. Once I felt it was loose enough, I carefully removed the hose clamp/clasp and let it sit in the opening between the drum and front door. I was then able to remove the bellows from the inner rim of the washer. This completes the removal part. I lined up the new bellows using the washer's input tube on the front left to ensure it would line up when I tighten down the clamp on the inner drum. Once the bellows was in place and the clamp was on, I checked the alignment again before tightening the clamp with the screw driver. With it loose you can make any adjustments if needed. Then I re-tighten the screw and checked to see if it would move at all. Next you need to re-seat the outer seal to the door and double check to ensure it is on all the way around. This next part can be hard and you will need a second pair of hands. There are a couple of ways you can put the retention ring on the door to the washer. I kept the whole ring and spring together and this is where a second pair of hands will be needed. I placed the retention ring at the top and worked it around the lip. If you have ever changed a tire on a bike it is very similar. Once I had it in place as far as I could get it, my wife held the two spots and using a screw driver I was able to gently get the spring to expand and pop the ring in place. I double checked to ensure it was all in place and snug. Then I double checked the lip of the seal and it all looked good. I had my wife run a rinse without any cloths and checked for leaks. No leaks. It has been working fine ever since. The wife tried to fix it herself with crazy glue and it dried out the ring so that it leaked.
0 of 1 people found this instruction helpful.
Was this instruction helpful to you?
Thank you for voting!
Customer:
Cameron from Edmonds, WA
Parts Used:
W10902779, WP8182210, WP8182119
Difficulty Level:
Easy
Total Repair Time:
30 - 60 mins
Tools:
Screw drivers
Unpleasant odor.
Followed the directions in the video. Most of the time was spent cleaning the related parts
0 of 1 people found this instruction helpful.
Was this instruction helpful to you?
Thank you for voting!
  • 1

Model Compatibility

This part works with the following models:
Fix Number: FIX11744957
Manufacturer Part Number: WP8182119
Brand
Model Number
Description
Kenmore
11042822203
Washer
Kenmore
11042824203
Washer
Kenmore
11042922202
Washer
Kenmore
11042922203
Washer
Kenmore
11042924202
Washer
Kenmore
11042924203
Washer
Kenmore
11042926202
Washer
Kenmore
11042926203
Washer
Kenmore
11043902202
Washer
Kenmore
11043902203
Washer
Kenmore
11044826301
Washer
Kenmore
11044832202
Washer
Kenmore
11044834202
Washer
Kenmore
11044836301
Washer
Kenmore
11044921301
Washer
Kenmore
11044921302
Washer
Kenmore
11044931301
Washer
Kenmore
11044931302
Washer
Kenmore
11044932202
Washer
Kenmore
11044932203
Washer
Kenmore
11044934202
Washer
Kenmore
11044934203
Washer
Kenmore
11044936202
Washer
Kenmore
11044936203
Washer
Kenmore
11045081400
Washer
Kenmore
11045081401
Washer
Kenmore
11045081402
Washer
Kenmore
11045081403
Washer
Kenmore
11045081404
Washer
Kenmore
11045087400
Washer