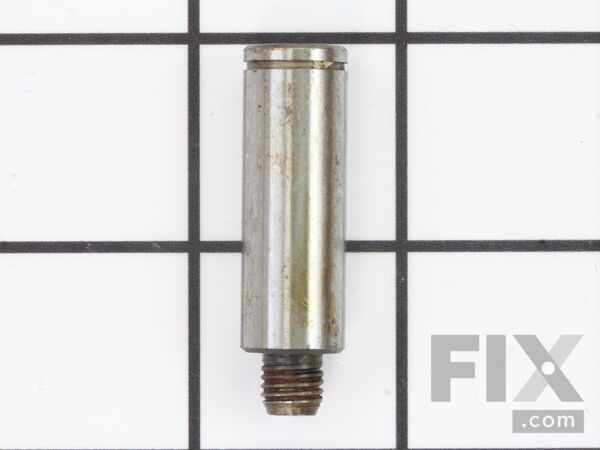
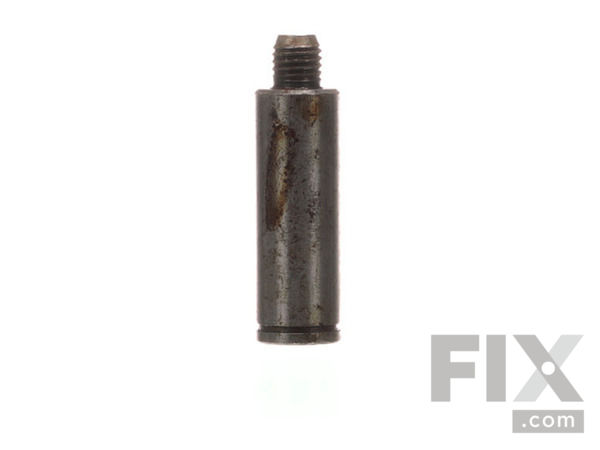
Part Location Diagram of WP6-3129480 Whirlpool Roller Shaft
See part 6 in the diagram
Replacing your Maytag Dryer Roller Shaft
( Grid squares measure 1x1 inch )

Roller Shaft

Works With Model MDE16CSAKQ!

Rated by 22 customers 

?

Easy 

1- 2 hours 

Ratings submitted by customers like you who bought this part.

?
$9.81
In Stock
Fix Number:
FIX11743031
Manufacturer #:
WP6-3129480
Manufactured by:
Whirlpool
Works With Model MDE16CSAKQ!

Product Description

The roller shaft is also known as a support roller shaft or a drum roller axle. It is a part in your dryer that the drum rollers spin on, helping your dryer to tumble. If your appliance is noisy while operating, or will not tumble at all, you may need to replace the roller shaft. You may also want to inspect the drum rollers at the same time and replace them if necessary. Replacing the roller shaft will require that you remove the front panel and the drum from the dryer. Please ensure that you disconnect the power supply before beginning this project. The tools you will need include a Philips screwdriver, a 5/16-inch nut driver, a pair of snap-ring pliers, and a 9/16-inch wrench. The roller shaft is an authentic OEM part.

Videos For installing this part.

Replacing your Roller Shaft

Replacing your Roller Shaft

Questions and Answers

We're sorry, but our Q&A experts are temporarily unavailable.
Please check back later if you still haven't found the answer you need.

Installation Instructions Provided by Fix customers like you.

Average Repair Rating: 2.8 / 5.0, 22 reviews.
  • 1
  • 2
  • 3
Sort by:
Sorry, we couldn't find any existing installation instruction that matched.
Customer:
Brian from Novi, MI
Parts Used:
WP6-3129480, WP6-3037050, WPY312959, WPY312527, 306508, 12001541, WP9703438, WP354987
Difficulty Level:
Easy
Total Repair Time:
30 - 60 mins
Tools:
Nutdriver, Screw drivers, Socket set
Squeaking noises while running dryer
Followed the Video Directions from website. All went as planed. The dryer is running like new now.
13 of 14 people found this instruction helpful.
Was this instruction helpful to you?
Thank you for voting!
Customer:
Tim from PORTLAND, OR
Parts Used:
WP6-3700340, WP6-3129480, WP33002535, 306508, 12001541, WP9703438
Difficulty Level:
Easy
Total Repair Time:
1- 2 hours
Tools:
Nutdriver, Pliers, Screw drivers
Dryer was a bit noisy with a full load of wet clothes
As per the repair videos on the site, I searched the internet for a couple of supplementary videos just to make sure I was doing it correctly. It was was all pretty easy. Expect to vacuum out and clean out the interior of the dryer. Also, to make things easier, disconnect the bulkhead and exterior like in the video, but also keep the top flipped up until reassembling, it'll make it much easier. When reinstalling the belt, remember how the belt is going to go around the pulley, you'll have to do this without sight as the barrel will the way and you won't be able to see what you're doing. It's really not hard but just keep this in mind. Also, as you disassembling, it would help to snap some pictures of where each screw goes and how; reassembly was a tiny bit tricky as I didn't do this.
8 of 9 people found this instruction helpful.
Was this instruction helpful to you?
Thank you for voting!
Customer:
James from SANTA ROSA, CA
Parts Used:
WP6-3129480, WP33001003, 12001541
Difficulty Level:
Easy
Total Repair Time:
1- 2 hours
Tools:
Nutdriver, Screw drivers, Socket set, Wrench (Adjustable)
My drier was making rumbling noises.
I followed the video instructions, which were great by the way. Pretty easy to remove the front panel, then housing, then belt, then drum to expose drum support rollers and shafts. Removed old and replaced with new after cleaning lint up a bit. Unfortunately, there is still a bit of a rumble when the drier starts up. I fully expected the changed out parts to make a difference, but it was only a modest improvement. I need to do further trouble shooting and diagnosis.
4 of 5 people found this instruction helpful.
Was this instruction helpful to you?
Thank you for voting!
Customer:
Tammy from Fremont, OH
Parts Used:
WP6-3700340, WP6-3129480, WP33002535, 12001541
Difficulty Level:
Easy
Total Repair Time:
30 - 60 mins
Tools:
Pliers, Screw drivers, Socket set
Very loud rubbing/squeaking noise
Watched 2 YouTube videos. 1. How to take apart a dependable care dryer. 2. How to replace a belt on a maytag dryer. We replaced all the parts. It was eeasy. When putting dryer back together make sure felt is straight. We did have to take it apart again there was felt sticking out inside the dryer and it caused the drum to not spin. Every thing works great. And Thank you parts select. I received the right parts in 2 days without paying extra. I will use you again.
3 of 5 people found this instruction helpful.
Was this instruction helpful to you?
Thank you for voting!
Customer:
Steven from Troy, OH
Parts Used:
WP6-3129480, WP6-3037050, WPY312959, 12001541
Difficulty Level:
Easy
Total Repair Time:
30 - 60 mins
Tools:
Nutdriver, Pliers
Dryer was making noise like an indy car now like a Prius
Exactly like in the online video. The video was an excellent tool for this repair. Thank you, !
2 of 4 people found this instruction helpful.
Was this instruction helpful to you?
Thank you for voting!
Customer:
donald from franklin lakes, NJ
Parts Used:
WP6-3129480, 12001541
Difficulty Level:
Easy
Total Repair Time:
1- 2 hours
Tools:
Nutdriver, Screw drivers, Socket set
replace drum rollers and their shafts
followed applianceparts video on youtube,although dryer somewhat different(older) ....video made the repair happen...
1 of 2 people found this instruction helpful.
Was this instruction helpful to you?
Thank you for voting!
Customer:
Eric from Fort Bragg, CA
Parts Used:
WP6-3129480, 12001541
Difficulty Level:
Easy
Total Repair Time:
30 - 60 mins
Tools:
Nutdriver, Wrench set
Dryer had squeaking noise
Remove door and front panel remove drum replace drum support roller and roller shaft.
0 of 1 people found this instruction helpful.
Was this instruction helpful to you?
Thank you for voting!
Customer:
Randall from Valrico, FL
Parts Used:
WP6-3129480, 12001541
Difficulty Level:
Really Easy
Total Repair Time:
More than 2 hours
Tools:
Screw drivers, Wrench set
Noisy
I pulled the entire unit apart, because I didn't , for sure, know what the problem was. I'm glad I did as it had years of crud and dust in it. The shaft and roller were easy to install. The belt routing was the hardest part, which was actually simple. It now makes no noise and dries really good.
0 of 1 people found this instruction helpful.
Was this instruction helpful to you?
Thank you for voting!
Customer:
John from McAllister, MT
Parts Used:
WP6-3700340, WP6-3129480, WP33002535, WP303396, 12001541
Difficulty Level:
Easy
Total Repair Time:
More than 2 hours
Tools:
Nutdriver, Screw drivers, Socket set, Wrench set
Dryer was extremely noisy squeeling and sqeaking
Followed installation videos and removed entire front of cabinet including door, loosened belt and removed drum. Only problem was the snap ring pliers I had were too large to fit in the holes of the drum roller snap ring. Ended up taking two 3 inch deck screws with sharp points, putting them in the snap ring holes and removing the ring by that method. Did the same when replacing it although this time, had to have my wife put a flat screwdriver against it while I pulled it apart with the screws. Rest of the repair was quite easy and dryer works great.
0 of 1 people found this instruction helpful.
Was this instruction helpful to you?
Thank you for voting!
Customer:
Robert from Encinitas, CA
Parts Used:
WP6-3129480, WP6-3037050, WPY312959, 12001541
Difficulty Level:
Easy
Total Repair Time:
1- 2 hours
Tools:
Screw drivers, Socket set, Wrench set
periodic screeching sound
1. bought the only snap ring pliers available at homedepot. 2. turned off the gas and unplugged 3. moved it away from back wall. 4. removed front panel. 5. removed drum housing. 6. slid off belt. 7. removed drum. 8 found one frozen roller and a second with roller washer severely worn washer. The pins on the snap ring plier were too lar ge to insert into the spring rings. ground the small pins down with a power grinder until finally fit. (took a long time). Finally fit well enough to get retaining rings off. 9. replaced both shafts and rollers, though it was unclear whether the solid shafts needed replacement. 10. from rear, removed access panel and replaced idler pulley wheel. 11. placed drum back with new belt, then fit it over motor and pulley. Took a bit to get it fitted correctly. Much easier from rear panel than reaching around. 12. reinstalled housing and front panel. Problem areas: GET A SMALL SNAP RING PLIERS THAT WILL FIT ! Easier to install belt around idler pulley wheel from rear access panel. Replacement of roller shafts was probably not necessary. Works great now.
0 of 1 people found this instruction helpful.
Was this instruction helpful to you?
Thank you for voting!
  • 1
  • 2
  • 3

Model Compatibility

This part works with the following models:
Fix Number: FIX11743031
Manufacturer Part Number: WP6-3129480
Brand
Model Number
Description
Roper
2570B00
Range - Electric
Roper
2570B10
Range - Electric
Crosley
CDE4205AYJ
Dryer - Residential
Crosley
CDE4205AYW
Dryer - Residential
Crosley
CDE4205AZJ
Dryer - Residential
Crosley
CDE4205AZW
Dryer - Residential
Crosley
CDG4205AWJ
Dryer - Residential
Crosley
CDG4205AWW
Dryer - Residential
Maytag
DE106
Dryer - Electric
Maytag
DE107
Dryer - Electric
Maytag
DE110
Dryer - Electric
Maytag
DE18CA
Dryer - Electric
Maytag
DE18CM
Dryer - Electric
Maytag
DE18CS
Dryer - Electric
Maytag
DE18CT
Dryer - Electric
Maytag
DE19CA
Dryer - Electric
Maytag
DE19CD
Dryer - Electric
Maytag
DE19CS
Dryer - Electric
Maytag
DE19CT
Dryer - Electric
Maytag
DE210
Dryer - Electric
Maytag
DE212
Dryer - Residential
Maytag
DE21CA
Dryer - Electric
Maytag
DE21CM
Dryer - Electric
Maytag
DE21CS
Dryer - Electric
Maytag
DE21CT
Dryer - Electric
Maytag
DE22CA
Dryer - Electric
Maytag
DE22CS
Dryer - Electric
Maytag
DE22CT
Dryer - Electric
Maytag
DE23CD
Dryer - Electric
Maytag
DE24CA
Dryer - Electric