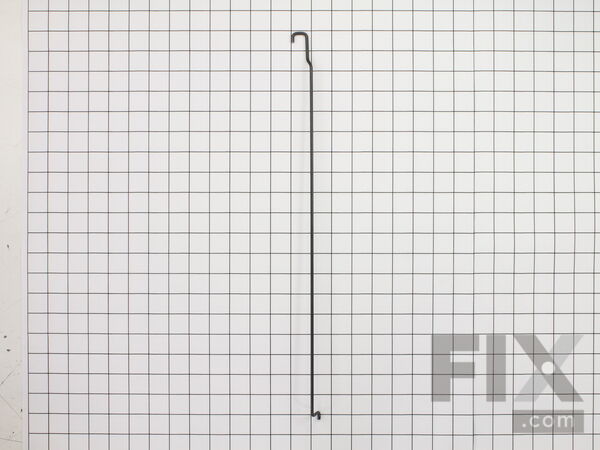
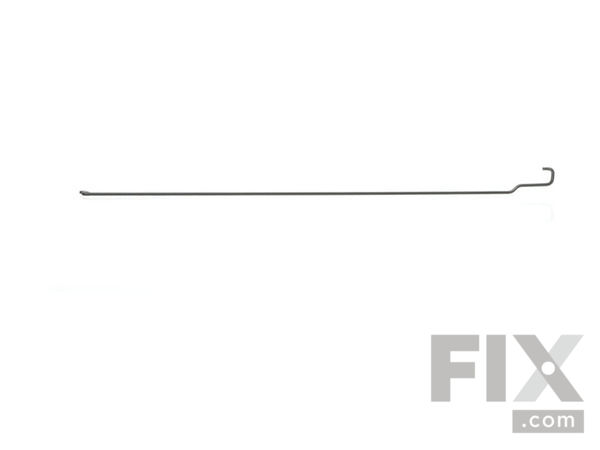
Part Location Diagram of WP4452396 Whirlpool Torsion Spring - Stainless Steel - Right Side
See part 36 in the diagram
( Grid squares measure 1x1 inch )

Torsion Spring - Stainless Steel - Right Side

Works With Model KBHC109JBT03!
★★★★★
★★★★★
1 Review

Rated by 3 customers 

?

Easy 

30 - 60 mins 

Ratings submitted by customers like you who bought this part.

?
$70.06
In Stock
Fix Number:
FIX11742586
Manufacturer #:
WP4452396
Manufactured by:
Whirlpool
Works With Model KBHC109JBT03!

Product Description

This is to be used with Stainless Steel models.

Questions and Answers

We're sorry, but our Q&A experts are temporarily unavailable.
Please check back later if you still haven't found the answer you need.

Installation Instructions Provided by Fix customers like you.

Average Repair Rating: 3.2 / 5.0, 3 reviews.
  • 1
Sort by:
Sorry, we couldn't find any existing installation instruction that matched.
Customer:
William from Lewis Cent, OH
Parts Used:
WP4452396
Difficulty Level:
A Bit Difficult
Total Repair Time:
1- 2 hours
Tools:
Screw drivers
Broken door spring on microwave door
Except for one step, this is an easy fix. IMPORTANT INFO before you start. These instructions are primarily for the stainless steel models, although many may also apply to the non-stainless steel models. I strongly suggest you perform the disassembly before ordering the parts. There are two door springs. More than likely, only one has b roken. Each spring goes across the entire front of the door so it is best to ignore the description of right or left. Also, the SS models have much heaver doors than the non SS models and use different springs that are much stronger. If you order the springs for the non SS door, you will be disappointed. The springs are really rods that criss-cross across the front of the door. they are connected to the hinge on each side. One starts at the top of the hinge on the left side and extends to the bottom of the hinge on the right side. The other starts on the top of the hinge on the right side and extends to the bottom of the hinge on the left side. For the SS models, the spring that runs from the top of the hinge on the LEFT side and connects to the bottom of the hinge on the right side is part number 4452396. The spring that runs from the top of the hinge on the RIGHT side to the bottom of the hinge on the left side is part number 4452395. The springs are not interchangeable. I needed the one that ran from the top of the left hinge to the bottom of the right hinge. Now for the repair instructions. Open the microwave door. You will find one screw on each side at the top inside of the door. Remove both while holding the door or it might fall to the floor. After removing these two screws, close the door half way and lift the outer stainless steel door from the two clips at the bottom of the door (one on each side and visible from the outside of the microwave). Set that part aside. You will now see a plastic inner door frame and a plastic grid at the bottom. First remove the plastic grid at the bottom. There are four screws holding it in place. One at the far right, one at the far left, and two in the center. Open the main oven door to remove the two screws in the middle. Remove and set that part aside. The inner door frame is held in place by two screws on the bottom approximately 7.5 inches from each side. You do not need to remove the two screws holding the two clips that hold the outer stainless steel door in place. Now the only hard step. The screw on the right side is easily removed, but the one on the left side is above the exhaust vent from the oven and there is no room to get a screwdriver on it (even a right-angle screwdriver). I found that I needed to remove the screw holding the exhaust vent which is at the inside front of the exhaust vent. To do this, I used a very small (about 6 inch) vice-grip. It just fit in the exhaust vent opening and I would tighten it around the screw head and then turn it. After multiple steps of doing this I was able to remove this screw. Now you can slide the front of the exhaust vent to the side (do not try to remove it) and reach the other bottom screw holding the inner door frame in place. After removing the inner door frame you will see the two springs. Remove the broken spring by sliding it out of the hole in the hinge. Install the new one by starting from the hinge where the spring is on the bottom of the hinge and sliding it through the appropriate hole in that hinge towards the top of the opposite side hinge. You must push the final 1/4 inch of the rod into the appropriate holes of each hinge on each side at the same time. There is no torsion on the spring when it is being installed, only when the door is being opened, so it is not difficult, just the proper alignment and a little push to the right or left. Reverse all the other steps above to reinstall the other parts and the job is done. Good Luck.
6 of 6 people found this instruction helpful.
Was this instruction helpful to you?
Thank you for voting!
Customer:
Mitchell from Waynesville, NC
Parts Used:
WP4452395, WP4452396
Difficulty Level:
Really Easy
Total Repair Time:
15 - 30 mins
Tools:
Screw drivers
Right side torsion spring broke making door heavy
Was easy once I realized that the spring is located in the door. Instructions I could then follow. Careful when you get to the. Removing the glass section!
1 person found this instruction helpful.
Was this instruction helpful to you?
Thank you for voting!
Customer:
Lance from Angels Camp, CA
Parts Used:
WP4452396
Difficulty Level:
Easy
Total Repair Time:
30 - 60 mins
Tools:
Screw drivers
Door spring broken
1). Open door; 2). remove side trim pieces (one screw on each side).; 3). remove bottom trim (one screw each side; 4). remove 2 screws on bottom of oven door ( a little hard to get to, use flex drive Phillips screw driver or angled screw driver tool. 5). Remove 2 screws recessed into top inside of door (have someone help to hold door when removing). 6) lift off door front. 7) remove broken spring from brackets (slide torsion spring from retention holes). 7) install new spring with door in closed position. ( slide spring through holes and bend to snap into bracket on other side. make sure spring U shaped ind is seated fully flush to bracket.) 8). re-assemble all parts in reverse order.
0 of 1 people found this instruction helpful.
Was this instruction helpful to you?
Thank you for voting!
  • 1
Customer Reviews
Average Rating: (1 Review)
5.0
★★★★★
★★★★★
Filter By Rating:
  • 5
    1
  • 4
    0
  • 3
    0
  • 2
    0
  • 1
    0
  • 1
Sort by:
Sorry, we couldn't find any existing reviews that matched. Try using some different or simpler keywords.

Model Compatibility

This part works with the following models:
Fix Number: FIX11742586
Manufacturer Part Number: WP4452396
Brand
Model Number
Description
Whirlpool
GSC308PJB06
Microwave Oven Combo - Wall, Electric, Built-in
Whirlpool
GSC308PJB1
Microwave Oven Combo - ELECTRIC OVEN/MW COMBO
Whirlpool
GSC308PJB2
Microwave Oven Combo - Wall, Built-in, Electric
Whirlpool
GSC308PJB3
Microwave Oven Combo - Wall, Built-in, Electric
Whirlpool
GSC308PJB4
Microwave Oven Combo - Wall, Electric
Whirlpool
GSC308PJQ06
Microwave Oven Combo - Wall, Electric, Built-in
Whirlpool
GSC308PJQ1
Microwave Oven Combo - ELECTRIC OVEN/MW COMBO
Whirlpool
GSC308PJQ2
Microwave Oven Combo - Wall, Built-in, Electric
Whirlpool
GSC308PJQ3
Microwave Oven Combo - Wall, Built-in, Electric
Whirlpool
GSC308PJQ4
Microwave Oven Combo - Wall, Electric
Whirlpool
GSC308PJS06
Microwave Oven Combo - Wall, Electric, Built-in
Whirlpool
GSC308PJS1
Microwave Oven Combo - ELECTRIC OVEN/MW COMBO
Whirlpool
GSC308PJS2
Microwave Oven Combo - Wall, Built-in, Electric
Whirlpool
GSC308PJS3
Microwave Oven Combo - Wall, Built-in, Electric
Whirlpool
GSC308PJS4
Microwave Oven Combo - Wall, Electric
Whirlpool
GSC308PJT06
Microwave Oven Combo - Wall, Electric, Built-in
Whirlpool
GSC308PJT1
Microwave Oven Combo - ELECTRIC OVEN/MW COMBO
Whirlpool
GSC308PJT2
Microwave Oven Combo - Wall, Built-in, Electric
Whirlpool
GSC308PJT3
Microwave Oven Combo - Wall, Built-in, Electric
Whirlpool
GSC308PJT4
Microwave Oven Combo - Wall, Electric
Whirlpool
GSC308PRB00
Microwave Oven Combo - Wall, Built-in, Electric
Whirlpool
GSC308PRB01
Microwave Oven Combo - Built-in, Wall, Electric
Whirlpool
GSC308PRQ00
Microwave Oven Combo - Wall, Built-in, Electric
Whirlpool
GSC308PRQ01
Microwave Oven Combo - Built-in, Wall, Electric
Whirlpool
GSC308PRS00
Microwave Oven Combo - Wall, Built-in, Electric
Whirlpool
GSC308PRS01
Microwave Oven Combo - Built-in, Wall, Electric
Whirlpool
GSC308PRT00
Microwave Oven Combo - Wall, Built-in, Electric
Whirlpool
GSC308PRT01
Microwave Oven Combo - Built-in, Wall, Electric
KitchenAid
KBHC109JBL0
Microwave Oven Combo
KitchenAid
KBHC109JBL03
Microwave Oven Combo