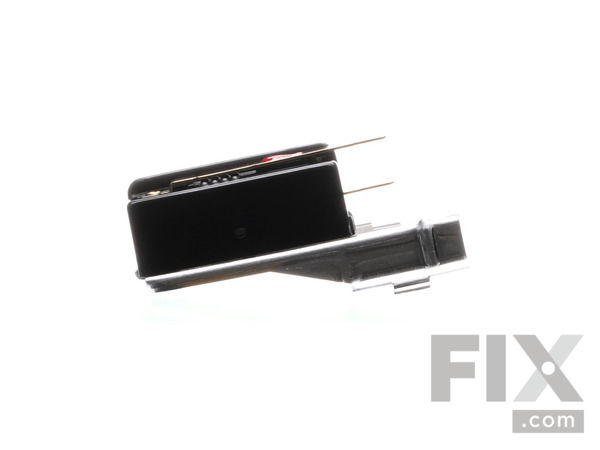
Part Location Diagram of WP338906 Whirlpool Dryer Radiant Flame Sensor
See part 48 in the diagram
Replacing your Kenmore Dryer Dryer Radiant Flame Sensor
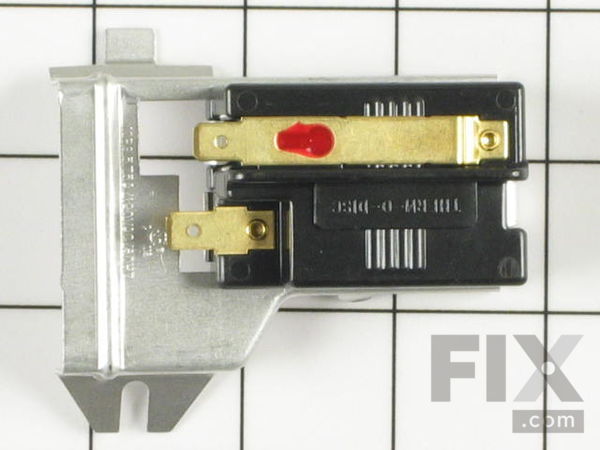
( Grid squares measure 1x1 inch )

Dryer Radiant Flame Sensor

Works With Model MGDB835DC3!
★★★★★
★★★★★
1 Review

Rated by 12 customers 

?

Really Easy 

30 - 60 mins 

Ratings submitted by customers like you who bought this part.

?
$47.91
In Stock
Fix Number:
FIX11741429
Manufacturer #:
WP338906
Manufactured by:
Whirlpool
Works With Model MGDB835DC3!

Product Description

This genuine OEM part is a radiant flame sensor for your gas dryer. It is used to determine when the temperature of the igniter is hot enough to ignite the gas. Once the igniter is hot enough, it allows the valve to open to release the gas. This acts as a safety mechanism which prevents dangerous levels of gas from building up. If your dryer will not start, is not producing enough heat, not heating up at all, is taking too long to dry laundry, or is shutting off too soon, you may need to replace the radiant flame sensor. Please be sure to disconnect the power and gas supply to your dryer before beginning this repair.

Videos For installing this part.

Replacing your Dryer Radiant Flame Sensor

Replacing your Dryer Radiant Flame Sensor

Questions and Answers

We're sorry, but our Q&A experts are temporarily unavailable.
Please check back later if you still haven't found the answer you need.

2 questions answered by our experts.
  • 1
Sort by:
Sorry, we couldn't find any existing answers that matched.
Try using some different or simpler keywords, or submit your new question by using the "Ask a Question" button above!
Cluet
September 19, 2022
I am all numb with this dryer I was getting some heat but not enough to dry the clothes. I change the timer now it work fine but still no more heat, I change that small flat white sensor now I get no heat at all, I change the sensor next to it with the four wire connections nothing change. I am at a lost all that time waisted not to mention money I am all spent out I need help to save the dump or selling it to scrap metal.
For model number LGR762OLWO
Fix.com logo
Hello Cluet, thank you for your inquiry! Our research indicates that the issue is probably with the Thermal Fuse, part number FIX11741460. If that is not the problem or if you have already fixed that, then the problem would be related to the M Series Coil Kit, part number FIX334310. Customer service is available 7 days a week if you need help placing an order. Glad to be of assistance!

Was this helpful?
Thank you for voting!
Related Parts:
David
October 14, 2023
Hello, I am helping my mother in law with her gas dryer. The issue is sometimes it heats and sometimes it doesn’t. I replaced the vent pipe and cleaned out all the lent to eliminate a venting issue. The old did have a good amount in the old pipe. So it seems to run and heat for maybe half a cycle then stops heating. Seems like it could be several parts so looking for the most common or any tests I can do
For model number LDG7334AAE
Fix.com logo
Hi David, thank you for reaching out. Based on the description you have provided, it seems that there is an issue with the dryer flame sensor, part number FIX11741429. This acts as a safety mechanism which prevents dangerous levels of gas from building up. You may need to replace it to fix the issue. We hope that helps

Was this helpful?
Thank you for voting!

Installation Instructions Provided by Fix customers like you.

Average Repair Rating: 3.4 / 5.0, 12 reviews.
  • 1
  • 2
Sort by:
Sorry, we couldn't find any existing installation instruction that matched.
Customer:
William from Corsicana, TX
Parts Used:
WP338906
Difficulty Level:
Really Easy
Total Repair Time:
Less than 15 mins
Tools:
Wrench set
Oor dryer would not get hot.
I opened the bottom section and watched as the igniter got red hot as it should but the gas valve did not open. I wired around the sensor and the gas valve opened and the fuel ignited. VERY IMPORTANT: DO NOT RUN YOUR DRYER IN THIS STATE: IT WILL BLOW UP!! I did a VERY short test, then ordered the new sensor. Just one screw holds the sensor (as shown in the Parts video). One screw out, new sensor, one screw in and our dryer is back in full and proper running order.
4 of 5 people found this instruction helpful.
Was this instruction helpful to you?
Thank you for voting!
Customer:
Donald from Ottawa, IL
Parts Used:
W11050897, WP338906, WP3387134, 279834
Difficulty Level:
Really Easy
Total Repair Time:
15 - 30 mins
Tools:
Nutdriver, Screw drivers
no heat
Cost was $114.00 to replace all parts , It took longer to take apart & test everything than it did to do the repair ! I tested all parts twice , everything would test fine , I put it all back together and the dryer worked for 5 minutes , did that twice and decided to order all the parts an be done with it . Ordered the parts , that showed up at my door in 2 days !!! Turned OFF gas , took off vent hose , took back off with 8 screws , popped up top in the front , took 2 screws off the top in the back removing the brackets , Inside the front under the top removed 2 screws holding on the front , lifted the front and removed . All parts only have 1 or 2 screws holding them in place , removed 1 part at a time , removing and replacing 1 wire from old part to the new part so I did not mix up the wires , replace the part and go to the next part . It was pretty self explanatory replacing the parts , It took 20 minutes to take apart , replace the parts and put back together so my loving wife could do laundry again. You don't realize what a inconvenience it is to go without a dryer for 3 days when you have had one for 37 yrs ..... THANK YOU , 3 days can seem like forever when someone is not happy , but it was much much better than waiting 7 to 10 days for the wrong parts from somewhere else . You have the BEST parts website that I have EVER used !!! THANK YOU AGAIN , Donald
4 of 8 people found this instruction helpful.
Was this instruction helpful to you?
Thank you for voting!
Customer:
Rick from Temecula, CA
Parts Used:
WP338906, 279834, 279311
Difficulty Level:
Easy
Total Repair Time:
1- 2 hours
Tools:
Nutdriver, Pliers, Screw drivers, Socket set, Wrench (Adjustable)
Dryer was not heating.
Did a search for our make & model and came upon your site. Found rather quickly our Whirlpool model. In order to avoid a $75 Service visit + eventual parts to try my hand at it. Read similar posts of not heating but wasn't sure where problem existed so watching the very helpful videos and using the % of what would fix it decided to or der the (3) parts. After ordering though I continued to research and saw where the problem probably started by removing the back panel, where lint had accumulated around the thermal fuse so I ordered that too. Once I received all the parts began to re-assemble. The only difficulty was the space for my hands to get those small screws back right away on the Igniter kit but with a little patience made it happen. It indicated you could remove the drum for more access room but thought I may be going a little to far with removing that too with the serpentine belt. Since I put all "new parts" in for under what it would cost for just the service call I felt I came out ahead and basically have a new dryer! Only suggestion is if you do the job yourself expect your wife to say, "If you know so much about this appliance try using it once in awhile"!! I gave it a go and it's kinda fun especially knowing you got it to work again. Thanks, Rick
3 of 8 people found this instruction helpful.
Was this instruction helpful to you?
Thank you for voting!
Customer:
Daniel from Spencer, MA
Parts Used:
WP40113801, WP338906
Difficulty Level:
Very Easy
Total Repair Time:
1- 2 hours
Tools:
Nutdriver, Socket set, Wrench set
Not enough heat
replaced the High limit thermal fuse and the radiant flame sensor but did not solve the problem as it turned out
1 of 2 people found this instruction helpful.
Was this instruction helpful to you?
Thank you for voting!
Customer:
Gregory C. from Brookville, IN
Parts Used:
WP338906, WP33002793
Difficulty Level:
Really Easy
Total Repair Time:
30 - 60 mins
Dryer is propane gas and burner would not stay on.
Still haven't figured out for sure exactly what is wrong. All the sensors I replaced so far have not fixed the cut out problem. I had to move the high limit off to the side of the mounting hole in the firing tube to keep it from shutting down the burner. I still need to check my gas pressure regulators, which would cause the burner to be extra hot if the pressure is too high. I have been hearing a low pitched buzzing noise come from the high pressure regulator on my 1000 gallon tank. I will have my gas supplier check out the regulators in the system.
1 person found this instruction helpful.
Was this instruction helpful to you?
Thank you for voting!
Customer:
Sachiko from HUntington Beach, CA
Parts Used:
WP338906
Difficulty Level:
Really Easy
Total Repair Time:
More than 2 hours
Tools:
Nutdriver
Dryer won't heat
Diagnostics first, the glow stick would glow, but not full glow, and then the glowstick would shutoff. You would hear a loud click, which was the first solenoid opening, but the 2nd solenoid would not open, nor the glowstick glow for 10 seconds. The problem was the new solenoids that I bought from this website. the connector on the 2nd so lenoid had pushed out the white wires, causing a circuit break in the system. So reinserted the white wires, and tested again. The glow would glow, the loud click was gone, the glowstick would go full brightness, and the 2nd solenoid would open the 2nd valve, causing gas to release, and the flame to light. Didn't really need the sensor, but installed it anyways. The sensor was not the problem.
1 person found this instruction helpful.
Was this instruction helpful to you?
Thank you for voting!
Customer:
Randall from Carlsbad, CA
Parts Used:
WP8577274, WP338906, WP3387223, 279311
Difficulty Level:
Easy
Total Repair Time:
30 - 60 mins
Tools:
Nutdriver, Screw drivers
Would not dry clothes completely in any setting.
As this site recommends the parts that would be needed to fix the problem, it recommends the most likely to the least likely. Of course I bought the least likely and proceeded to buy all parts up the the most likely. All though I only spent about $100.00 total, it was the most likely that fixed the problem. The fixes were fairly easy to do and were all made from the front side of the unit. Not much space to work in but made all the fixes with out issues. Unit seems to be running well. Glad I did it myself, would do it again!
1 person found this instruction helpful.
Was this instruction helpful to you?
Thank you for voting!
Customer:
Norman C from Lansing, IL
Parts Used:
WP338906, 279311
Difficulty Level:
A Bit Difficult
Total Repair Time:
1- 2 hours
Tools:
Nutdriver, Pliers, Wrench (Adjustable)
No Heat
After using a plastic scraper to release the top, the two screws inside the front are loosened and the front is lifted off of the two bottom hooks. The wires are removed from the door switch and the front put aside. The belt is removed from the motor pulley and the drum removed from the dryer. One sheet metal screw is removed from the bu rner tunnel to take out the heat sensor. The gas valve is turned 90 degrees off and the burner nut is loosened. For sheet metal screws hold the burner assembly to the base. One screw holds the flame igniter to the burner. The drum is reinserted with the belt to the wear pattern and back around the motor pulley. The drum is rotated to insure the belt will stay on. The front is both pushed into the drum and down over the two lower hooks. The two screws are inserted and tightened. Start the dryer to insure proper operation before putting down the top.
0 of 1 people found this instruction helpful.
Was this instruction helpful to you?
Thank you for voting!
Customer:
howard from roy, UT
Parts Used:
WP338906, 279834, 279311
Difficulty Level:
Very Easy
Total Repair Time:
30 - 60 mins
Tools:
Screw drivers
Dryer Would Not Heat
Your web site suggested parts for the problem; I ordered the parts and the problem was corrected; simple thank you!!!!!!!!
0 of 1 people found this instruction helpful.
Was this instruction helpful to you?
Thank you for voting!
Customer:
suzanne from belvidere, IL
Parts Used:
WP338906, 279834
Difficulty Level:
Easy
Total Repair Time:
30 - 60 mins
Tools:
Nutdriver, Wrench set
lack of heat
Remove screws holding front and top panel, remove drum to access burner assembly replace coils and put back together.
0 of 1 people found this instruction helpful.
Was this instruction helpful to you?
Thank you for voting!
  • 1
  • 2
Customer Reviews
Average Rating: (1 Review)
5.0
★★★★★
★★★★★
Filter By Rating:
  • 5
    1
  • 4
    0
  • 3
    0
  • 2
    0
  • 1
    0
  • 1
Sort by:
Sorry, we couldn't find any existing reviews that matched. Try using some different or simpler keywords.

Model Compatibility

This part works with the following models:
Fix Number: FIX11741429
Manufacturer Part Number: WP338906
Brand
Model Number
Description
Kenmore
10687884100
Dryer
Kenmore
10687884300
Dryer
Kenmore
10687884600
Dryer
Kenmore
10697502820
Dryer - Kenmore Dryer Model 106.97502820 (10697502820, 106 97502820) Parts
Kenmore
1103401795
Dryer
Kenmore
1103401796
Dryer
Kenmore
1103402855
Dryer
Kenmore
1103402856
Dryer
Kenmore
1106507821
Dryer
Kenmore
1106507830
Dryer
Kenmore
1106507831
Dryer
Kenmore
1106517741
Dryer
Kenmore
1106517744
Dryer
Kenmore
1106517746
Dryer
Kenmore
1106807613
Dryer
Kenmore
1106807615
Dryer
Kenmore
1106807703
Dryer
Kenmore
1106807705
Dryer
Kenmore
1106807811
Dryer
Kenmore
1106807822
Dryer
Kenmore
1106807830
Dryer
Kenmore
1106817231
Dryer
Kenmore
1106817241
Dryer
Kenmore
1106907100
Dryer
Kenmore
1106907101
Dryer
Kenmore
1106907200
Dryer
Kenmore
1106907201
Dryer
Kenmore
1106907600
Dryer
Kenmore
1106907610
Dryer
Kenmore
1106907613
Dryer