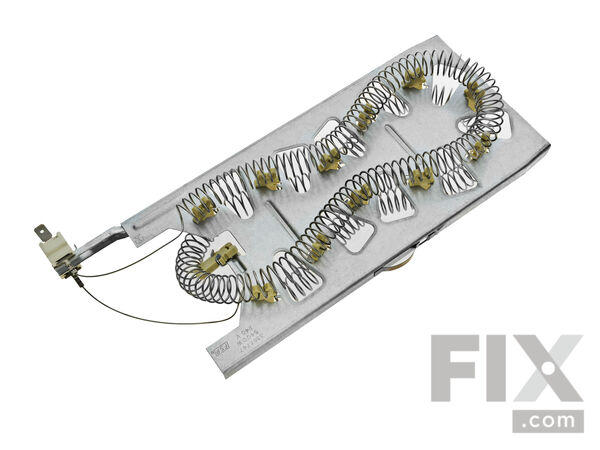
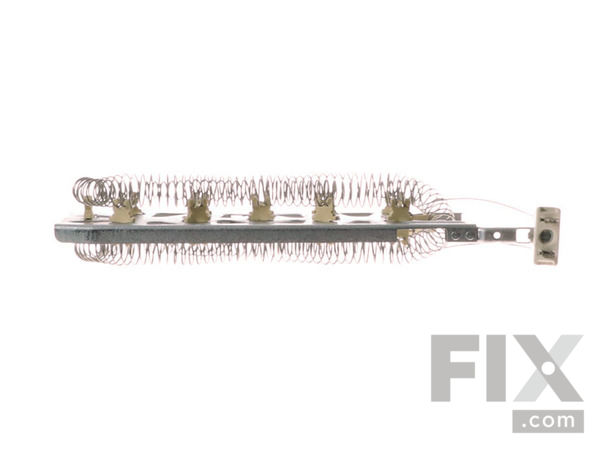
Part Location Diagram of WP3387747 Whirlpool Dryer Heating Element
See part 14 in the diagram
Replacing your Kenmore Dryer Dryer Heating Element
( Grid squares measure 1x1 inch )

Dryer Heating Element

Works With Model 4KMEDC300BW0!
★★★★★
★★★★★
4 Reviews

Rated by 27 customers 

?

Easy 

30 - 60 mins 

Ratings submitted by customers like you who bought this part.

?
$94.64
In Stock
Fix Number:
FIX11741416
Manufacturer #:
WP3387747
Manufactured by:
Whirlpool
Works With Model 4KMEDC300BW0!

Product Description

When connected to electricity the dryer heating element glows red hot and generates heat. When air is blown over it, it heats the air which is used to dry the clothes. The heating element fits inside the heater housing inside the dryer. Wear and tear on the heater coil from use will eventually cause the coil to break and the element to fail. When this part fails it can cease to produce any heat. Alternately, the coil could break and short to ground allowing the dryer to continue to heat even when turned off. The latter is a fire hazard and the dryer should be disconnected from power until the element is replaced. If the element coil breaks, the element needs to be replaced. This model is 11 by 5 inches with 5/16” terminals, metal and ceramic, and comes in black. It is sold individually.

Videos For installing this part.

Replacing your Dryer Heating Element

Replacing your Dryer Heating Element

Questions and Answers

We're sorry, but our Q&A experts are temporarily unavailable.
Please check back later if you still haven't found the answer you need.

Installation Instructions Provided by Fix customers like you.

Average Repair Rating: 3.5 / 5.0, 27 reviews.
  • 1
  • 2
  • 3
Sort by:
Sorry, we couldn't find any existing installation instruction that matched.
Customer:
jeffrey from Brookhaven, PA
Parts Used:
WP8577274, WP3390719, WP3387747, 279769, 279570
Difficulty Level:
Easy
Total Repair Time:
30 - 60 mins
Tools:
Screw drivers, Socket set, Wrench set
Dryer would run, but not heat
Needed it running quick, so no diagnostics. Ordered one of everything that could fix problem (plus a new door catch). Tipped it onto it's back & popped the bottom cover off. Element, thermal cutoff, thermistor, and fuse. were right in front and held by 2 screws each (don't drop them, don't ask). A little bit tight inside, but no big issu e. vacuumed the inside, replaced everything (it was the Heating Element, by the way), slapped the cover on, and put it back in its spot. works like it was new. Yes, I unplugged it first. Remember! Safety Third!
22 of 26 people found this instruction helpful.
Was this instruction helpful to you?
Thank you for voting!
Customer:
Thomas from North Little Rock, AR
Parts Used:
WP3387747
Difficulty Level:
Really Easy
Total Repair Time:
15 - 30 mins
Tools:
Nutdriver, Pliers, Socket set
Dryer would not heat (nor dry) on any setting. All cycles appeared to be working and exhaust tube and lint-catcher were clear.
The Partselect video for this project is a must - it was really helpful and written for the novice. I made a couple of adjustments but that was to make up for my lack of training. Follow the video. I did use my camera phone to photograph the wiring layout on the left side of the heating element. That helped me to make sure that I put the male/female plugs back on properly once I installed the new heating element into the grooved sleeve. I used the brush to clean debris out of the hot air intake (at the back of your dryer) because mine had a lot of lint in an around the heating element. The brushing was just preventative - you'll see the hole to brush when you take out the heat element and the sleeve,). I used the pencil to "color" the sides of the new heating element. It fits tight into the groove on the protective sleeve and one doesn't want to use oil or anything burnable since the heating coil gets very hot. The pencil graphite helped the unit to slide in the sleeve easier without jamming or risking a bend on the new heating plate during installation and doesn't smell when the unit is turned on. The only other change that I made from the video was to plug the unit in and test it through a cycle BEFORE I snapped the lower cabinet cover back on. This allowed me to see the new heating coil work and to make sure that any knocked -loose lint or debris wasn't posing a fire hazard. Once I was satisfied that the dryer was working (like brand new!) I snapped on the cabinet lid using the butter knife to depress the tabs. As I said, the pencil, camera phone, and brush were my idea but the rest was done by this site excellent video example. I had my machine up and running within four days using this site diagnostics, quick mail delivery, and more-than-helpful repair video. That is faster than waiting for a repairman AND ordering and having delivered a new unit -- not to mention a whole lot less expensive. ($55.00 investment). I'm somewhat adept with minor repairs but no expert.This site made it easy. I'll use them for all of my appliance repairs in the future. -- T.E.
8 of 8 people found this instruction helpful.
Was this instruction helpful to you?
Thank you for voting!
Customer:
Al from Cape Coral, FL
Parts Used:
WP8577274, 72017, WP3390719, WP3387747
Difficulty Level:
Really Easy
Total Repair Time:
30 - 60 mins
Tools:
Nutdriver
No heat when trying to dry clothes .
Followed instructions on your videos. Everything went as planned and the dryer works like new....
4 of 8 people found this instruction helpful.
Was this instruction helpful to you?
Thank you for voting!
Customer:
steve from POPLAR GROVE, IL
Parts Used:
WP8559751, WP3387747, WP22002263, 279973
Difficulty Level:
Really Easy
Total Repair Time:
30 - 60 mins
Tools:
Socket set
Dryer would not heat
Watched YouTube videos on how to diagnose and execute the repair. Always unplug the unit prior to performING any work. Diagnosed the heating element was bad. Easy to remove using only a 1/4" socket or nut driver. Decided to replace the thermal fuse and thermostat while I had the unit apart. To reassemble just reverse the steps. Very easy repair to complete yourself with little/no appliance knowledge. Good luck.
3 of 3 people found this instruction helpful.
Was this instruction helpful to you?
Thank you for voting!
Customer:
Lander from beaumont, TX
Parts Used:
WP3392519, WP3387747
Difficulty Level:
Really Easy
Total Repair Time:
Less than 15 mins
Tools:
Pliers, Screw drivers, Socket set
Dryer was turning drum and fan, all lights and controls were working. No heat was being generated.
I started by removing the front lower kick plate by unscrewing the two 1/4" hex screws. The kick plate is held by those screws and then you have to unlock the plate. Once that's done, you'll have to remove the fan plate by removing three 1/4" hex screws. Then you will be able to see the fan, the duct that takes the air out to the exaust a ND the heating element to the right of the fan. The manual says to check continuity (with a multivolt meter) from the thermal fuse, heating element, high limit thermostat, and on other element on the heater box. Inot my case the heater was not giving me continuity. So I checked some other thing that they recommended and those checked ok. I went online and found the parts here at the site. purchased them and waited. The parts arrived at the date promised and packaging was average. The parts were new. To insall the thermal fuse, use a needle nose plier to remove the e ires from it and then unscrew the crew. Reconnect the world and put the screw back in (I changed the fuse because the dryer is old.. and figured it was probably the next thing to go bad). To install the heating element, remove the wires from the heater terminal, remove the screw from the side of the heater terminal and slide the heating element out. Slide in the new part and reverse the removal process. It was very simple and easy!!
3 of 3 people found this instruction helpful.
Was this instruction helpful to you?
Thank you for voting!
Customer:
Wesley from Cleveland, TX
Parts Used:
WP3387747, 279769
Difficulty Level:
Very Easy
Total Repair Time:
15 - 30 mins
Tools:
Nutdriver, Screw drivers
Dryer not heating
Removed front lower panel. Removed heating element casing, replaced all 3 parts, reinstalled into dryer. Very simple. Clean lint while doing repair. Make sure you remember where your wires go.
1 person found this instruction helpful.
Was this instruction helpful to you?
Thank you for voting!
Customer:
Raul from Phoenix, AZ
Parts Used:
WP3387747
Difficulty Level:
Really Easy
Total Repair Time:
30 - 60 mins
Tools:
Pliers, Socket set
Dryer generating very low heat output
I recommend using the installation video on this website to do the repair. That's what I did. The hardest part for me was releasing the lower panel (kick plate) on the dryer. The video doesn't explain how the clips (clamps?) work so I struggled for about 10 minutes to release the clips. There are 2 different ways to do this install. (1) r emoving only the heating element itself from the dryer or (2) removing the housing for the heating element and then replacing the heating element on a table. I chose method #2 and I would definitely recommend this method. Especially if you are replacing the thermostat and/or thermal fuse kit at the same time (WHICH I WOULD RECOMMEND DOING AS BOTH SENSORS ARE LOCATED ON THE SAME HOUSING). To do this repair, you need the following tools: flash light, putty knife (or a butter knife if you don't have one), 1/4" socket, needle nose pliers (optional). STEP 1: UNPLUG YOUR HEATER!! THIS IS VERY IMPORTANT! STEP 2: Use a flash light to locate the clips holding the lower panel in place (they are approx 4" in from either side). One at a time, use a putty knife (or butter knife) to press down on the clip while pulling on the panel to release each side. The panel folds out and down. STEP 3: You will see the heat shield on the right, held in by one hex head screw. Use a 1/4" socket to remove the screw and heat shield. STEP 4: Use needle nose pliers (or your fingers) to disconnect the 6 wires connected to the left side of the housing. Make sure you remember which wires go on top and which ones go on bottom (take a pic or record short video if you have to). The wires on my dryer were easy to remember as the red wires with a white stripe went on top. STEP 5: The heating element is positioned in an open-front housing. This housing is held in place by 2 hex head screws. Use a 1/4" socket to remove the screws. Then, wiggle the housing and turn it 1/4 turn clockwise and pull it straight out from under the dryer. Place it on a table or work bench. STEP 6: The heating element is fastened to the left side of the housing by 1 hex head screw located on the "rail" of the element. Use a 1/4" socket to remove the screw that hold the element in place. Pull hard to remove the element. Installation instructions are reverse of removal instructions. NOTE: REPLACING MY HEATING ELEMENT DID NOT FIX MY PROBLEM. REPLACING MY THERMOSTAT & FUSE KIT FIXED MY PROBLEM SO I WOULD RECOMMEND REPLACING THE HIGH TEMP THERMOSTAT/THERMAL FUSE KIT AT THE SAME TIME AS THEY ARE LOCATED ON THE SAME HOUSING AS THE ELEMENT.
1 person found this instruction helpful.
Was this instruction helpful to you?
Thank you for voting!
Customer:
Tim from Cary, NC
Parts Used:
WP3392519, WP3387747
Difficulty Level:
Very Easy
Total Repair Time:
30 - 60 mins
Tools:
Nutdriver, Screw drivers
Dryer stopped heating
YouTube videos made it extremely. Was ready to buy a new $700 dryer instead spent less than $100 and an hour of my time!
0 of 1 people found this instruction helpful.
Was this instruction helpful to you?
Thank you for voting!
Customer:
Arthur from Aurora, CO
Parts Used:
WP3387747
Difficulty Level:
Really Easy
Total Repair Time:
15 - 30 mins
Tools:
Wrench set
My dryer wasn't heating up!
It was very simple after watching the video, I was instructed on which tools to use, where the item was located. My dryer is working perfectly. Thank You.
0 of 1 people found this instruction helpful.
Was this instruction helpful to you?
Thank you for voting!
Customer:
Judy from Denver, CO
Parts Used:
WP3387747
Difficulty Level:
A Bit Difficult
Total Repair Time:
30 - 60 mins
Tools:
Nutdriver
The dryer continued to run but no heat
Since we were unable to find our dryer model, we looked up a part number from the side of the heating element. Since we couldn't reach any of these parts we took a picture with our cell phone. I could see the past number of the thermostat in the picture. After that, I was able to find a video of how to remove and install all of the pa rts needed to get our dryer working again. I ordered the parts from the same webpage. The only part we needed was the heating element, but I ordered the thermostat just in case, which I have returned unopened. We are so happy that we don't have to buy a new dryer! Plus it drys our close much faster than before.
0 of 1 people found this instruction helpful.
Was this instruction helpful to you?
Thank you for voting!
  • 1
  • 2
  • 3
Customer Reviews
Average Rating: (4 Reviews)
4.5
★★★★★
★★★★★
Filter By Rating:
  • 5
    3
  • 4
    0
  • 3
    1
  • 2
    0
  • 1
    0
  • 1
Sort by:
Sorry, we couldn't find any existing reviews that matched. Try using some different or simpler keywords.

Model Compatibility

This part works with the following models:
Fix Number: FIX11741416
Manufacturer Part Number: WP3387747
Brand
Model Number
Description
Kenmore
11060052990
Dryer
Kenmore
11060052991
Dryer
Kenmore
11060056990
Dryer
Kenmore
11060056991
Dryer
Kenmore
1106007299
Dryer - Kenmore Dryer Model 110.6007299 (1106007299, 110 6007299) Parts
Kenmore
11060072990
Dryer
Kenmore
11060072991
Dryer
Kenmore
11060092990
Dryer
Kenmore
11060092991
Dryer
Kenmore
11060094990
Dryer
Kenmore
11060094991
Dryer
Kenmore
11060096990
Dryer
Kenmore
11060096991
Dryer
Kenmore
11060097990
Dryer
Kenmore
11060372710
Dryer - Dryer
Kenmore
1106090199
Dryer - Kenmore Dryer Model 110.6090199 (1106090199, 110 6090199) Parts
Kenmore
11060901990
Dryer
Kenmore
1106090299
Dryer - Kenmore Dryer Model 110.6090299 (1106090299, 110 6090299) Parts
Kenmore
11060902990
Dryer
Kenmore
11060904990
Dryer
Kenmore
1106090799
Dryer - Kenmore Dryer Model 110.6090799 (1106090799, 110 6090799) Parts
Kenmore
11060907990
Dryer
Kenmore
11060912990
Dryer
Kenmore
1106092299
Dryer - Kenmore Dryer Model 110.6092299 (1106092299, 110 6092299) Parts
Kenmore
11060922990
Dryer
Kenmore
11060924990
Dryer
Kenmore
1106092799
Dryer - Kenmore Dryer Model 110.6092799 (1106092799, 110 6092799) Parts
Kenmore
11060927990
Dryer
Kenmore
1106093299
Dryer - Kenmore Dryer Model 110.6093299 (1106093299, 110 6093299) Parts
Kenmore
11060932990
Dryer