Ratings submitted by customers like you who bought this part.
?
$27.97
In Stock
Fix Number:
FIX11741405
Manufacturer #:
WP3387134
Manufactured by:
Whirlpool
Works With Model IES5000RQ1!
Product Description
This thermostat is an OEM replacement part for a dryer. It is sold individually. It measures approximately 2-inches by 1.5-inches, is black and silver, and constructed of plastic and metal material. You will find this part attached to the blower wheel housing. Cycling thermostats continually cycle the heating element off and on to maintain a constant inner temperature inside the dryer. This particular cycling thermostat will turn the heating element off once the temperature reaches 155F and cycles back on once the internal temperature drops by 25F. Do not forget to unplug the power to the dryer before you begin this repair. Keep in mind that you will need to pull the dryer out from the wall because this repair will need to be done from the back of the appliance with the back panel removed.
Works with the following brands:
Whirlpool, Kenmore, Maytag, KitchenAid
Works with the following products
Dryer, Washer Dryer Combo
Fixes the following symptoms
Too hot, Not Heating, Heat stays on after drum has stopped
This thermostat is an OEM replacement part for a dryer. It is sold individually. It measures approximately 2-inches by 1.5-inches, is black and silver, and constructed of plastic and metal material. You will find this part attached to the blower wheel housing. Cycling thermostats continually cycle the heating element off and on to maintain a constant inner temperature inside the dryer. This particular cycling thermostat will turn the heating element off once the temperature reaches 155F and cycles back on once the internal temperature drops by 25F. Do not forget to unplug the power to the dryer before you begin this repair. Keep in mind that you will need to pull the dryer out from the wall because this repair will need to be done from the back of the appliance with the back panel removed.
Works with the following brands:
Whirlpool, Kenmore, Maytag, KitchenAid
Works with the following products:
Dryer, Washer Dryer Combo
Fixes the following symptoms:
Too hot, Not Heating, Heat stays on after drum has stopped
Part# WP3387134 replaces these:
AP6008270, 2011, 3-6910, 306910, 3387134, 3387135
...
Show more, 3387139, WP3387134VP Show less
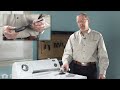
Videos For installing this part.
Replacing your Dryer Cycling Thermostat
Questions and Answers
We're sorry, but our Q&A experts are temporarily unavailable.
Please check back later if you still haven't found the answer you need.
8 questions answered by our experts.
< Prev
1
Next >
Sort by:
Search filter:
Clear Filter
Your search term must have 3 or more characters.
Keep searches simple. Use keywords, e.g. "leaking", "pump", "broken" or "fit".
Sorry, we couldn't find any existing answers that matched. Try using some different or simpler keywords, or submit your new question by using the "Ask a Question" button above!
Robert
January 27, 2022
how do you test the cycle thermostat? Should it be closed on both terminals?
For model number rgd4440sq0
Hello Robert, thank you for contacting us. With a multimeter you can test the two large terminals on the thermostat, they should read closed for continuity and the two small ones should show an ohms resistance value. We hope this helps and good luck with the repair!
3 people found this helpful.
Was this helpful?
Thank you for voting!
Jesse
March 18, 2022
My timer does not advance when in Auto - it never turns off. I tested the cycle thermostat and I get almost zero on the large pins and about 7K on the small ones with the wires unplugged. When running I get 120V on the big pins and nothing on the small ones.
For model number LE5200XTW1
Hi Jesse,
Thank you for your question. If your dryer does not turn off, there are some parts that you will need to check to see which one is causing the issue. You will need to check the cycling thermostat, the thermal fuse, the door catch kit, the lid switch, the timer power resistor, the dryer door actuator spring/lever and the belt. We have included a link that you may reference on how to check some of these parts. Once you have determined the part you need, please feel free to call customer service. We are open 7 days a week and anyone will be happy to assist you. We look forward to hearing from you!
Will not stop in either auto dry or timed mode. Goes into cool down only and continues to run. I am assuming this would eliminate timer? Thank you!
For model number NED4655EW1
Hello Jerome, thank you for asking. There can be several reasons behind the failure of the dryer to stop at auto, dry, or timed mode. We will guide you through the most probable and frequent reasons. It can be caused by a clogged exhaust which can cause restricted airflow. You have to open and clean the exhaust and check the screen lint. If it is damaged you need to change it. Its part number is FIX16543575. It can also be caused by a faulty heating element which has part number FIX334313. It can be caused by a malfunctioning cycling thermostat with part number FIX11741405. Thirdly, it can be a problematic timer with part number FIX11773247. Sometimes it could be an issue with the moisture sensor, you might want to check that too. If it is unable to detect the moisture level the dry stop can not work. Rarely, it can be caused by the dryness control board, and the start switch. Please feel free to ask any follow-up questions regarding the repair and purchase. If you need assistance our customer service is here to help.
Hello, does is this part compatible with this dryer?
For model number MDG6000BWW
Hello Aaron, thank you for your inquiry. Yes, this part will fit your model. Customer service is always available to help you place an order if you are having trouble doing so. Good luck with your repair.
1 person found this helpful.
Was this helpful?
Thank you for voting!
Richard
February 27, 2023
My dryer won’t turn off. What is the most logical part to replace
For model number WED4815EW1
Hello Richard, thank you for your question. Based on our research, the issue is probably due to the timer, part number FIX11749831, and the door switch, part number FIX11750824. Some other parts that can cause this issue in your appliance are the cyclic thermostat, part number FIX11741405, and the thermal fuse, part number FIX11741460. Please test these parts with a multimeter for continuity and replace the defective parts. We hope this helps, good luck with this repair!
My dryer won't start so I replaced the Thermal fuse,cycling thermostat, and the push to start switch and it still won't start.
For model number CGD5832VQ1
Hello Joanne, thank you for reaching out. Based on the description that you have provided, we would recommend you replace the door switch, part number FIX11750824, to fix the issue. We hope this information helps!
My kenmore has 2 thermostats on the blower housing. How to replace it.
For model number 11086160600
Hello Eric, thank you for contacting us. We have attached a relevant video that may not be exactly the same, but will help you in replacing the thermostat. We hope this helps!
Was this helpful?
Thank you for voting!
Henry
May 13, 2022
I need a cycling thermostat that flips between 2 positions. Does WP3387134 do that or does it only shut off 1 position.
Hi Henry,
Thank you for your question. This particular cycling thermostat will turn the heating element off once the temperature reaches 155F and cycles back on once the internal temperature drops by 25F. To verify if this is the correct cycling thermostat for your dryer, we will need the model number from it. We have included a link from our website that you may use to find the model number on it. If you could resubmit your question with this information, we would be happy to help you. We are open 7 days a week. We look forward to hearing from you!
This thermal cut-off kit is for a dryer and is sourced directly from the manufacturer. The thermal cut-off is a safety mechanism that is designed to trip if your dryer is at risk of overheating, to prevent further damage...
The dryer thermal fuse, also sometimes referred to as the thermal cut off or temperature fuse, is a 2 by 1/2-inch, white, plastic safety mechanism that halts the flow of electricity to the motor circuit when a dryer over...
This is a manufacturer-approved high-limit thermostat for your dryer. This part includes one high limit thermostat with a terminal extension arm. It is a safety mechanism that prevents your dryer from overheating. Once t...
Installation Instructions Provided by Fix customers like you.
Average Repair Rating: 3.8 / 5.0, 64 reviews.
< Prev
1
2
3
Next >
Sort by:
Search filter:
Clear Filter
Your search term must have 3 or more characters.
Keep searches simple. Use keywords, e.g. "leaking", "pump", "broken" or "fit".
Sorry, we couldn't find any existing installation instruction that matched.
Checked the heating element and found a break in the heating coil. Decided to change the thermal fuse and the the cycling thermostat because of the age of the dryer.
I ordered the parts I thought may be the problem. If you watch any of the videos to help with a repair most of the video time is spent taking off and putting on the back panel. That being said once the panel was off it took me maybe 20 minutes to install the 4 parts I had ordered. Could have gone faster but also had 3 kids ages 2 and u
... Read morep to work around. This web site not only helps you trouble shoot but then gives discounts for the parts needed and helps with the repair through videos. Obviously the objective was to help customers from start to finish and I believe they achieved just that. Will use this site in the future and tell others about it as well. My instructions are to watch their video to do the repair. Don't rush or get anxious just focus on your task. My wife said the dryer works like new now.
Best site I have ever used for repairs. First a list of what parts were needed was provided right from the start, no guessing. I followed all of the video's provided for installation instructions and and that was it. Very easy to make repairs and almost rebuilt my dated dryer to like new condition. Appliance was in very good physical c
... Read moreondition just needed new components to bring it back. Highly recommend this site to anyone who can turn a wrench.
Dryer ran, heated got to temp but would not heat again
Took off back panel of dryer and be removed old thermostat and thermal fuse. Replaced with the new one and wired up by transferring one wire at a time. Took apart top and front of dryer to get to coil valve. Replaced with new ones. Repair person would have posted 150 to diagnose and additional 50 per part got all three parts shipped for
... Read more 50 so did it myself and saved at least 250.
Dryer would not turn off at the end of the timer cycle
Unlike the video related to the Cycle Thermostat, I had to remove the control panel, top, front and drum to access the part. I might have been able to access it from the lower front panel but given the age I was really happy I took it apart and cleaned all the link out. I found other videos on YouTube to help me take it apart. It works
... Read more perfect now and it is much much quieter. Not sure what I did to quiet it down, but everyone including the cat is happy!
I initially thought to replace the heater element, however the website gave me a list of the possible issues, with the probability ratings conveniently listed next to the part numbers. Not knowing exactly which part was needed I decided to replace all three just to be on the safe side. The parts arrived quickly (about five days) and the i
... Read morenstallation was easy and straightforward. Total cost for this project was about $50 bucks, which sure beats buying a brand new dryer.
Cost was $114.00 to replace all parts , It took longer to take apart & test everything than it did to do the repair ! I tested all parts twice , everything would test fine , I put it all back together and the dryer worked for 5 minutes , did that twice and decided to order all the parts an be done with it . Ordered the parts , that showed
... Read more up at my door in 2 days !!! Turned OFF gas , took off vent hose , took back off with 8 screws , popped up top in the front , took 2 screws off the top in the back removing the brackets , Inside the front under the top removed 2 screws holding on the front , lifted the front and removed . All parts only have 1 or 2 screws holding them in place , removed 1 part at a time , removing and replacing 1 wire from old part to the new part so I did not mix up the wires , replace the part and go to the next part . It was pretty self explanatory replacing the parts , It took 20 minutes to take apart , replace the parts and put back together so my loving wife could do laundry again. You don't realize what a inconvenience it is to go without a dryer for 3 days when you have had one for 37 yrs ..... THANK YOU , 3 days can seem like forever when someone is not happy , but it was much much better than waiting 7 to 10 days for the wrong parts from somewhere else . You have the BEST parts website that I have EVER used !!! THANK YOU AGAIN , Donald
Read less
4 of 8 peoplefound this instruction helpful.
Was this instruction helpful to you?
Thank you for voting!
< Prev
1
2
3
Next >
★
Customer Reviews
Average Rating:
(8 Reviews)
4.1
★★★★★
★★★★★
Filter By Rating:
5★
6
4★
0
3★
0
2★
1
1★
1
< Prev
1
Next >
Sort by:
Search filter:
Clear Filter
Your search term must have 3 or more characters.
Keep searches simple. Use keywords, e.g. "leaking", "pump", "broken" or "fit".
Sorry, we couldn't find any existing reviews that matched. Try using some different or simpler keywords.
★★★★★
★★★★★
Troy T - April 15, 2022
Verified Purchase
Fast delivery and the perfect part.
The instructions was short and very accurate and the web site even had a video of the installation. What more could you have asked for?
★★★★★
★★★★★
Eric G - October 21, 2021
Verified Purchase
cycle thermostat
The part was shipped promptly and worked fine.
★★★★★
★★★★★
Lisa F - January 27, 2021
Verified Purchase
Thermostat
Simple to replace. Works great.
★★★★★
★★★★★
James O - October 22, 2020
Verified Purchase
It worked
Quick delivery & the correct part
★★★★★
★★★★★
Glennell G - March 25, 2020
Verified Purchase
Worked great.
Thanks
★★★★★
★★★★★
Karen M - October 6, 2019
Verified Purchase
Did not fix problem
Part arrived immediately and video was GREAT. Unfortunately, my dryer timer will not advance and my dryer is in danger of over heating as a result.
★★★★★
★★★★★
Donna R C - May 26, 2019
Verified Purchase
Part listed for my machine model doesn't fit
It is not the right part for my machine even though I listed my model number on the website & ordered the recommended part. It can't be used.
★★★★★
★★★★★
David C - May 24, 2019
Verified Purchase
Dryer fixed
The right part at a great price, and received two days after ordered. What else could you ask for.
Model Compatibility
This part works with the following models:
Fix Number: FIX11741405
Manufacturer Part Number: WP3387134
Some of the parts we sell are eligible for mail-in rebates since we can recycle them. We will display any applicable rebates in your shopping cart. To redeem your rebate, contact Customer Service after you have received your part.