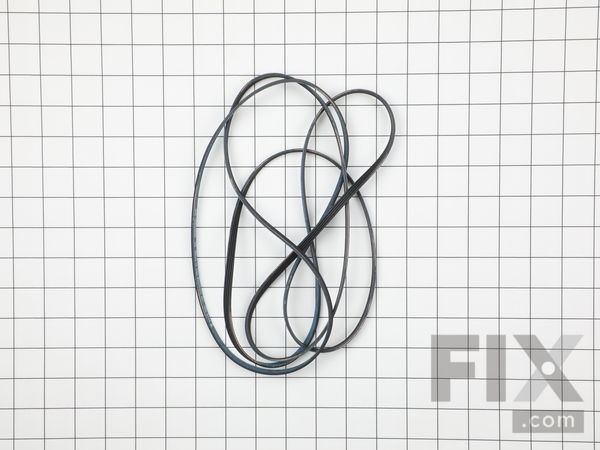
Part Location Diagram of 134503600 Frigidaire Drum Belt
See part 25 in the diagram
Replacing your Frigidaire Dryer Drum Belt
( Grid squares measure 1x1 inch )

Drum Belt

Works With Model AEQB7000ES0!

Rated by 17 customers 

?

Easy 

1- 2 hours 

Ratings submitted by customers like you who bought this part.

?
$17.66
In Stock
Fix Number:
FIX1148434
Manufacturer #:
134503600
Manufactured by:
Frigidaire
Works With Model AEQB7000ES0!

Product Description

The drum belt, also known as a drive belt, is a rubber piece that wraps around the dryer drum, idler pulley, and motor pulley and is used to make the drum rotate. If you can hear the motor running, but the drum is not spinning, it may be an issue with the drum belt. Since it is made of rubber, it can become brittle with age causing it to break. Alternatively, it could be stretched out and no longer gripping to the dryer drum. Both of these issues would require you to replace the belt. To do this repair you will need a putty knife to pop open the top and front panel of your dryer, and a Phillip head screwdriver. Be sure to disconnect the power to your appliance before beginning your repair. This drum belt measures 88 and 3/4 inches long by 1/4 inch wide. As it is a genuine OEM part, this size will be compatible with your appliance model.

Videos For installing this part.

Replacing your Drum Belt

Replacing your Drum Belt

Questions and Answers

We're sorry, but our Q&A experts are temporarily unavailable.
Please check back later if you still haven't found the answer you need.

Installation Instructions Provided by Fix customers like you.

Average Repair Rating: 3.0 / 5.0, 17 reviews.
  • 1
  • 2
Sort by:
Sorry, we couldn't find any existing installation instruction that matched.
Customer:
vaughn from Lancaster, PA
Parts Used:
134503600
Difficulty Level:
Easy
Total Repair Time:
15 - 30 mins
Tools:
Nutdriver
Belt broke
Replaced the belt
3 of 3 people found this instruction helpful.
Was this instruction helpful to you?
Thank you for voting!
Customer:
Timothy from York, PA
Parts Used:
134503600, 5303937139, 131560100
Difficulty Level:
Easy
Total Repair Time:
30 - 60 mins
Tools:
Pliers, Screw drivers, Socket set
motor buzzing and not turning the drum
Before I started the repair, I found the dryer nonoperative. The motor would just buzz. Being that the dryer is 19 years old I figured the bearings seized up. I pulled the small back access panel, took off the belt from the tensioner. And tried to turn the motor shaft. It wasnt budging. So, before ordering parts, I took the dryer apart, t o make sure the rest of the dryer was ok. With a flat head screw driver, I popped the two clips that hold the top to the front of the dryer. Then I laid the top against the wall(its sorta hinged at the back). Then undid to screws, one on each side, where the front attaches to both sides. Then, undid the wiring to the door closed switch, and cut the ziptie to get the wires out of the way. Then, I just pulled up the front a lil, to get it off the side clips, and laid it flat on the ground to undo the clips at the bottom. The upper drum guide was shot, so i knew i needed another one of those. The drum, came out easy. A quick firm tug of the belt upwards unseated the spindle from the bushing in the back, and the drum came out threw the front of the dryer. The belt was ok, but, being so old I figured i might as well replace it. The motor was down at the bottom. One half circular clip holds the back bearing in place, you pop that from the left hand side. One the back of the blower housing is a plastic slider pieced that snugs up against the front motor bearing. Pull that up and out. The blower wheel is left hand threads,(theres an arrow showing direction for off) so make sure you turn the ratchet the correct way Its either a 7/8 or 22 mm, I just used used a 22 mm(its all i had handy) with a extension(and a pair of plyers to hold the other end of the shaft). Youll have to move the motor backwards while unscrewing the blower wheel because there isnt much room in the housing. Once thats detached(you leave the blower wheel in the housing) I unplugged the motor, and lifted it out. There bearings were seized bad. So i ordered a motor, belt and upper drum guide. While waiting, I cleaned ALL the lint buildup inside the dryer.The parts came within 3 days. First i scrapped off the old upper drum guide from the front piece, and glued the new one in. I also used clothes pin sorta clips to to hold it in place while it dried. I let it dry overnight. The following day, i put the motor back in, getting the shaft inside the blower wheel, and turning the wheel on the shaft while positioning the motor where its suppose to sit. Then tightened up the blower wheel with the 22mm socket. It doesnt need to be super tight. You'll have to hold the other end of the motor shaft while tighting it up with a pair a plyers. Then plugged the plug bck into the motor. Once that was done, i took the old belt off the drum, and put the new one on. Make sure the ribs on the belt are facing the same way as the old one. Then it was pretty straight forward really, put the drum back in(i greased up the spindle that sits inside that bushing/bracket). Seated the spindle in the bushing. Put the front panel back on.in reverse order,laid the top back down and seated it to the clips sticking up from the front panel.Then, got into the access panel, and put the belt back on the motor, and tensioner. then put the access cover back on Then it was done and ready to test. Plugged it back into the wall, hooked the duct work back up, and viola, she runs and purrs like a kitten, good as new!
1 person found this instruction helpful.
Was this instruction helpful to you?
Thank you for voting!
Customer:
Gary from SCOTTSDALE, AZ
Parts Used:
134503600
Difficulty Level:
Really Easy
Total Repair Time:
15 - 30 mins
Tools:
Screw drivers
Broken Belt
Watched the video & then did the repair the next day. It was easier than I expected, as I did not take any notes of video. Good price, delivery and all around very satisfied. Thanks!.
1 of 2 people found this instruction helpful.
Was this instruction helpful to you?
Thank you for voting!
Customer:
Russ from Mt. Holly, VT
Parts Used:
134503600
Difficulty Level:
Really Easy
Total Repair Time:
15 - 30 mins
Tools:
Nutdriver, Screw drivers
Drum wouldn't turn
Watched the repair video on this site, then took dryer apart. My dryer was a little different than the one in video, but the video made repair a lot easier. I defenanetly will use this site again, what a money saver.
0 of 1 people found this instruction helpful.
Was this instruction helpful to you?
Thank you for voting!
Customer:
Ben from Corrales, NM
Parts Used:
134503600, 5303281153, 131825900
Difficulty Level:
Easy
Total Repair Time:
1- 2 hours
Tools:
Pliers, Screw drivers, Socket set
thumping sound drum was wobbling
Replaced the drum bearing kit. Hardest part was screwing new screws into the rear bearing. I recommend you screw them in first then take them out then place bearing on drum and screw them back in or youll never bet them on. Add plenty of grease and put the bearing in from outside back not from inside. Alot easier. CAREFUL OF METAL SO SHA RP IT CUTS LIKES RAZOR USE TOWEL AND LONG SLEEVES OR YOULL LOOSE FINGERS EASY.
0 of 1 people found this instruction helpful.
Was this instruction helpful to you?
Thank you for voting!
Customer:
Brent from Maple Grove, MN
Parts Used:
134503600, 5300622032, 131825900
Difficulty Level:
Really Easy
Total Repair Time:
1- 2 hours
Tools:
Nutdriver, Pliers, Screw drivers
No heat, drum would spin
so eliminated idea of thermostat. replaced heating element coil. also replaced drum bearing and belt as long as it was apart Forgot to mention how quickly we received our parts. Amazingly fast. Thank you .
0 of 1 people found this instruction helpful.
Was this instruction helpful to you?
Thank you for voting!
Customer:
Ken from Oneonta, NY
Parts Used:
134503600
Difficulty Level:
Really Easy
Total Repair Time:
30 - 60 mins
Tools:
Pliers, Screw drivers
Drum belt replacement. Item in dryer tangled, jammed the drum and broke the belt.
This model dryer has the controls on the front, top of the machine. The video provided on the part select web site has the controls at the top rear of the machine. To access the belt you need to remove the top panel, releasing the screws and spring clips, front and back. Then you need to remove the front panel (with the door and drum seal ) by removing the two screws inside, top left and right and then releasing the spring clips below the screws. This can be done as the video shows with a metal putty knife. The front panel can stay attached with its wiring and swung to the right side out of the way. The old belt can be removed and the new belt positioned from the front by lifting the drum an inch or so and sliding the belt under and around the drum. Then the belt can be positioned on the motor pulley and spring idler as per the video using a mirror with a good light. Be sure that the grooved side of the belt is on the outside of the drum.
0 of 1 people found this instruction helpful.
Was this instruction helpful to you?
Thank you for voting!
Customer:
Steven from Citrus Heights, CA
Parts Used:
134503600, 5303281153, 131825900
Difficulty Level:
Really Easy
Total Repair Time:
1- 2 hours
Tools:
Screw drivers
Dryer was making a squealing noise
On the back of the dryer there is an inspection cover, remove it and you can get to the belt. release tension and remove the belt (Very easy to do, no tools required). Two screws hold the top in place, remove, slide top back and set to side. There are two screws and four clips holding the front on remove the screws and pop the clips loos e, unplug wiring harness and remove front. Remove plastic guide that is in front of the drum, pop drum up and out of bracket holding the back, slide drum out the front. Now you have access to the rear drum bearing. Reassemble in the reverse order. There is a good video online that you can follow prior to starting this project.
0 of 1 people found this instruction helpful.
Was this instruction helpful to you?
Thank you for voting!
Customer:
Carol from Concord, NC
Parts Used:
134503600
Difficulty Level:
Difficult
Total Repair Time:
1- 2 hours
Tools:
Screw drivers
squicking coming from dryer so thought it needed belt replacement
Opening the dryer and replacing the belt was not that hard but getting the front on straight was a chore. The dryer is old and one of the bottom clips broke when I took the front off. This made getting the front lined up to put the two screws in very difficult.The other clips on the front were missing. Took me a long time to get it all li ned up to finish. The dryer still has a squeak. Not as bad as before. I would suggest greasing any parts that need it before closing the dryer and finishing the job.
0 of 1 people found this instruction helpful.
Was this instruction helpful to you?
Thank you for voting!
Customer:
Debra from San Jose, CA
Parts Used:
134503600, 5303281153
Difficulty Level:
Easy
Total Repair Time:
1- 2 hours
Tools:
Nutdriver, Pliers, Screw drivers, Wrench set
Increasing loud screeching as the dryer functioned-HORRID!
There is no need for me to describe how my friend and I did this repair as this site offers wonderful video instruction! I am a 50 year old woman, willing to try new things...like dryer repair... we simply took our time and followed the video instructions. I have stackable washer & dryer so this wasn't a one woman/man job. It was smoo th as silk and my dryer is back to like-new condition! THANK YOU!
0 of 1 people found this instruction helpful.
Was this instruction helpful to you?
Thank you for voting!
  • 1
  • 2

Model Compatibility

This part works with the following models:
Fix Number: FIX1148434
Manufacturer Part Number: 134503600
Brand
Model Number
Description
Frigidaire
41749012890
Dryer - Residential, Electric
Frigidaire
41749022890
Dryer - Residential, Electric
Kenmore
41759012890
Dryer - Kemore Dryer 41759012890
Frigidaire
41759022890
Dryer - Gas
Kenmore
41761712510
Washer Dryer Combo - LAUNDRY CENTER
Kenmore
41761722510
Washer Dryer Combo - LAUNDRY CENTER
Kenmore
41761723510
Washer Dryer Combo - LAUNDRY CENTER
Kenmore
41764182300
Dryer
Kenmore
41769042990
Dryer
Kenmore
41769042991
Dryer
Kenmore
41769052991
Dryer
Kenmore
41771712510
Washer Dryer Combo - LAUNDRY CENTER
Kenmore
41771712511
Washer Dryer Combo - LAUNDRY CENTER
Kenmore
41771722510
Washer Dryer Combo - LAUNDRY CENTER
Kenmore
41771722511
Washer Dryer Combo - LAUNDRY CENTER
Kenmore
41771723510
Washer Dryer Combo - LAUNDRY CENTER
Kenmore
41771723511
Washer Dryer Combo - LAUNDRY CENTER
Kenmore
41774182300
Dryer
Kenmore
41774182301
Dryer
Kenmore
41779042900
Dryer - Kenmore Dryer Model 417.79042900 (41779042900, 417 79042900) Parts
Kenmore
41779042990
Dryer
Kenmore
41780032990
Dryer
Kenmore
41780042991
Dryer
Kenmore
4178005291
Dryer - Kenmore Dryer Model 417.8005291 (4178005291, 417 8005291) Parts
Kenmore
41780412700
Dryer
Kenmore
41781042000
Dryer
Kenmore
41781142000
Dryer
Kenmore
41781142001
Dryer
Kenmore
41782042101
Dryer
Kenmore
41782042102
Dryer