Part Location Diagram of WP6-3037050 Whirlpool Idler Pulley Wheel
See part 16 in the diagram
Replacing your Maytag Dryer Idler Pulley Wheel
( Grid squares measure 1x1 inch )

Idler Pulley Wheel WP6-3037050

Works With Model LDE9806ADE!

Rated by 14 customers 

?

Easy 

1- 2 hours 

Ratings submitted by customers like you who bought this part.

?
$19.25
In Stock
Fix Number:
FIX11743028
Manufacturer #:
WP6-3037050
Manufactured by:
Whirlpool
Works With Model LDE9806ADE!

Product Description

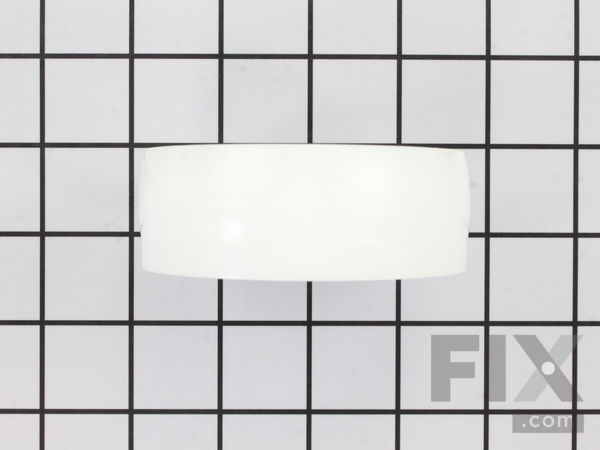
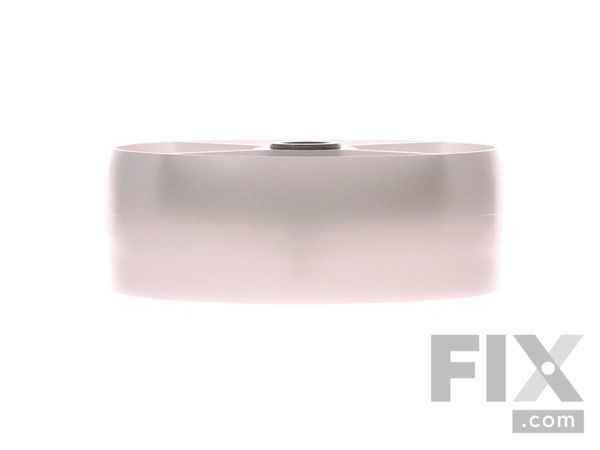
This part is used to help the belt to rotate the drum. It is white and made of plastic with a metallic bearing in the center.

Videos For installing this part.

Replacing your Idler Pulley Wheel

Replacing your Idler Pulley Wheel

Questions and Answers

We're sorry, but our Q&A experts are temporarily unavailable.
Please check back later if you still haven't found the answer you need.

View More View Less
Drum Support Roller Kit
$13.49
In Stock
Front Glide Kit
$14.69
In Stock
Tumbler and Motor Belt
$32.39
In Stock
Roller Shaft
$9.80
In Stock
Idler Pulley Shaft Washer
$13.44
In Stock
Idler Pulley Arm
$56.20
In Stock
Affresh Washing Machine Cleaner - 3 pack
$12.58
In Stock
Produce Preserver Filter
$21.50
In Stock
Affresh Dishwasher Cleaner Tablets - 6
$19.09
In Stock
Cooktop Cleaning Cream
$15.57
In Stock
Cooktop Cleaner
$17.74
In Stock
Affresh Cleaner
$19.09
In Stock

Installation Instructions Provided by Fix customers like you.

Average Repair Rating: 3.1 / 5.0, 14 reviews.
  • 1
  • 2
Sort by:
Sorry, we couldn't find any existing installation instruction that matched.
Customer:
James from Gainesville, GA
Parts Used:
WPY312959, WP6-3037050, 306508, 12001541
Difficulty Level:
Very Easy
Total Repair Time:
1- 2 hours
Tools:
Nutdriver, Pliers, Screw drivers
"Sqealing" noise when drum rotating
Disconnected power supply, removed front panel, removed tub support bracket, removed electrical lines from light and door switch( to have better access to install front guide kit), removed belt, removed drum, removed old rollers, installed new rollers and rest of installation was in reverse order of taking machine apart. In order to insta ll the front guide kit(which I've never done before), I had to watch the installation instructions via you-tube. This was a tremendous aide as the instructions were simple and very adequate.
27 of 28 people found this instruction helpful.
Was this instruction helpful to you?
Thank you for voting!
Customer:
Brian from Novi, MI
Parts Used:
WP6-3129480, WP6-3037050, WPY312959, WPY312527, 306508, 12001541, WP9703438, WP354987
Difficulty Level:
Easy
Total Repair Time:
30 - 60 mins
Tools:
Nutdriver, Screw drivers, Socket set
Squeaking noises while running dryer
Followed the Video Directions from website. All went as planed. The dryer is running like new now.
13 of 14 people found this instruction helpful.
Was this instruction helpful to you?
Thank you for voting!
Customer:
Paul from Springfield, IL
Parts Used:
WP6-3037050, WPY312959, 12001541
Difficulty Level:
Easy
Total Repair Time:
30 - 60 mins
Tools:
Nutdriver, Pliers, Screw drivers
broken dryer belt.
I followed the instructions on each part that was sent to me. I've taken the front and tumbler assembly off before, so that was already easy. The tip that is not offered that makes a huge difference in replacing the belt is this. Make sure that you take the belt out if the bag and let it rest for a few minutes before installing. Also, m ake sure that you have the ribbed side of the belt facing up on the tumbler. It is easier to get it right while the tumbler is out of the unit than when it's inside and you are working in a 1 foot section.
4 of 5 people found this instruction helpful.
Was this instruction helpful to you?
Thank you for voting!
Customer:
Steven from Troy, OH
Parts Used:
WP6-3129480, WP6-3037050, WPY312959, 12001541
Difficulty Level:
Easy
Total Repair Time:
30 - 60 mins
Tools:
Nutdriver, Pliers
Dryer was making noise like an indy car now like a Prius
Exactly like in the online video. The video was an excellent tool for this repair. Thank you, !
2 of 4 people found this instruction helpful.
Was this instruction helpful to you?
Thank you for voting!
Customer:
James from Canyon Lake, TX
Parts Used:
W10410999, WP6-3037050, 12001541
Difficulty Level:
Easy
Total Repair Time:
More than 2 hours
Tools:
Pliers, Screw drivers, Socket set
dryer shut off. restarted and motor shut off again after about 10 seconds. smelled burning. .
used u tube video to show me how to do the job. this slowed me down but the video showed the exact model of the dryer and how to take it apart and put back together. was easy. the problem was easy to figure out because the motor was actually smoking and was hard to turn the shaft. the drum rollers and the idlier wheel were turning ok. not hing left to cause the problem. proof was when it went back together it ran smooth and quite the way it was supposed to.
1 of 3 people found this instruction helpful.
Was this instruction helpful to you?
Thank you for voting!
Customer:
Anita from WILLOW SPGS, MO
Parts Used:
WP6-3037050
Difficulty Level:
Really Easy
Total Repair Time:
30 - 60 mins
Tools:
Screw drivers, Socket set
Pulley wheel wore out and loose
Put pulley on from back access then removed front panel adjusted belt then tightened wheel..by the way I am a 59 year old woman
1 person found this instruction helpful.
Was this instruction helpful to you?
Thank you for voting!
Customer:
Robert from Encinitas, CA
Parts Used:
WP6-3129480, WP6-3037050, WPY312959, 12001541
Difficulty Level:
Easy
Total Repair Time:
1- 2 hours
Tools:
Screw drivers, Socket set, Wrench set
periodic screeching sound
1. bought the only snap ring pliers available at homedepot. 2. turned off the gas and unplugged 3. moved it away from back wall. 4. removed front panel. 5. removed drum housing. 6. slid off belt. 7. removed drum. 8 found one frozen roller and a second with roller washer severely worn washer. The pins on the snap ring plier were too lar ge to insert into the spring rings. ground the small pins down with a power grinder until finally fit. (took a long time). Finally fit well enough to get retaining rings off. 9. replaced both shafts and rollers, though it was unclear whether the solid shafts needed replacement. 10. from rear, removed access panel and replaced idler pulley wheel. 11. placed drum back with new belt, then fit it over motor and pulley. Took a bit to get it fitted correctly. Much easier from rear panel than reaching around. 12. reinstalled housing and front panel. Problem areas: GET A SMALL SNAP RING PLIERS THAT WILL FIT ! Easier to install belt around idler pulley wheel from rear access panel. Replacement of roller shafts was probably not necessary. Works great now.
0 of 1 people found this instruction helpful.
Was this instruction helpful to you?
Thank you for voting!
Customer:
Patricia from Toms River, NJ
Parts Used:
WP6-3037050, WPY312959, WPY312527, 12001541
Difficulty Level:
Really Easy
Total Repair Time:
15 - 30 mins
Tools:
Nutdriver, Screw drivers
Loud noise while spinning, metal to metal sounds
Removed dryer from laundry room, removed front cover, removed drum, replaced parts, reassembled, returned dryer to laundry room, no more noise, like new. Very easy even for a woman to do.
0 of 1 people found this instruction helpful.
Was this instruction helpful to you?
Thank you for voting!
Customer:
Patricia from Parker, AZ
Parts Used:
WP6-3037050
Difficulty Level:
Very Easy
Total Repair Time:
30 - 60 mins
Tools:
Pliers
Broken belt and idle wheel
I followed the instructions on the video they provided and that's it. So so helpful??
0 of 1 people found this instruction helpful.
Was this instruction helpful to you?
Thank you for voting!
Customer:
Michael from Camino, CA
Parts Used:
WP6-3129480, WP6-3037050, WPY312959, WPY312527, Y303836, 12001541, WP9703438
Difficulty Level:
Easy
Total Repair Time:
More than 2 hours
Tools:
Nutdriver, Pliers, Screw drivers, Wrench set
I had a horrendous squealing noise that sounded like bearings that needed oil.
First I watched the video on how to take the front off and gain access. Simple and straight fore ward. Then watched the video on how to remove the drum. Simple. Located the Drum Rollers. I spun the right one---it was grinding and definitely bad. I spun the left one---it was not as bad but still did not spin freely and quietly. Watc hed the video on how to install new Roller Shafts and Drum Wheels. I needed a 1/2" box wrench to remove the hex nut holding the Roller Shaft (not a 5/8" as in the video). A simple job. I then watched the video on how to install a new Blower Wheel. My Blower Wheel wobbled a little. It fit a little loose on the shaft and vibrated when spinning. So I replaced it as long as I had the dryer open anyway. Likewise for the Idler Pulley Wheel. I don't know if it was also making noise but I replaced it anyway. Again a simple job. I took time to clean and vacuum up all the lint and dust from the entire insides as needed. Good for another 10 years now! The videos make this an "easy" repair project. This was my first repair on any Dryer. I spent more time cleaning up the dust etc. inside than I did installing the new parts. It runs great now! Quiet! Since it is over ten years old I would imagine the next thing to fail will be something electrical but now I know I can learn how to repair what ever is needed from the appropriate video and then order the parts.
0 of 1 people found this instruction helpful.
Was this instruction helpful to you?
Thank you for voting!
  • 1
  • 2

Model Compatibility

This part works with the following models:
Fix Number: FIX11743028
Manufacturer Part Number: WP6-3037050
Brand
Model Number
Description
Maytag
DE106
Dryer - Electric
Maytag
DE107
Dryer - Electric
Maytag
DE110
Dryer - Electric
Maytag
DE180
Dryer - Maytag Dryer Model DE180 Parts
Maytag
DE18CA
Dryer - Electric
Maytag
DE18CM
Dryer - Electric
Maytag
DE18CS
Dryer - Electric
Maytag
DE18CT
Dryer - Electric
Maytag
DE19CA
Dryer - Electric
Maytag
DE19CD
Dryer - Electric
Maytag
DE19CS
Dryer - Electric
Maytag
DE19CT
Dryer - Electric
Maytag
DE210
Dryer - Electric
Maytag
DE212
Dryer - Residential
Maytag
DE21CA
Dryer - Electric
Maytag
DE21CM
Dryer - Electric
Maytag
DE21CS
Dryer - Electric
Maytag
DE21CT
Dryer - Electric
Maytag
DE22CA
Dryer - Electric
Maytag
DE22CS
Dryer - Electric
Maytag
DE22CT
Dryer - Electric
Maytag
DE23CD
Dryer - Electric
Maytag
DE24CA
Dryer - Electric
Maytag
DE24CM
Dryer - Electric
Maytag
DE24CS
Dryer - Electric
Maytag
DE24CT
Dryer - Electric
Maytag
DE25CS
Dryer - Electric
Maytag
DE26CA
Dryer - Commercial
Maytag
DE26CD
Dryer - Commercial
Maytag
DE26CS
Dryer - Electric