Part Location Diagram of 279769 Whirlpool Thermal Cut-Off Kit
See part 20 in the diagram
Replacing your Kenmore Dryer Thermal Cut-Off Kit
( Grid squares measure 1x1 inch )

Thermal Cut-Off Kit

★★★★★
★★★★★
2 Reviews

Rated by 22 customers 

?

Really Easy 

30 - 60 mins 

Ratings submitted by customers like you who bought this part.

?
$28.85
In Stock
Fix Number:
FIX334278
Manufacturer #:
279769
Manufactured by:
Whirlpool

Product Description

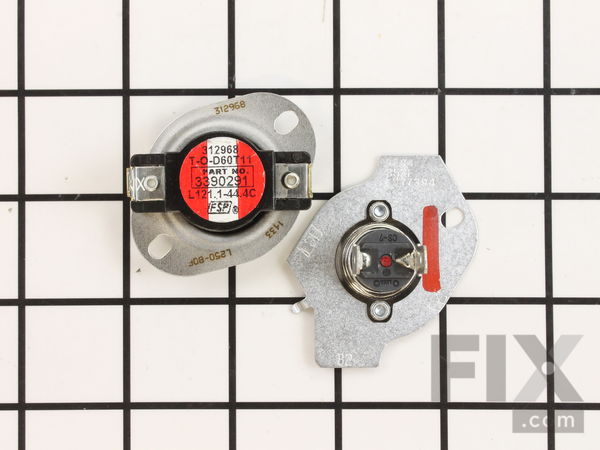
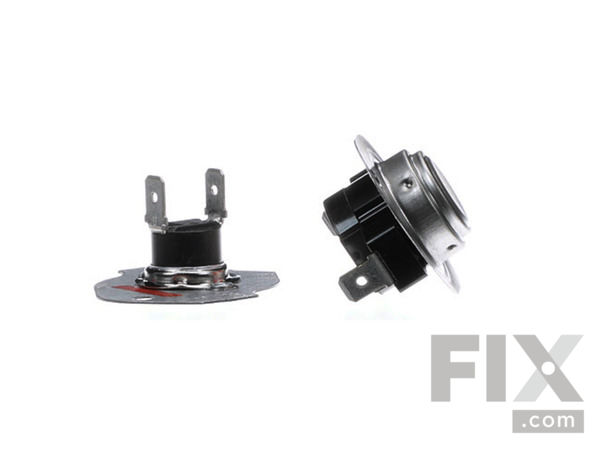
This genuine OEM kit includes a high limit thermostat and a thermal cut-off fuse for your dryer. The thermostat has a limit of 250 degrees Fahrenheit, and the fuse has a limit of 360 degrees Fahrenheit. The purpose of these parts is to prevent your dryer from overheating. If your clothes are coming out of the dryer too hot, or there is no heat at all, it is likely that these parts will need to be replaced. To complete this repair, you will need a putty knife, quarter-inch nut driver, and a pair of pliers. Please be sure to disconnect the power supply to your dryer before beginning this repair. The thermostats are located on the element housing, and we find it easiest to remove the entire heating assembly from the dryer in order to replace these parts. Take note when removing the old thermostats, if there is any discoloration on the terminals then the wire ends may also need to be replaced.

Videos For installing this part.

Replacing your Thermal Cut-Off Kit

Replacing your Thermal Cut-Off Kit

Questions and Answers

We're sorry, but our Q&A experts are temporarily unavailable.
Please check back later if you still haven't found the answer you need.

Installation Instructions Provided by Fix customers like you.

Average Repair Rating: 3.7 / 5.0, 22 reviews.
  • 1
  • 2
  • 3
Sort by:
Sorry, we couldn't find any existing installation instruction that matched.
Customer:
jeffrey from Brookhaven, PA
Parts Used:
WP8577274, WP3390719, WP3387747, 279769, 279570
Difficulty Level:
Easy
Total Repair Time:
30 - 60 mins
Tools:
Screw drivers, Socket set, Wrench set
Dryer would run, but not heat
Needed it running quick, so no diagnostics. Ordered one of everything that could fix problem (plus a new door catch). Tipped it onto it's back & popped the bottom cover off. Element, thermal cutoff, thermistor, and fuse. were right in front and held by 2 screws each (don't drop them, don't ask). A little bit tight inside, but no big issu e. vacuumed the inside, replaced everything (it was the Heating Element, by the way), slapped the cover on, and put it back in its spot. works like it was new. Yes, I unplugged it first. Remember! Safety Third!
22 of 26 people found this instruction helpful.
Was this instruction helpful to you?
Thank you for voting!
Customer:
Sheryl from North Little Ro, AR
Parts Used:
279769, 279457
Difficulty Level:
Really Easy
Total Repair Time:
Less than 15 mins
Tools:
Nutdriver
Dryer ran, but without heat.
offered a youtube video for the repair. My dryer looked a little different, but the parts were the same. When I ordered a thermostat button, I noticed a wire kit, too. Both parts showed to be 95% most common repairs for problem. Sure enough, I needed BOTH parts. I had a burnt wire, and the thermostat button adjacent to the burnt wire was out, too. Thanks for the info; you saved me a lot of time by providing this information! I just clipped the burnt wire, removed 1/2" of casing and joined the new wire end to the rest of the wire with the wire nut provided. The button was attached with two hex-head screws, so I removed them with the nut driver, removed the wires and plugged them into the new part and screwed it back in place. Plugged the dryer back in and had heat again!
6 of 7 people found this instruction helpful.
Was this instruction helpful to you?
Thank you for voting!
Customer:
Christopher from New Castle, DE
Parts Used:
WP8577274, WP3392519, 279769
Difficulty Level:
Easy
Total Repair Time:
30 - 60 mins
Tools:
Screw drivers, Socket set
dryer blow fuse, was running hot
replaced the above items, dryer worked but did not solve the problem of running hot on all settings, replaced the temp gauge, did not solve the problem. Realized it was probably the electronic control assy. Decided to replace the dryer given this one's age and the ability to get a new one for about $400. Parts sent were correct. I sho uld have checked the continuity of the parts prior to buying the new ones. Probably only needed a fuse.
2 of 3 people found this instruction helpful.
Was this instruction helpful to you?
Thank you for voting!
Customer:
michael from Darien, CT
Parts Used:
279769
Difficulty Level:
Very Easy
Total Repair Time:
Less than 15 mins
Tools:
Nutdriver
My thermal cut out went bad
Replaced thermal cut out
1 person found this instruction helpful.
Was this instruction helpful to you?
Thank you for voting!
Customer:
Wesley from Cleveland, TX
Parts Used:
WP3387747, 279769
Difficulty Level:
Very Easy
Total Repair Time:
15 - 30 mins
Tools:
Nutdriver, Screw drivers
Dryer not heating
Removed front lower panel. Removed heating element casing, replaced all 3 parts, reinstalled into dryer. Very simple. Clean lint while doing repair. Make sure you remember where your wires go.
1 person found this instruction helpful.
Was this instruction helpful to you?
Thank you for voting!
Customer:
Vernon from Woolwich, ME
Parts Used:
279769
Difficulty Level:
Very Easy
Total Repair Time:
15 - 30 mins
Tools:
Nutdriver, Screw drivers
No Hot Air..
1 - took back off.... 2- tested element... it's ok.... ouch.. 3- went on line to check price of new machine... ouch.. too much.... 4.. queried UTUBE found you folks 5- ordered the parts.. & got them in a flash .. 5- installed and cleaned the vent hose, then dried first load... in about 30 min... ( with out any blood ) I'm guessing that dryer is about 35 yrs old...It's always been the heating element ... kinda threw me at first,,,, so to you folks thanks for saving me some money....BTW I'm 73... so the pc thingie was the hard part...take care vb
1 person found this instruction helpful.
Was this instruction helpful to you?
Thank you for voting!
Customer:
micah from CLOQUET, MN
Parts Used:
279769, 279457
Difficulty Level:
Easy
Total Repair Time:
30 - 60 mins
Tools:
Nutdriver, Pliers, Screw drivers, Socket set
My dryer ran but with no heat.
First, remove the front panel just below the door. To do this, tip the dryer back a little. You can then see how the two clips on the top and the two on the bottom work. Now remove the forwardmost tubing by removing the two screw holding it in place. Next, remove the panel in front of the housing holding the heating element, high temperat ure fuse, and the thermal cut-off(Three of the four components that may be your problem. All of these can be tested with a multimeter on ohms. As can your fourth item located on the housing behind the heating tube previously removed. This item is your high temperature thermostat. If there is infinite resistance, the part is bad.). Disconnect the six wires connected to the components inside the heating element. Now, remove the housing by twisting right 45 degrees and then lifting up and to the right. From this point the removal and replacement is obvious. Now when I removed my housing, one of my wire ends was corroded and broke, so I needed to buy the above end and replace it. The end comes with instructions.
1 person found this instruction helpful.
Was this instruction helpful to you?
Thank you for voting!
Customer:
Phillip M from Remlap, AL
Parts Used:
WP4391960, 279769
Difficulty Level:
Easy
Total Repair Time:
15 - 30 mins
Tools:
Nutdriver, Screw drivers
Dryer ran But No Heat
Removed Dryer Back And Checked Parts With An Ohm Meter. Found Parts Were Open.Dryer Vent To Outside Was Stopped Up.Cleaned Out Lint. Replaced Parts Unit Runs Fine Now
0 of 1 people found this instruction helpful.
Was this instruction helpful to you?
Thank you for voting!
Customer:
Mike from Marysville, WA
Parts Used:
WP3392519, WP3387134, 279769
Difficulty Level:
Really Easy
Total Repair Time:
30 - 60 mins
Tools:
Nutdriver
Dryer getting to hot and shutting off to early.
I replaced a total of 5 parts that were the to be the problem Solvers. Thermostat, Internal-Bias Thermal Fuse Thermal Cut-Off Kit just because I did not want to get just one of the so called culprits and have that not be the problem and have to wait another 6 days for the next possible could be part.The total cost was $69.00 all works li ke new now.Yes I would recommend this site for future resources
0 of 1 people found this instruction helpful.
Was this instruction helpful to you?
Thank you for voting!
Customer:
Patrick from Columbia, MD
Parts Used:
279769
Difficulty Level:
Easy
Total Repair Time:
1- 2 hours
Tools:
Screw drivers
Dryer still tumbling, but no longer heating
The "how to" video on the website is fantastic, and I followed every step in the video. I had a technician originally come out to check on the problem, as this is the dryer that came with the house. The thermal and cut off fuse had gone bad, and they wanted $250 to repair it. The parts were only $30 with shipping. After removing the front panel, I removed all the screws from the heating unit, and disconnected the wires. I then unlocked and removed the entire heating unit, which made it easier to replace the fuses. The only reason it took as long as it did was due to the 5+ years of lint that had built up in the machine, so I spent most of the time vacuuming it up. It was a little tricky reinstalling the heating unit, but keep working to snap the ledge back into place. Dryer is working perfectly again.
0 of 1 people found this instruction helpful.
Was this instruction helpful to you?
Thank you for voting!
  • 1
  • 2
  • 3
Customer Reviews
Average Rating: (2 Reviews)
4.5
★★★★★
★★★★★
Filter By Rating:
  • 5
    1
  • 4
    1
  • 3
    0
  • 2
    0
  • 1
    0
  • 1
Sort by:
Sorry, we couldn't find any existing reviews that matched. Try using some different or simpler keywords.

Model Compatibility

This part works with the following models:
Fix Number: FIX334278
Manufacturer Part Number: 279769
Brand
Model Number
Description
Kenmore
11060052990
Dryer
Kenmore
11060052991
Dryer
Kenmore
11060056990
Dryer
Kenmore
11060056991
Dryer
Kenmore
1106007299
Dryer - Kenmore Dryer Model 110.6007299 (1106007299, 110 6007299) Parts
Kenmore
11060072990
Dryer
Kenmore
11060072991
Dryer
Kenmore
11060092990
Dryer
Kenmore
11060092991
Dryer
Kenmore
11060094990
Dryer
Kenmore
11060094991
Dryer
Kenmore
11060096990
Dryer
Kenmore
11060096991
Dryer
Kenmore
11060097990
Dryer
Kenmore
1106090199
Dryer - Kenmore Dryer Model 110.6090199 (1106090199, 110 6090199) Parts
Kenmore
11060901990
Dryer
Kenmore
1106090299
Dryer - Kenmore Dryer Model 110.6090299 (1106090299, 110 6090299) Parts
Kenmore
11060902990
Dryer
Kenmore
11060904990
Dryer
Kenmore
1106090799
Dryer - Kenmore Dryer Model 110.6090799 (1106090799, 110 6090799) Parts
Kenmore
11060907990
Dryer
Kenmore
11060912990
Dryer
Kenmore
1106092299
Dryer - Kenmore Dryer Model 110.6092299 (1106092299, 110 6092299) Parts
Kenmore
11060922990
Dryer
Kenmore
11060924990
Dryer
Kenmore
1106092799
Dryer - Kenmore Dryer Model 110.6092799 (1106092799, 110 6092799) Parts
Kenmore
11060927990
Dryer
Kenmore
1106093299
Dryer - Kenmore Dryer Model 110.6093299 (1106093299, 110 6093299) Parts
Kenmore
11060932990
Dryer
Kenmore
1106093699
Dryer - Kenmore Dryer Model 110.6093699 (1106093699, 110 6093699) Parts