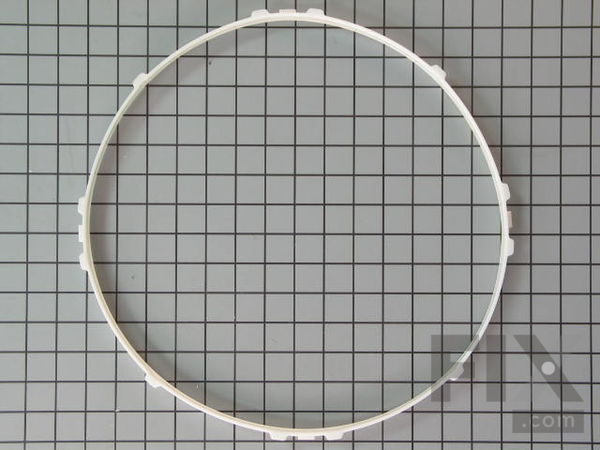
Bearing Ring
$76.42
Special Order
Fix Number: FIX11741469
Manufacturer #: WP3394508
Manufactured by:
Whirlpool
-
Product Description
Fits around the front of the drum.
-
Works with the following brandsKenmore, Whirlpool, Roper, KitchenAid
-
Works with the following productsDryer, Washer Dryer Combo
-
Fixes the following symptomsNoisy
-
Part Number Cross ReferencePart# WP3394508 replaces these:296780, 297936, 299798, 3394508
Product Description
Fits around the front of the drum.
-
Works with the following brands:Kenmore, Whirlpool, Roper, KitchenAid
-
Works with the following products:Dryer, Washer Dryer Combo
-
Fixes the following symptoms:Noisy
-
Part# WP3394508 replaces these:296780, 297936, 299798, 3394508
Questions and Answers
We're sorry, but our Q&A experts are temporarily unavailable.
Please check back later if you still haven't found the answer you need.
Related PartsAdditional or alternate parts to consider.
Installation Instructions Provided by Fix customers like you.
- < Prev
- 1
- Next >
Sort by:
Search filter:
Clear Filter
Your search term must have 3 or more characters.
Keep searches simple. Use keywords, e.g. "leaking", "pump", "broken" or "fit".
Sorry, we couldn't find any existing installation instruction that matched.
-
Customer:Robert from Dallas, TX
-
Parts Used:WP3394508
-
Difficulty Level:Easy
-
Total Repair Time:15 - 30 mins
-
Tools:Nutdriver, Screw drivers
Front drum bearing wore our, broke and fell into the drum
1) After unplugging the power cord, I removed the lint screen, unscrewed and using a Phillips head scre driver, I removed the two screws attaching the lint screen housing to the cabinet top and popped the top open at the front of the cabinet using the putty knife, swinging the top open. 2) I then disconnected the door switch on the inside of the front panel, removed the two hex-head screws attaching the top of the front panel to the cabinet sides using a nut driver and lifted off the front panel, setting it aside. 3) I then took the new drum bearing and positioned it at the front of the drum opening, aligning the clips into their respective slots inside the drum's front lip. The first two clips went in relatively easily, but as the gasket was somewhat larger in diameter than the inner diameter of the drum, so I had to gently bow the excess plastic of the gasket away from the drum. 4) Once I got the 3rd clip aligned with the slot, I was able to gently snap the gasket against the inside of the drum, forming a compression fit inside the drum and getting the last clip positioned in its respective hole. 5) I re-positioned the front panel onto the two bottom tabs of the cabinet and proceeded to reverse the steps I took in taking the cabinet apart. 6) Once I verified the cabinet was properly assembled, I replaced the lint screen and plugged the power cord into the outlet. 7) I turned on the dryer to test and the dryer ran just fine. 8) DONE!
Was this instruction helpful to you?
Thank you for voting!
- < Prev
- 1
- Next >
Model Compatibility
This part works with the following models:
Fix Number: FIX11741469
Manufacturer Part Number: WP3394508
Brand
Model Number
Description