Some of the parts we sell are eligible for mail-in rebates since we can recycle them. We will display any applicable rebates in your shopping cart. To redeem your rebate, contact Customer Service after you have received your part.
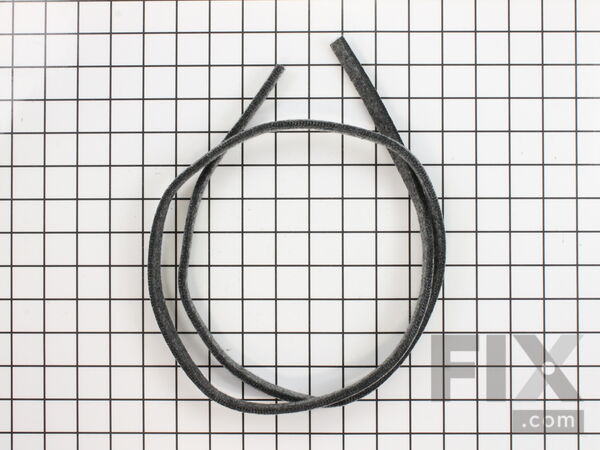
Duct Felt Seal
- Fix Number:
- FIX12722961
- Manufacturer #:
- WE09X27634
- Manufactured by:
- GE
- Product Description
- This is a duct felt seal for a dryer. The duct felt seal allows the front-load dryer drum to glide smoothly on the front panel. Your dryer will not function properly if the drum felt seal is compromised. Disconnect power to the dryer before completing this repair. You will need to remove the front of the dryer to gain access to the felt seal. This felt seal may differ in appearance from your original but will function the same as your original. This is an OEM replacement part that is sourced directly from the authentic manufacturer.
- Works with the following brands:
- General Electric, Hotpoint, Kenmore
- Works with the following products
- Dryer, Washer Dryer Combo
- Fixes the following symptoms
- Noisy, Marks left on clothes, Too hot
- Part# WE09X27634 replaces these:
- WE09M0015, WE09X20441, WE9M15, WE9M30
Product Description
This is a duct felt seal for a dryer. The duct felt seal allows the front-load dryer drum to glide smoothly on the front panel. Your dryer will not function properly if the drum felt seal is compromised. Disconnect power to the dryer before completing this repair. You will need to remove the front of the dryer to gain access to the felt seal. This felt seal may differ in appearance from your original but will function the same as your original. This is an OEM replacement part that is sourced directly from the authentic manufacturer.
-
Works with the following brands:General Electric, Hotpoint, Kenmore
-
Works with the following products:Dryer, Washer Dryer Combo
-
Fixes the following symptoms:Noisy, Marks left on clothes, Too hot
-
Part# WE09X27634 replaces these:WE09M0015, WE09X20441, WE9M15, WE9M30
Videos For installing this part.
Replacing your Duct Felt Seal

Questions and Answers
We're sorry, but our Q&A experts are temporarily unavailable.
Please check back later if you still haven't found the answer you need.
Related Parts Additional or alternate parts to consider.
Installation Instructions Provided by Fix customers like you.
- < Prev
- 1
- 2
- 3
- Next >
- Customer:
- Donald L. from Belmont, MA
- Parts Used:
- WE09X27634, WE1M1067, WE3M26, WE1M504
- Difficulty Level:
- Really Easy
- Total Repair Time:
- 30 - 60 mins
- Tools:
- Screw drivers
- Customer:
- Nae from BRENTWOOD, TN
- Parts Used:
- WE09X27634, WE03X29897, WE05X20431, WE3M26, WE1M504, WE2M96, WE12X83
- Difficulty Level:
- Really Easy
- Total Repair Time:
- 30 - 60 mins
- Tools:
- Screw drivers
- Customer:
- Gerald from Schertz, TX
- Parts Used:
- WE09X27634, WE1M1067, WE1M504
- Difficulty Level:
- Really Easy
- Total Repair Time:
- 30 - 60 mins
- Tools:
- Screw drivers
- Customer:
- Vincent from Apopka, FL
- Parts Used:
- WE09X27634, WE1M1067, WE3M26, WE1M504
- Difficulty Level:
- Really Easy
- Total Repair Time:
- 30 - 60 mins
- Tools:
- Pliers, Screw drivers
- Customer:
- VINCENT FLYNN from FARMINGTON, NH
- Parts Used:
- WE09X27634, WE1M1067, WE3M26, WE1M504
- Difficulty Level:
- Really Easy
- Total Repair Time:
- 30 - 60 mins
- Tools:
- Pliers, Screw drivers
- Customer:
- Jeff from GLENDALE, AZ
- Parts Used:
- WE09X27634, WE1M1067, WE3M26, WE1M504
- Difficulty Level:
- Very Easy
- Total Repair Time:
- 15 - 30 mins
- Tools:
- Screw drivers
- Customer:
- Tennyson from Walters, OK
- Parts Used:
- WE09X27634, WE1M1067, WE3M26, WE1M504
- Difficulty Level:
- Very Easy
- Total Repair Time:
- 30 - 60 mins
- Tools:
- Screw drivers
- Customer:
- Darlene from Rio Rancho, NM
- Parts Used:
- WE09X27634, WE1M1067, WE9M31, WE1M504
- Difficulty Level:
- Very Easy
- Total Repair Time:
- 15 - 30 mins
- Tools:
- Screw drivers
- Customer:
- Robin from Onset, MA
- Parts Used:
- WE09X27634
- Difficulty Level:
- Really Easy
- Total Repair Time:
- 30 - 60 mins
- Tools:
- Screw drivers
- Customer:
- Willard J from Havre de Grace, MD
- Parts Used:
- WE09X27634, WE1M1067, WE14M124, WE05X20431, WE1M504
- Difficulty Level:
- Easy
- Total Repair Time:
- 30 - 60 mins
- Tools:
- Pliers, Screw drivers
- < Prev
- 1
- 2
- 3
- Next >
Model Compatibility
Manufacturer Part Number: WE09X27634


