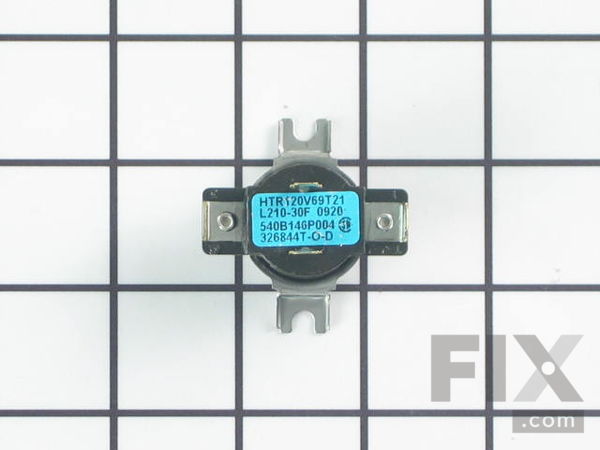
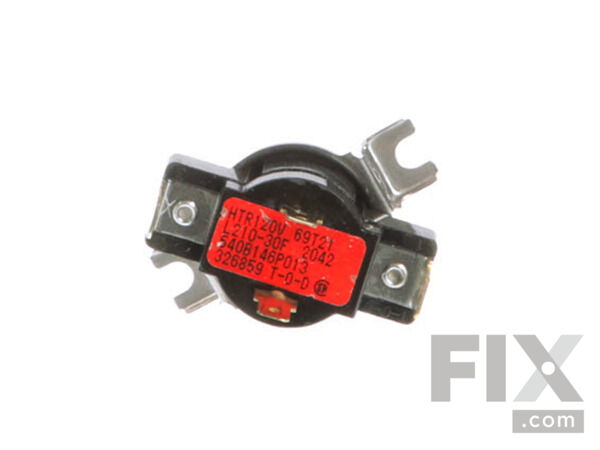
Part Location Diagram of WE4M181 GE Cycling Thermostat - 4 Wire
See part 507 in the diagram
Replacing your General Electric Dryer Cycling Thermostat - 4 Wire
( Grid squares measure 1x1 inch )

Cycling Thermostat - 4 Wire

★★★★★
★★★★★
2 Reviews

Rated by 11 customers 

?

Easy 

30 - 60 mins 

Ratings submitted by customers like you who bought this part.

?
$62.85
In Stock
Fix Number:
FIX267926
Manufacturer #:
WE4M181
Manufactured by:
GE

Product Description

This thermostat helps to regulate the dryer's internal temperature. L210-30F

Videos For installing this part.

Replacing your Cycling Thermostat - 4 Wire

Replacing your Cycling Thermostat - 4 Wire

Questions and Answers

We're sorry, but our Q&A experts are temporarily unavailable.
Please check back later if you still haven't found the answer you need.

Installation Instructions Provided by Fix customers like you.

Average Repair Rating: 3.0 / 5.0, 11 reviews.
  • 1
  • 2
Sort by:
Sorry, we couldn't find any existing installation instruction that matched.
Customer:
Billy from COOKEVILLE, TN
Parts Used:
WE4M181
Difficulty Level:
A Bit Difficult
Total Repair Time:
30 - 60 mins
Tools:
Pliers, Screw drivers
Dryer would heat but not dry very well
Watching the video they put with the 4 Wire Thermostat was a big help. It gives you a good game plan for when you try it yourself. Here is how my install went.
I slid the dryer out of place to where I had some room to work. I took off the top and front as shown in the video. Just four screws total. No big deal. Then I reached in and undid the rotation belt for the drum. Again just like shown in the video. Then the difficulty came in. The drum did not slide out anywhere near as easy as the guy in the video did it. I eventually gave up on trying to completely remove it from the dryer body and just pulled it our far enough to get to the back panel. This made working kind of awkward but it worked. Once there I noticed that I had no clearance to get to the screw holding the thermostat in place. Unlike in the video, I had to unmount the heating coils to get to the screw. Again no big deal. Just another 4 screws. I switched out the part no problem. Now this is very important. Take a good picture of how it is currently wired up before you undo the connections. The guy in the video said they were sized differently to help plug them in right. This was not the case for this dryer. I did not take a good picture so I had to basically guess. Fortunately, the screw that held the old part in place had marred the tab it held so I was able to work out the orientations of the wire connections. After that, I put the heating element back in place and put the drum back in. It was kind of difficult to get the back bearing of the drum back in the rear wall since you couldn’t see what you were doing. You might want a helper for that part. After the drum was in place I rerouted the belt back on the tension pulley and put the front panel back on. I then plugged it in and turned it on high and started it with the top panel off. That way I was able to check proper function and make sure it was heating correctly. When everything seemed to be in order I put the top plate back on. Ran some towels, the item we were having the most trouble drying, through the washer and then dried them at our normal time. They dried perfectly. Hope this helps!
4 of 4 people found this instruction helpful.
Was this instruction helpful to you?
Thank you for voting!
Customer:
Tom from SARASOTA, FL
Parts Used:
WE4M181
Difficulty Level:
Easy
Total Repair Time:
15 - 30 mins
Tools:
Screw drivers
unit gets hot, then shuts off
turn off power.remove 4 torx screws from the top of the console. tip console panel forward. remove 2 black screws from back panel bracket. 1 of the screws holds the ground wire. next remove the 2 large pan head screws on the front of the control panel frame. Then remove the 2 long screws from the front panel. remove the top panel.tip back the control panel frame. the thermostat is right on top of the heater assembly. note the locations of the wires. remove the wires from the old thermostat. remove the black screw. be careful not to drop it. install the new thermostat and reverse the order to reassemble. This is much quicker than removing the drum and belt as in your video.
1 person found this instruction helpful.
Was this instruction helpful to you?
Thank you for voting!
Customer:
Cheri from Creekside, PA
Parts Used:
WE03X29897, WE4M181
Difficulty Level:
Really Easy
Total Repair Time:
15 - 30 mins
Tools:
Pliers, Screw drivers
Dryer not heating
I came to PartSelect and put in my model number. I clicked on dryer not heating. The cycling thermostat was the part that causes this problem most often and I took the chance that this is what was causing my dryer to not heat. Replacing it was super easy. I watched the video on the replacement. My therm. was in a different location then t he one shown on the video but the same instructions still worked. I replaced my belt at this time too just because I use my dryer constantly. I have 7 kids so laundry is always being done. The repair went smoothly and quickly. Removed the top panel. Removed the Front panel and the wire assembly from the door and set that aside. Loosened the belt. Removed the drum. Took the wire harness off the thermostat, and took the old one out. Put in the new one and popped the wires back on. Slid the drum part way in, and placed the belt over the drum before putting in back in fully. Reached under and got the belt back on the tensioner and motor shaft. Replaced the front panel and top panel. I plugged it back in and tried it out. Unfortunately for me, this was not the cause of my problem. I am not a professional repairwoman. I got it wrong this time. I am replacing the gas coils tomorrow and if that does not do the trick, I will be calling a repair man. Usually part select allows me to fix my own appliances without any problems. This is the first time the top recommended part did not correct my problem. I have repaired my dryer once, washer once, dish washer three times. I have also been able to repair my sister's dryer, my mother's dryer and my mother in law's washer with the videos and parts from PartSelect. This truly is a very easy repair. It does not take long at all.
1 person found this instruction helpful.
Was this instruction helpful to you?
Thank you for voting!
Customer:
Donald from Wappingers Falls, NY
Parts Used:
WE4M181
Difficulty Level:
A Bit Difficult
Total Repair Time:
30 - 60 mins
Tools:
Screw drivers
Low heat in electric dryer
Followed the video on the web site. The video showed every step required. The web page showed a 50% probability that the thermostat was the problem. A continuity check on the heater elements showed they were good, the web page showed only a 25% probability that the heater elements were the problem. So I went with replacing the thermos tat. Re-stringing the drive belt was a bit tricky. The dryer now works perfectly. I saved many dollars, thanks to this site .
1 person found this instruction helpful.
Was this instruction helpful to you?
Thank you for voting!
Customer:
Jim from Houston, TX
Parts Used:
WE4M181
Difficulty Level:
Really Easy
Total Repair Time:
1- 2 hours
Tools:
Pliers, Screw drivers
No/Low Heat on different heat settings
Never worked on a dryer before, but after seeing detailed installation video along with % of needed repairs, I figured it was worth a try. So of 3 thermostats, I replaced the cycling thermostat, hoping that I would get lucky on the first try. After little more than an hour, I had it running again and everything was working fine. My repair cost cut down to less than $40 + 1 hour of labor.
1 person found this instruction helpful.
Was this instruction helpful to you?
Thank you for voting!
Customer:
Paul from Pflugerville, TX
Parts Used:
WE03X29897, WE4M181
Difficulty Level:
A Bit Difficult
Total Repair Time:
1- 2 hours
Tools:
Screw drivers
Clothes were not dry at the end of the automatic cycles
Remove the top by opening the door and removing the two screws, one on each side, at the top of the door opening. Lift the front of the top, unlatch it from the back and slide it off. Remove the front by removing the two screws, one on each side, near the top inside holding the front on. Make sure you support the top of the front so i t doesn't fall forward and break the door switch by jerking on the wires. Lean the front out and unhook the wires to the door switch and the light. Then lift the front out of the holes on the bottom and set it aside. Remove the drum and belt. You've likely have to spread the sides out before the drum will slide out. Remove the wires from the thermostat at the back of the dryer then remove the one screw holding it in. I used pliers to loosen the screw from the underside because there's not enough room to get leverage with a stubby screwdriver. Remove and replace the thermostat and hook up the wires. Reinstall the drum and belt. I laid the dryer on its back to make it easier to reinstall the drum. Set the dryer back up to reinstall the belt on the motor and idler pulley. I set a block under the front of the dryer to put it up at an angle to make it easier to get my hand in under the drum to deal with the belt. Reinstall the front making sure to reconnect the door switch and light wires. Finally, reinstall the top and you're done. I found a good youtube video which showed all these steps. I don't recall the url but, with a little bit of searching, I'm sure you can find it.
1 person found this instruction helpful.
Was this instruction helpful to you?
Thank you for voting!
Customer:
gerald from oxford, MI
Parts Used:
WE4M181
Difficulty Level:
Easy
Total Repair Time:
15 - 30 mins
Tools:
Pliers, Screw drivers
inconsistent heating and drying times
Followed the video instructions. They were perfectly accurate.
1 person found this instruction helpful.
Was this instruction helpful to you?
Thank you for voting!
Customer:
anthony from levittown, NY
Parts Used:
WE4M181
Difficulty Level:
Really Easy
Total Repair Time:
30 - 60 mins
no heat
this was not the problem. back to the drawing board.
0 of 1 people found this instruction helpful.
Was this instruction helpful to you?
Thank you for voting!
Customer:
Jan from Elkins Park, PA
Parts Used:
WE4M181
Difficulty Level:
A Bit Difficult
Total Repair Time:
1- 2 hours
Tools:
Pliers, Screw drivers
A full load of laundry would take 3 or more hours to dry
The cycling Thermostat that I ordered from you last Wednesday for our GE gas dryer ( DRSR495GGIWW) was delivered on Monday. Though I had some trepidation that it was the right part and that I would be able to re-thread the dryer belt over the idler pulley correctly I took on the job this morning. Disassembly of the dryer went relatively q uick and changing out the thermostat was straight forward, all thanks to the video. It was a game saver to view and review your video to how the drum belt gets threaded. The gentleman in the video who showed and explained it was superb. After getting the belt threaded the dryer went back together easily. The payoff was washing a full load of laundry and having the dryer get it dry in an hour and 15 minutes. For awhile now it has taken at least three hours to do the same load.
I simply wanted to thank you for getting the part out to me and providing the excellent support to both figure out and repair this dryer.
0 of 1 people found this instruction helpful.
Was this instruction helpful to you?
Thank you for voting!
Customer:
Thomas from Wake Forest, NC
Parts Used:
WE4M181
Difficulty Level:
A Bit Difficult
Total Repair Time:
30 - 60 mins
Tools:
Screw drivers
Getting the drum out and back is the tough part of the job
First unplug dryer. Open dryer door remove 2 Phillips head screws holding the dryer top on located on the corner. Also I found removing the control panel from the cabinet made removing the top easier. The top has three slots that slide into the control panel . Slide the panel slightly to dislodge the dryer top. Set the top aside. Next rem ove the front panel wires from the harness. Remove panel and set that asiide also. Now reach in near the fan on the left and slide belt tensioner to the right to remove belt. Remove the drum by sliding forward. It's in tight so press carefully on the side of the cabinet so it will slide out. Set that aside. To replace the 4 wire thermostat use a angled Phillips head screwdriver and install wires exactly like the old one. Once installed. The bellt tensioner needs to be brought all the way to the right onto a metal piece. Reinstall the drum,realign the drum. Now install belt over the drum and by reaching in with both hands carefully put the grooved part of the belt on the pulley on the fan and the flat part goes around the tensioner. Once in position you can release the tensioner on the belt, if you turn the dryer drum by hand and the fan moves your good,, Now reinstall all panels and screws and your done. Plug in and test for proper operation.
0 of 1 people found this instruction helpful.
Was this instruction helpful to you?
Thank you for voting!
  • 1
  • 2
Customer Reviews
Average Rating: (2 Reviews)
5.0
★★★★★
★★★★★
Filter By Rating:
  • 5
    2
  • 4
    0
  • 3
    0
  • 2
    0
  • 1
    0
  • 1
Sort by:
Sorry, we couldn't find any existing reviews that matched. Try using some different or simpler keywords.

Model Compatibility

This part works with the following models:
Fix Number: FIX267926
Manufacturer Part Number: WE4M181
Brand
Model Number
Description
Kenmore
2661532110
Washer Dryer Combo - LAUNDRY CENTER
General Electric
2661532210
Washer Dryer Combo
General Electric
2661532211
Kenmore
2661532212
Washer Dryer Combo - HOME LAUNDRY COMBO
Kenmore
2661532311
Washer Dryer Combo - LAUNDRY CENTER (ELECTRIC)
Kenmore
2661532312
Washer Dryer Combo - LAUNDRY CENTER
Kenmore
2661532412
Washer Dryer Combo - HOME LAUNDRY COMBO
Kenmore
2661532413
Washer Dryer Combo - HOME LAUNDRY COMBO
Kenmore
2661532513
Washer Dryer Combo - HOME LAUNDRY COMBO
Kenmore
36361532110
Washer Dryer Combo - HOME LAUNDRY COMBO
Kenmore
36361532412
Washer Dryer Combo - LAUNDRY CENTER
Kenmore
36361542
Washer Dryer Combo - HOME LAUNDRY COMBO
Kenmore
36361542211
Washer Dryer Combo - HOME LAUNDRY COMBO
Kenmore
36361542310
Washer Dryer Combo - HOME LAUNDRY COMBO
Kenmore
36361542410
Washer Dryer Combo - HOME LAUNDRY COMBO
Kenmore
36361542411
Washer Dryer Combo - HOME LAUNDRY COMBO
Kenmore
36371532110
Washer Dryer Combo - HOME LAUNDRY COMBO
Kenmore
36371542211
Washer Dryer Combo - HOME LAUNDRY COMBO
General Electric
633615
Dryer
General Electric
633616
Dryer
General Electric
633617
Dryer
General Electric
653615
Dryer
General Electric
653616
Dryer
General Electric
653617
Dryer
General Electric
662310
Dryer
General Electric
662311
Dryer
General Electric
662410
Dryer
General Electric
662411
Dryer
General Electric
662412
Dryer
General Electric
663615
Dryer