Some of the parts we sell are eligible for mail-in rebates since we can recycle them. We will display any applicable rebates in your shopping cart. To redeem your rebate, contact Customer Service after you have received your part.
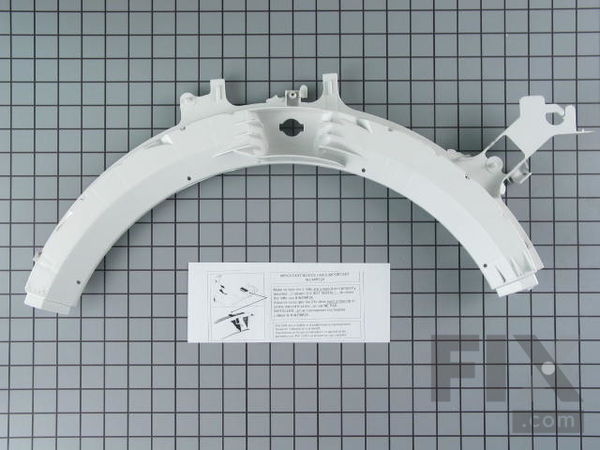
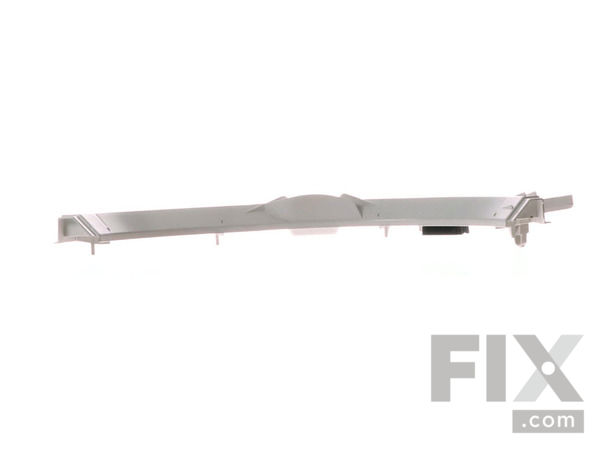
Top Bearing
$75.84
In Stock
- Fix Number:
- FIX1766010
- Manufacturer #:
- WE14M124
- Manufactured by:
- GE
- Product Description
- The drum slides are not included with this part. The top bearing helps your dryer operate as quietly as possible. This part will require two green drum slides and 2 white drum slides.
- Works with the following brands:
- General Electric
- Works with the following products
- Dryer
- Fixes the following symptoms
- Noisy, Marks left on clothes
- Part# WE14M124 replaces these:
- AP4297334, 1257069, WE14M124, WE14M106, WE14M120
Part Number Cross Reference
Product Description
The drum slides are not included with this part. The top bearing helps your dryer operate as quietly as possible. This part will require two green drum slides and 2 white drum slides.
-
Works with the following brands:General Electric
-
Works with the following products:Dryer
-
Fixes the following symptoms:Noisy, Marks left on clothes
-
Part# WE14M124 replaces these:AP4297334, 1257069, WE14M124, WE14M106, WE14M120
Videos For installing this part.
Replacing your Top Bearing

Questions and Answers
We're sorry, but our Q&A experts are temporarily unavailable.
Please check back later if you still haven't found the answer you need.
Related Parts Additional or alternate parts to consider.
Installation Instructions Provided by Fix customers like you.
- < Prev
- 1
- 2
- Next >
Sort by:
Search filter:
Clear Filter
Your search term must have 3 or more characters.
Keep searches simple. Use keywords, e.g. "leaking", "pump", "broken" or "fit".
Sorry, we couldn't find any existing installation instruction that matched.
- Customer:
- Nina from Kissimmee, FL
- Parts Used:
- WE14M124
- Difficulty Level:
- Very Easy
- Total Repair Time:
- 1- 2 hours
- Tools:
- Screw drivers
Dryer made very loud grinding sound, clothes hung up at top front of drum, then drum stopped turning.
Just like in any of the videos. Only difference was that the area around drum was too small for my hands to fit in to replace the belt. I had to remove the circuit board bridge at top of machine and move it back to allow the drum to be tipped up a sufficient distance so that I could get my hands in. Was actually able to see the idler a
... Read more
rm on the right side (left looking from front) behind motor to help mount belt (gave me another 6" - 8" clearance). It would have helped if the video had noted that the belt went to one of the rear groves molded into the tub. Also not really clear how the felt strip mounted around lower section (exhaust vent under filter). It seems to have a weird tie-off; and, does the flat side or narrow side go in (I put the flat side toward the front panel housing). Really good that the video noted that the ribbed side of belt went toward the drum.
Read less
0 of 1 people
found this instruction helpful.
Was this instruction helpful to you?
Thank you for voting!
- Customer:
- Willard J from Havre de Grace, MD
- Parts Used:
- WE09X27634, WE1M1067, WE14M124, WE05X20431, WE1M504
- Difficulty Level:
- Easy
- Total Repair Time:
- 30 - 60 mins
- Tools:
- Pliers, Screw drivers
Squeaking and clothes getting caught between drum and dryer causing clothes to be damaged.
Removed screws from top and front leaving bottom screws in just loose.Front will lift off lower bottom screws to make reinstall much easier and quicker repair.
0 of 1 people
found this instruction helpful.
Was this instruction helpful to you?
Thank you for voting!
- Customer:
- darin from liberty, IN
- Parts Used:
- WE1M1067, WE14M124, WE05X20431, WE1M504
- Difficulty Level:
- Really Easy
- Total Repair Time:
- 15 - 30 mins
- Tools:
- Screw drivers
Clothes were getting stuck up at the top of the dryer and getting ruined
I simply watched the video and ordered the replacement parts. Very easy to do and I would highly recommend doing this yourself rather than paying a repairman.
0 of 1 people
found this instruction helpful.
Was this instruction helpful to you?
Thank you for voting!
- Customer:
- PHILIP from MANASSAS, VA
- Parts Used:
- WE1M1067, WE14M124, WE05X20431, WE1M504
- Difficulty Level:
- A Bit Difficult
- Total Repair Time:
- 30 - 60 mins
- Tools:
- Screw drivers
Top Bearing Worn Through
I simply followed the video for this repair on youtube. The only difference was that steve left out the two screws on the back of the console that needed to be removed before the console would come off.
0 of 1 people
found this instruction helpful.
Was this instruction helpful to you?
Thank you for voting!
Clothes getting caught in bearing a twisting until there's a hole or garment is damaged.
Followed the video easily enough. All but one slide was worn out and missing. Originally, I only ordered the Top Bearing and the 4 slides, but found out the felt ring had also deteriorated and needed to be replaced, so I had to place a 2nd parts order. I kept the old Top Bearing for possible future use, as it looked to be in good shape
... Read more
and only the slides and felt ring were worn out.
Read less
0 of 1 people
found this instruction helpful.
Was this instruction helpful to you?
Thank you for voting!
- Customer:
- D Brant from Ponte Vedra Beach, FL
- Parts Used:
- WE09X27634, WE1M1067, WE14M124, WE1M504
- Difficulty Level:
- Very Easy
- Total Repair Time:
- 1- 2 hours
- Tools:
- Screw drivers
Dark spots on clothes
Per the video instructions. It was fast and easy. A great service.
0 of 1 people
found this instruction helpful.
Was this instruction helpful to you?
Thank you for voting!
- Customer:
- JAMES from VERNAL, UT
- Parts Used:
- WE09X27634, WE1M1067, WE14M124, WE1M504
- Difficulty Level:
- Really Easy
- Total Repair Time:
- 30 - 60 mins
- Tools:
- Pliers, Screw drivers
Garmets Caught Between Drum And Front Panel, Black Marks And Wear Spots On Garmets.
After unplugging the power cord, remove plastic cover from behind control panel (3 screws keep separate). Now the (2 screws) that hold the top of the dryer in place can be removed. Slide the top forward and lift it off. Unplug the control panel from the mother board, also unplug light and door switch from the wire harness (quick conn
... Read more
ects). The control panel can now be removed and set aside (2 screws). With the door open remove the 4 hinge screws and set the door aside. Back the screw on the bottom of the front panel out about 1/4 inch, there is one on each bottom corner just above the leveling foot. Remove the 2 screws on the top of the front panel and it can then be tilted forward until it clears the drum at which point it can be lifted off of the 2 bottom screws previously loosened. Lay the front panel flat on something soft to protect the paint. (Blanket or carpet) I bent a coat hanger into a hook and used it to hold the drum up and centered while I replaced the bearings and felt in the front panel. Using only your fingers it is possible to release the clips holding the top bearing in place. Before removing the old top bearing I assembled the new top bearing placing the black and white slide bearings to match the old ones. Remove duct felt and old top bearing and snap the new one in place being sure to clip the wires back into their same position. Replace the new duct felt seal and you are ready to put it all back together. With the door removed the front panel is much lighter and easier to handle. Slide the front panel onto the 2 bottom screws remove the hanger and reach through the front opening and hold the drum centered while you slide the front panel back into place. Once the front panel is back in place and the top and bottom screws are tightened the rest of the dryer can easily be reassembled in the reverse order as it was taken apart. All the screws used to assemble the dryer are the same except the 3 that holding the plastic cover on the back of the control panel. (Keep them separate) oh yes, the hinge screws are different too. Good luck!
Read less
0 of 1 people
found this instruction helpful.
Was this instruction helpful to you?
Thank you for voting!
The Drum Makeing A Noise
Put in new parts
0 of 1 people
found this instruction helpful.
Was this instruction helpful to you?
Thank you for voting!
- Customer:
- mike from Farmington, NM
- Parts Used:
- WE09X27634, WE1M1067, WE5M62, WE14M124, WE05X20431, WE1M504
- Difficulty Level:
- Really Easy
- Total Repair Time:
- 30 - 60 mins
- Tools:
- Screw drivers
slides and bearing worn
the parts arrived quick and they were all correct. removed the dryer face and replaced new top bearing light socket and drum slides very very easy. like a new dryer and no squeeking any more. love the price and page diagrams and quick shipping.
0 of 1 people
found this instruction helpful.
Was this instruction helpful to you?
Thank you for voting!
Dryer was sqeaking bad
I did some research online then ordered front and rear bearings. I didn't realize they came 1 in a pack, so I had to order again. Shipping was fast. When I took the dryer apart, I found the bearing was bad too. I ordered the bearing. when that arrived, it only took a few minutes to put it all back together. Assembled everything, screwed i
... Read more
t together and it runs quiet like new. It was pretty straight forward. Took the panel off the back of the control, took the control assembly off, then the front door assembly. Put it together in reverse order.
Read less
0 of 1 people
found this instruction helpful.
Was this instruction helpful to you?
Thank you for voting!
- < Prev
- 1
- 2
- Next >
Model Compatibility
This part works with the following models:
Fix Number: FIX1766010
Manufacturer Part Number: WE14M124
Manufacturer Part Number: WE14M124
Brand
Model Number
Description
✖
Mail-In Recycling Rebate


