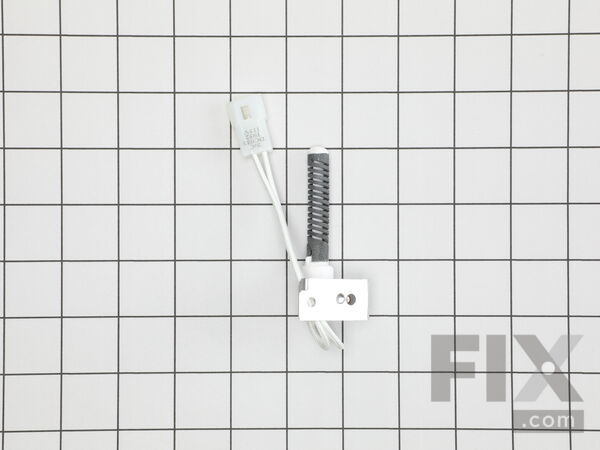
Part Location Diagram of WE04X25996 GE IGNITER
See part 717 in the diagram
( Grid squares measure 1x1 inch )

IGNITER WE04X25996

★★★★★
★★★★★
1 Review

Rated by 3 customers 

?

Easy 

30 - 60 mins 

Ratings submitted by customers like you who bought this part.

?
$50.46
In Stock
Fix Number:
FIX12342916
Manufacturer #:
WE04X25996
Manufactured by:
GE

Product Description

NOTE: Be very careful to not handle the igniter by its gray part as it's very fragile. Hold it by its white tip only.

Questions and Answers

We're sorry, but our Q&A experts are temporarily unavailable.
Please check back later if you still haven't found the answer you need.

View More View Less
M-Series Primary Dual Coil Gas Valve
$33.69
In Stock
M - Series Secondary Coil - 2 Terminals
$29.56
In Stock
Affresh Washing Machine Cleaner - 3 pack
$12.58
In Stock
Produce Preserver Filter
$21.50
In Stock
Affresh Dishwasher Cleaner Tablets - 6
$19.09
In Stock
Cooktop Cleaning Cream
$15.57
In Stock
Cooktop Cleaner
$17.74
In Stock
Affresh Cleaner
$19.09
In Stock

Installation Instructions Provided by Fix customers like you.

Average Repair Rating: 2.9 / 5.0, 3 reviews.
  • 1
Sort by:
Sorry, we couldn't find any existing installation instruction that matched.
Customer:
Robert from Burlingame, CA
Parts Used:
WE04X25996, WE4X693, WE4X692
Difficulty Level:
A Bit Difficult
Total Repair Time:
30 - 60 mins
Tools:
Pliers, Screw drivers
Dryer was initially heating up, then ran cold
I did not do a continuity test on the components, I did some research online and just replaced the high probability suspect parts associated with these symptoms. 1. Remove the three screws on top rear face of the plastic housing. 2. Remove the screws holding the top cover. 3. Remove the screws holding the Electronic Controls board. 4. Disconnect the ribbon cable connected to the printed circuit control board. 5. Remove the front control board assembly. 6. Remove the screws of the sheet metal cross brace (on top, front). 7. Remove the front panel (door assembly). 8. Have someone lift the drum up slightly while you undo the drum pulley belt from the spring loaded pulley. 9. Remove the large drum (it will just pull out, you will have to slightly spread the side panels outward). 10. You now have access to the primary / secondary coils and the Igniter. 11. Replace the faulty component. 12. Reassemble.
2 of 2 people found this instruction helpful.
Was this instruction helpful to you?
Thank you for voting!
Customer:
Donald from Mokena, IL
Parts Used:
WE1M1067, WE1M504, WE04X25996
Difficulty Level:
A Bit Difficult
Total Repair Time:
1- 2 hours
Tools:
Pliers, Screw drivers
Igniter failure.
First remove top, two screws just above door when opened. Remove a couple screws holding front to sides and remove front to expose drum bearing slides, mine weren't bad but since I was this far to get to the burner assy, why not replace them. Now the more difficult part - getting to the igniter. It is impossible to get to the igniter wi thout removing the side wall but on my unit there is/was a 4" knock-out in the side wall of the dryer to access or at least see the burner assy. I put the new slides in and replaced the front and top. Then took tin snips and cut a big flap and then opened the side to access the igniter. Now I was able to reach in and easily change the igniter, I then bent the side wall I had cut back into place and with a piece of sheet metal and some mini screws. Now I still had that knock out open so I could see if the new igniter worked and within seconds I had a fire and the dryer was repaired. replace the knock out so that no debris can get into the housing near the fire box.
1 person found this instruction helpful.
Was this instruction helpful to you?
Thank you for voting!
Customer:
Kevin from Portage, IN
Parts Used:
WE04X25996
Difficulty Level:
Really Easy
Total Repair Time:
30 - 60 mins
Gas dryer not heating
This is the second time I've had to replace this, so I knew where it was and how to get to it. When I pulled the old igniter out, you can visually see it was broke. Put the new one in and it works.
0 of 1 people found this instruction helpful.
Was this instruction helpful to you?
Thank you for voting!
  • 1
Customer Reviews
Average Rating: (1 Review)
5.0
★★★★★
★★★★★
Filter By Rating:
  • 5
    1
  • 4
    0
  • 3
    0
  • 2
    0
  • 1
    0
  • 1
Sort by:
Sorry, we couldn't find any existing reviews that matched. Try using some different or simpler keywords.

Model Compatibility

This part works with the following models:
Fix Number: FIX12342916
Manufacturer Part Number: WE04X25996
Brand
Model Number
Description
Kenmore
26715321
Washer Dryer Combo - HOME LAUNDRY COMBO
Kenmore
2671532110
Washer Dryer Combo - LAUNDRY CENTER
General Electric
2671532210
Washer Dryer Combo
Kenmore
2671532211
Washer Dryer Combo - HOME LAUNDRY COMBO
Kenmore
2671532212
Washer Dryer Combo - HOME LAUNDRY COMBO
Kenmore
2671532311
Washer Dryer Combo - HOME LAUNDRY COMBO
Kenmore
2671532312
Washer Dryer Combo - HOME LAUNDRY COMBO
Kenmore
2671532412
Washer Dryer Combo - HOME LAUNDRY COMBO
Kenmore
2671532413
Washer Dryer Combo - HOME LAUNDRY COMBO
Kenmore
36371542
Washer Dryer Combo - HOME LAUNDRY COMBO
Kenmore
36371542211
Washer Dryer Combo - HOME LAUNDRY COMBO
Kenmore
36371542310
Washer Dryer Combo - HOME LAUNDRY COMBO
Kenmore
36371542410
Washer Dryer Combo - HOME LAUNDRY COMBO
General Electric
36371542411
Washer Dryer Combo - GE Home Laundry Combo
General Electric
63740118
Dryer
General Electric
63740119
Dryer
General Electric
64100169
Dryer
General Electric
64100179
Dryer
General Electric
BJLR473GT0WW
Dryer - Gas
General Electric
BJLR473GV0WW
Dryer - Gas
General Electric
BVLR333GT0WW
Dryer - Gas
General Electric
BVLR333GV0WW
Dryer - Gas
General Electric
BWXR473GT0WW
Dryer - Gas
General Electric
BWXR473GT2WW
Dryer - Gas
General Electric
BWXR473GT3WW
Dryer - Gas
General Electric
BWXR473GT5AA
Dryer - Gas
General Electric
BWXR473GT5WW
Dryer - Gas
General Electric
CADG265RCL
Dryer - GE Dryer Model CADG265RCL Parts
General Electric
CGL2000R*178
Dryer
General Electric
CGL2000R*179
Dryer