Some of the parts we sell are eligible for mail-in rebates since we can recycle them. We will display any applicable rebates in your shopping cart. To redeem your rebate, contact Customer Service after you have received your part.
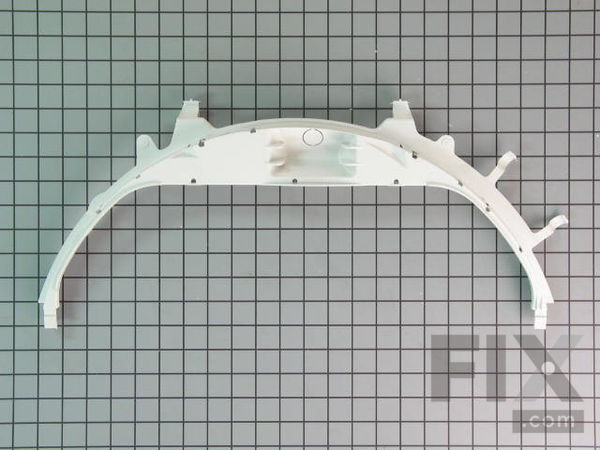
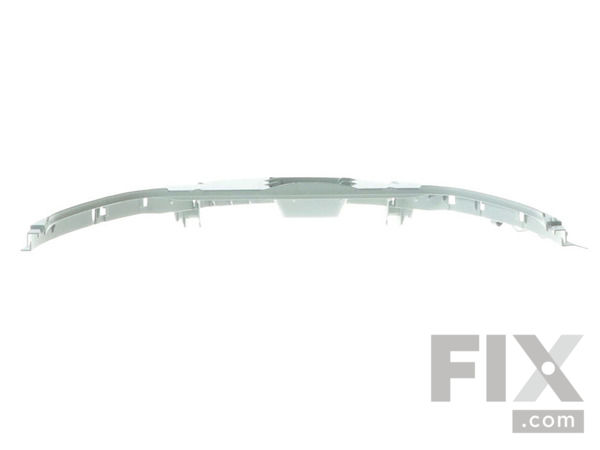
TOP BEARING
$49.70
In Stock
- Fix Number:
- FIX12342893
- Manufacturer #:
- WE03X25079
- Manufactured by:
- GE
- Product Description
- Note: The drum slides should also be replaced when your replacing the drum bearing. Slides are NOT included. This part helps your dryer operate as quietly as possible.
- Works with the following brands:
- General Electric, Hotpoint, Kenmore
- Works with the following products
- Dryer, Washer Dryer Combo
- Fixes the following symptoms
- Noisy, Marks left on clothes
- Part# WE03X25079 replaces these:
- WE03X20570
Part Number Cross Reference
Product Description
Note: The drum slides should also be replaced when your replacing the drum bearing. Slides are NOT included. This part helps your dryer operate as quietly as possible.
-
Works with the following brands:General Electric, Hotpoint, Kenmore
-
Works with the following products:Dryer, Washer Dryer Combo
-
Fixes the following symptoms:Noisy, Marks left on clothes
-
Part# WE03X25079 replaces these:WE03X20570
Questions and Answers
We're sorry, but our Q&A experts are temporarily unavailable.
Please check back later if you still haven't found the answer you need.
Related Parts Additional or alternate parts to consider.
Installation Instructions Provided by Fix customers like you.
- < Prev
- 1
- Next >
Sort by:
Search filter:
Clear Filter
Your search term must have 3 or more characters.
Keep searches simple. Use keywords, e.g. "leaking", "pump", "broken" or "fit".
Sorry, we couldn't find any existing installation instruction that matched.
- Customer:
- Gary from Fort Lauderdale, FL
- Parts Used:
- WE03X25079, WE1M504
- Difficulty Level:
- Really Easy
- Total Repair Time:
- 15 - 30 mins
- Tools:
- Pliers, Screw drivers
Loud squeeking noise. Louder when machine had heavy load.
Unplug machine. Remove two screws holding top on. They're inside the door, upper left and right corners. Lift front of top cover, swing up and slip the back edge tabs out of slots in top cover. Set cover aside. Remove two screws that hold sides to front panel. Pull top of front panel toward you 5 or 6 inches. Lift front panel free from ba
... Read more
se of machine and set it down close to the machine. Unplug wires for door switch and light located on lower left inside of panel. Panel is now free to move away from machine. Remove light bulb. Push down on the two vertical tabs on the upper part of drum bearing and pull bearing off front panel, discard. Line up new bearing and snap into place. I had to press and align the bearing to get it into proper position. Install guide strips, I needed 4. The hole in the guide goes over the pin in the bearing. Flex the guide until it can slip into the slot in the bearing. Don't worry they only go in one way. Reinstall light bulb. Move front panel close enough to machine to reconnect wires. Lift front panel onto base, leave a few inch gap at the top of the front panel. Open the door, put your hand inside and push the drum up slightly. Pivot the front panel back so it's up against side panels. Replace screws, top left and right holding front panel to sides. Replace top, hold front of lid higher in front. Line up the three tabs on the control panel with the three slots on the back edge of the lid. Swing the lid down like you would close the hood of a car. May have to play with it a bit but it will go. Replace the two screws inside the door cavity. Plug machine in and test. While the machine was apart I cleaned the duct work with a shop vac.
Read less
0 of 1 people
found this instruction helpful.
Was this instruction helpful to you?
Thank you for voting!
- Customer:
- CRAIG from ROANKE, VA
- Parts Used:
- WE09X27634, WE03X25079, WE1M1067, WE1M504
- Difficulty Level:
- Easy
- Total Repair Time:
- 30 - 60 mins
- Tools:
- Screw drivers
squeaking drum
Unplug. Remove 2 screws from top left-right inside dryer door opening. Remove screws holding timer-controls from back. Lift up cover. Remove 2 short screws inside left-right top holding front panel. Tilt out top front while holding drum up. Remove dryer bearing asembly from dryers frontpanel and replace new parts. Reaaemble.
0 of 1 people
found this instruction helpful.
Was this instruction helpful to you?
Thank you for voting!
- Customer:
- Dan from Chesterton, IN
- Parts Used:
- WE09X27634, WE03X25079, WE1M1067, WE1M504
- Difficulty Level:
- Easy
- Total Repair Time:
- 30 - 60 mins
- Tools:
- Nutdriver
very squeeky noisy!!! with or with out load
If your slide bearings are worn bad. The top Bearing(plastic housing) that holds the 4 slide bearings might be damaged, mine was warn to the point where the slide bearings would not mount to the old top bearing. Remove the two screws that hold the top of the dryer in place. (inside the door at the top) Lift the top from the front and w
... Read more
ork it out from the back top(control panel) pay attention how this tucks in the back. Next remove the two bigger screws from the inside next to the top of the drum that attach the front panel. remove the front panel partially so you can get the electrical connections on the door switch. Use needle nose pliers to un plug the connection on the switch and pull the other apart. remove front panel. take the panel to a bench or table after you clean all the lint trapped in the exhaust duct. remove old felt, install new felt the same way the old one was attached. now pry the top bearing from its plastic clips. Install the new bearing. Install the new bearing slides on the new bearing. re-connect the electrical connections with the front panel sitting on the floor in place. then put the front panel in from the bottom first, it sits in two perches. then pivit forward and install the front cover over the drum and onto the new bearings. install screws. install top cover from the back first, this is the trickiest part. pay attention and lift the front high to get the back tucked in under the control panel, then lower the top cover until it all pops together , don't force it! once it is in place open the door and install the 2 remaining screws. The dry will make a slight scrapping sound until the new slide bearings are worn in (2 or 3 loads) No more squeaky noisy DRYER!
Read less
0 of 1 people
found this instruction helpful.
Was this instruction helpful to you?
Thank you for voting!
- Customer:
- Kenneth from Barrington, RI
- Parts Used:
- WE03X25079, WE1M1067, WE03X29897, WE1M504, WE2M96, WE25M40, WE12X83
- Difficulty Level:
- Really Easy
- Total Repair Time:
- 30 - 60 mins
- Tools:
- Nutdriver, Screw drivers
Dryer was squeeking loudly
Searched Internet for dryer model squeeking. Found probable cusses. Watched video. Took dryer apart found the above parts worn out. Changed the belt and idler pulley just because I had the dryer apart. Less than 50 minutes dryer is fixed. Dryer is like news for $133.00
0 of 1 people
found this instruction helpful.
Was this instruction helpful to you?
Thank you for voting!
- Customer:
- Luther from Sacramento, CA
- Parts Used:
- WE09X27634, WE03X25079, WE03X29897, WE1M504, WE25M40
- Difficulty Level:
- A Bit Difficult
- Total Repair Time:
- More than 2 hours
- Tools:
- Nutdriver, Screw drivers
Dryer was making a turblence and started to eat clothings
Took the top and front off, saw that the bearing sides were worn and gone. Replaced the back bearing setup and belt while I had it open. would have been nice that the bearing sides came as a set and the houseing that they setin. Time was wasted waiting for the top bearing sides (green ones) to come in. They were completely gone as was one
... Read more
white one and part of the housing. It took about 8 hrs. in repair time as I am Disabled. Should of taking about 3 hrs with all parts on hand.
Read less
0 of 1 people
found this instruction helpful.
Was this instruction helpful to you?
Thank you for voting!
- Customer:
- Robert from El Cajon, CA
- Parts Used:
- WE03X25079, WE1M1067, WE05X20431, WE1M504
- Difficulty Level:
- Really Easy
- Total Repair Time:
- 15 - 30 mins
- Tools:
- Screw drivers
worn dryer drum slides
The repair video of our dryer (which was subsequently taken off the website) was very helpful and showed exactly how to replace the top drum bearing and slides. Since I am out of state I was able to direct my wife, who has little mechanical experience, to the video on the website and then provide her with additional assistance over the ph
... Read more
one. It was an easy repair and the video was very helpful in showing me how to make the repair so I could advise my wife. Thanks for the help. I will definitely use you for repairs in the future.
Read less
0 of 1 people
found this instruction helpful.
Was this instruction helpful to you?
Thank you for voting!
- < Prev
- 1
- Next >
★
Customer Reviews
Filter By Rating:
- < Prev
- 1
- Next >
Sort by:
Search filter:
Clear Filter
Your search term must have 3 or more characters.
Keep searches simple. Use keywords, e.g. "leaking", "pump", "broken" or "fit".
Sorry, we couldn't find any existing reviews that matched. Try using some different or simpler keywords.
STEPHEN S - April 2, 2020
Verified Purchase
Really??..
If this was in fact a “genuine ge part”, I can see why they’re out of the appliance business. The QC department had to have been taking a siesta to let this flash riddled part slip by. I made it work. We’ll see for how long. Delivery time was good though.
Model Compatibility
This part works with the following models:
Fix Number: FIX12342893
Manufacturer Part Number: WE03X25079
Manufacturer Part Number: WE03X25079
Brand
Model Number
Description
✖
Mail-In Recycling Rebate


