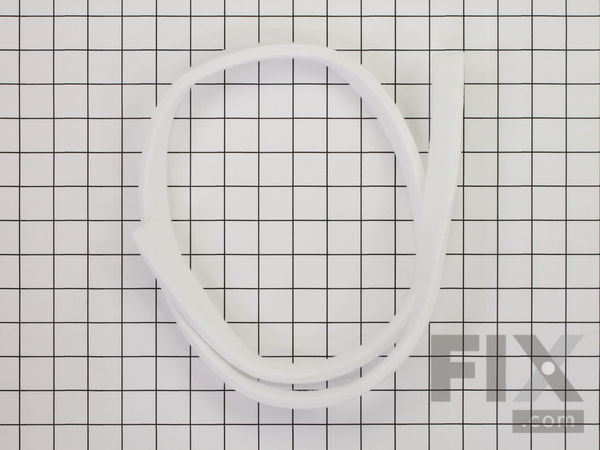
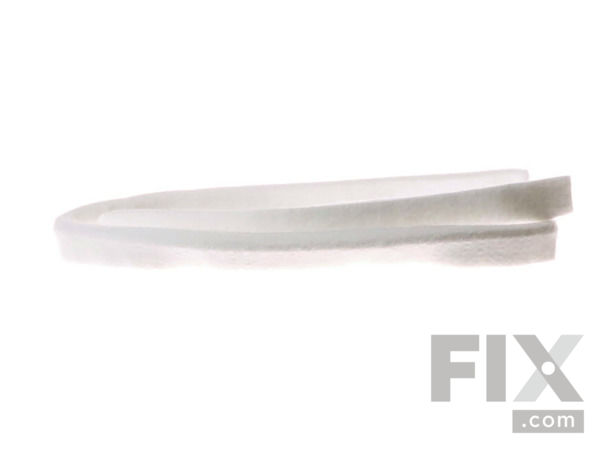
Part Location Diagram of 5303283286 Frigidaire Front Lower Drum Seal
See part 21 in the diagram
Replacing your Frigidaire Dryer Front Lower Drum Seal
( Grid squares measure 1x1 inch )

Front Lower Drum Seal

Rated by 14 customers 

?

Really Easy 

30 - 60 mins 

Ratings submitted by customers like you who bought this part.

?
$33.83
In Stock
Fix Number:
FIX460194
Manufacturer #:
5303283286
Manufactured by:
Frigidaire

Product Description

This part helps to keep the dryer running as quietly as possible.

Videos For installing this part.

Replacing your Front Lower Drum Seal

Replacing your Front Lower Drum Seal

Questions and Answers

We're sorry, but our Q&A experts are temporarily unavailable.
Please check back later if you still haven't found the answer you need.

Installation Instructions Provided by Fix customers like you.

Average Repair Rating: 3.5 / 5.0, 14 reviews.
  • 1
  • 2
Sort by:
Sorry, we couldn't find any existing installation instruction that matched.
Customer:
michael from Cave City, KY
Parts Used:
137292700, 134511600, 5303937139, 5303283286, 131825900
Difficulty Level:
Really Easy
Total Repair Time:
30 - 60 mins
Tools:
Screw drivers
browning clothes .zipper on jackets were tore off
after watching video and reading the review, whole job was simple
10 of 11 people found this instruction helpful.
Was this instruction helpful to you?
Thank you for voting!
Customer:
Art from Lynden, WA
Parts Used:
5303937139, 5303283286
Difficulty Level:
Easy
Total Repair Time:
30 - 60 mins
Tools:
Nutdriver, Screw drivers
Two of three plastic glides on the upper drum glide had broken off and the lower seal had discolored and was leaving short skinny brown stains on clothes.
The upper drum guide and lower drum seal were replaced using instructions from your videos. I recommend replacing both the drum glide and drum seal together; doesn't make sense to replace one and not the other, particularly on older models. I used a Universal Adhesive Cleaner (for removing automotive & RV decal glues; I had some left ov er from removing decals/glue off our RV) obtained at my local NAPA Auto Parts (Part #4070) which made removing the old parts and glue cleanup much easier. Simple apply sufficient solvent to saturate the felts, allow to stand 15-20 minutes then easily peel off the old felts. I used a 3" diameter wire wheel in my drill to quickly remove any remaining glue residue. There are probably other solvents that could be used in lieu of the Universal Adhesive Cleaner; the key is to use a solvent that will soften the old glue which which makes removing the felts and glue cleanup much easier. Be sure to wear solvent resistant gloves during this phase of the replacement process.
3 of 3 people found this instruction helpful.
Was this instruction helpful to you?
Thank you for voting!
Customer:
Ken from Naples, FL
Parts Used:
5303937139, 5303283286
Difficulty Level:
Very Easy
Total Repair Time:
1- 2 hours
Tools:
Screw drivers
Dryer was making brown marks.
Step 1- Removed all screws holding front and slanted panel above the washer. Step 2- removed two screws holding control panel. Step 3- removed screws holding 2nd galvanized panel under slanted panel. Step 4- unplug door switch wire. Step 5- removed door panel for scraping off old glide & seal. Step 6- make sure you do upper drum glide sc raping & replacing of glide before scraping off lower seal. Reason for doing that is to make sure glide & seal wind up in the same place. Step 7- replaced all parts. To make it easy I found by screwing the 4 top screws first I was able to align the drum in the door panel. Everything works great no more brown spots. Ken- FL
1 person found this instruction helpful.
Was this instruction helpful to you?
Thank you for voting!
Customer:
Bruce from Tacoma, WA
Parts Used:
5308027429, 5303937139, 5303283286
Difficulty Level:
Easy
Total Repair Time:
1- 2 hours
Tools:
Screw drivers
clothes kept getting ugly town spots and some got caught in the edge of the drum
Looked up on the web and found a parts list and a video showing the process of replacement of the drum seals. I ordered on line, received the parts within three days and spent a morning opening up the dryer, removing the old seals and gluing the new ones on, then reassembling the dryer. It works perfectly. What I found in addition was a huge buildup of lint in the blower channel. Removed all that, vacuumed the inside and it's as good as new. NOTE: you don't have to order an extra tube of glue. One comes with the parts. Bruce
1 person found this instruction helpful.
Was this instruction helpful to you?
Thank you for voting!
Customer:
James from Williamstown, MA
Parts Used:
5303937139, 5303283286
Difficulty Level:
Really Easy
Total Repair Time:
30 - 60 mins
Tools:
Screw drivers
clothes were getting burn marks and sometimes getting caught between drum and frame
I'm one of those guys who doesn't unplug an appliance before working on it. In this case, I should have. My wrist touched the back of the timer control when replacing the sheet metal screw on that side of the front panel, and I felt a sharp tingle that let me know I was part of a live circuit. My quick reaction caused my wrist to graze a sharp edge on the dryer frame. Just a bit of blood lost; only a flesh wound. Anyway, the enclosed instructions were very good, though I did go on line to see the exact location of the metal clips that secure the top of the machine.
0 of 1 people found this instruction helpful.
Was this instruction helpful to you?
Thank you for voting!
Customer:
Tim from Canton, OH
Parts Used:
5303937139, 5303283286
Difficulty Level:
Very Easy
Total Repair Time:
Less than 15 mins
Tools:
Screw drivers
Dryer was making a lot of noise and putting marks or holes in everything.
I watched your how to videos and it was that easy. The whole job took less than 15 minutes. After the glue dried I ran a load of clothes and it was like my dryer was brand new again. Follow the videos and you won't go wrong.
0 of 1 people found this instruction helpful.
Was this instruction helpful to you?
Thank you for voting!
Customer:
David G from Channahon, IL
Parts Used:
5303937139, 5303283286, 5303281153
Difficulty Level:
Easy
Total Repair Time:
30 - 60 mins
Tools:
Nutdriver, Screw drivers
Load squeaking coming from rear of drum area.
I watched the video on the page where I ordered the parts from and it was straight forward on what needed to be done. Only addition was to grease the pylley wheel shaft by sliding it off, cleaning it and reinstall with fresh grease. It all went well and no more noise!!
0 of 1 people found this instruction helpful.
Was this instruction helpful to you?
Thank you for voting!
Customer:
Eric from La Grange, IL
Parts Used:
5303937139, 5303283286
Difficulty Level:
Easy
Total Repair Time:
30 - 60 mins
Tools:
Screw drivers
The dryer was leaving brown marks on clothing
The repair was easy; it took longer for the glue to dry than it did to make the repair. I disconnected the electricity and opened up the top lid of the dryer. I then removed the front panel by removing two screws and two retainer clips. I pulled the old felt off by hand. A putty knife, wire brush and sandpaper cleaned the surface. Af ter vacuuming up the residue, I applied the glue and used adjustable clamps to hold the upper drum glide in place. Once that was dry, I glued down the lower drum seal. I allowed it to dry fully over night and then assembled the dryer. It works like new.
0 of 1 people found this instruction helpful.
Was this instruction helpful to you?
Thank you for voting!
Customer:
Richard from Doylestown, OH
Parts Used:
5303937139, 5303283286
Difficulty Level:
Really Easy
Total Repair Time:
30 - 60 mins
Tools:
Screw drivers
White clothes and light colored clothes had brown spots on them and dryer basket had dropped causing clothes to get caught between face of drum and door.
Went exactly as the video instruction directed.Very good instructional video.
0 of 1 people found this instruction helpful.
Was this instruction helpful to you?
Thank you for voting!
Customer:
James from Cooperstown, NY
Parts Used:
5303937139, 5303283286, 5303281153
Difficulty Level:
Really Easy
Total Repair Time:
30 - 60 mins
Tools:
Nutdriver, Screw drivers
Rubbing noise and cloths would stick between the drum and door putting marks on them
followed the video that is on this site.
0 of 1 people found this instruction helpful.
Was this instruction helpful to you?
Thank you for voting!
  • 1
  • 2

Model Compatibility

This part works with the following models:
Fix Number: FIX460194
Manufacturer Part Number: 5303283286
Brand
Model Number
Description
Frigidaire
41749012890
Dryer - Residential, Electric
Frigidaire
41749022890
Dryer - Residential, Electric
Kenmore
41759012890
Dryer - Kemore Dryer 41759012890
Frigidaire
41759022890
Dryer - Gas
Kenmore
41769042990
Dryer
Kenmore
41769042991
Dryer
Kenmore
41769052990
Dryer
Kenmore
41769052991
Dryer
Kenmore
41779042900
Dryer - Kenmore Dryer Model 417.79042900 (41779042900, 417 79042900) Parts
Kenmore
41779042990
Dryer
Kenmore
41779042991
Dryer
Kenmore
41779052990
Dryer
Kenmore
41779052991
Dryer
Kenmore
41780032990
Dryer
Kenmore
41780042990
Dryer
Kenmore
41780042991
Dryer
Kenmore
4178005291
Dryer - Kenmore Dryer Model 417.8005291 (4178005291, 417 8005291) Parts
Kenmore
41780052990
Dryer
Kenmore
41780052991
Dryer
Kenmore
41780142000
Dryer
Kenmore
41781042000
Dryer
Kenmore
41781042001
Dryer
Kenmore
41781052000
Dryer
Kenmore
41781052001
Dryer
Kenmore
41781142000
Dryer
Kenmore
41781142001
Dryer
Kenmore
41782042100
Dryer
Kenmore
41782042101
Dryer
Kenmore
41782052100
Dryer
Kenmore
41782052101
Dryer