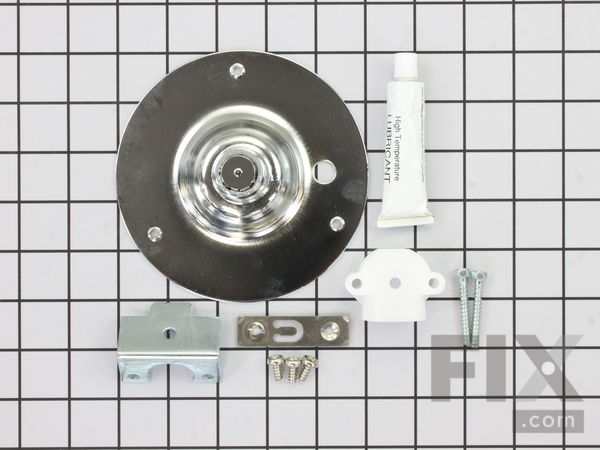
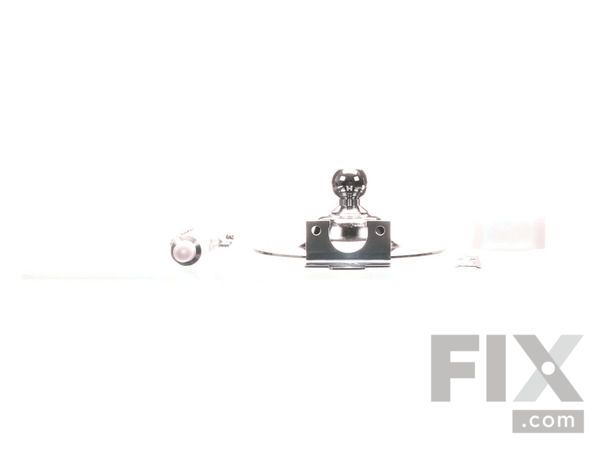
Part Location Diagram of 5303281153 Frigidaire Rear Drum Bearing Kit
See part 30 in the diagram
Replacing your Frigidaire Dryer Rear Drum Bearing Kit
( Grid squares measure 1x1 inch )

Rear Drum Bearing Kit 5303281153

Works With Model DET250K1W!
★★★★★
★★★★★
3 Reviews

Rated by 37 customers 

?

Easy 

1- 2 hours 

Ratings submitted by customers like you who bought this part.

?
$62.31
In Stock
Fix Number:
FIX459829
Manufacturer #:
5303281153
Manufactured by:
Frigidaire
Works With Model DET250K1W!

Product Description

This ball-and-socket style bearing kit is used in your dryer to support the rear of the drum as it tumbles through the dry cycle. The bearing attaches on the inside of the rear panel of the dryer cabinet. Over time, the bearing or the bushing can wear out, and the ball support can become damaged. If these things happen, your dryer may not tumble, or it will be noisy while operating. If this is the case, you may need to replace these parts. This genuine OEM parts kit includes one bearing, one ball shaft, one ball bearing, one ball bearing retainer, a small tube of high-temperature lubricant, and the installation screws. Completing this repair requires taking the entire drum out of your dryer along with handling greasy parts, so have a rag handy for cleanup. Please ensure that you disconnect the power supply to your appliance before beginning this repair.

Videos For installing this part.

Replacing your Rear Drum Bearing Kit

Replacing your Rear Drum Bearing Kit

Questions and Answers

We're sorry, but our Q&A experts are temporarily unavailable.
Please check back later if you still haven't found the answer you need.

View More View Less
Drum Belt
$17.64
In Stock
Upper Drum Glide
$34.77
In Stock
Affresh Washing Machine Cleaner - 3 pack
$12.58
In Stock
Produce Preserver Filter
$21.50
In Stock
Affresh Dishwasher Cleaner Tablets - 6
$19.09
In Stock
Cooktop Cleaning Cream
$15.57
In Stock
Cooktop Cleaner
$17.74
In Stock
Affresh Cleaner
$19.09
In Stock

Installation Instructions Provided by Fix customers like you.

Average Repair Rating: 2.8 / 5.0, 37 reviews.
  • 1
  • 2
  • 3
Sort by:
Sorry, we couldn't find any existing installation instruction that matched.
Customer:
Fred from San Antonio, TX
Parts Used:
5303281153
Difficulty Level:
Easy
Total Repair Time:
30 - 60 mins
Tools:
Nutdriver, Screw drivers
High pitched squeel while running dryer, replaced rear bearing, drive belt and front slider.
Followed the steps outlined in the video.
6 of 7 people found this instruction helpful.
Was this instruction helpful to you?
Thank you for voting!
Customer:
michael from louisville, KY
Parts Used:
5303281153
Difficulty Level:
Really Easy
Total Repair Time:
30 - 60 mins
Tools:
Screw drivers, Socket set
Squealing noise when drying clothes.
Disconnect power. Disconnected vent hose and moved dryer to area where i could easily remove drum. Opened top and front door dryer covers , cleaned dryer for lint buildup before you go any further, then i disconnected the wiring from open close switch noted where colored wires went on switch. Opened cover on back to get to drum belt on i dler motor pulleys. Took belt off idler motor pulleys. Lifted drum up off drum gear houseing useing the belt to help lift the back. Once drum removed used caulking tape to hold back of gear houseing with bearing t and used adjustable wrench to disconnect gear houseing with bearing. I then went to back of drum and took off the drum gear and installed new one. Before installing new one i used screws to tap into new three holes on new drum gear because they were not threaded and working by myself made it easier to align and install. Set and aligned drum gear on back of dryer drum and used caulking tape to hold gear in place and tightened screws with screw driver. Installed gear housing with ball bearing by aligning nut bar on back of dryer and holding in place with caulking tape then went around front inside of dryer and lightly screwed gear housing in place. Went around back of dryer where i slightly pulled out bar and useing gear grease installed the ball bearing and then tightened the housing in place. Removed all caulking tape and useing dryer belt reinstalled the dryer drum and connected dryer belt back onto the idler motor pulleys.. installed front door cover and installed wiring for open clothes switch and light socket. Then i tested dryer first manually to aligned the dryer belt to old markings on the drum, i reinstalled the dryer vent hose, then i plugged the dryer into the electrical outlet and set it on 10 minutest to dry. And it worked fine. So i aligned the top cover and snapped it back in place and useing screwdriver i put idler cover on.
2 of 2 people found this instruction helpful.
Was this instruction helpful to you?
Thank you for voting!
Customer:
David from Augusta, GA
Parts Used:
5303281153
Difficulty Level:
Really Easy
Total Repair Time:
30 - 60 mins
Tools:
Screw drivers, Socket set
Nylon boot worn causing ball hitch to grind away on bearing bracket
The ball hitch comes with pre drilled holes but none are threaded like the original. You have to thread them yourself and it is something your not going to like as you should never receive a new part and have to alter it in any way just to install it.
2 of 2 people found this instruction helpful.
Was this instruction helpful to you?
Thank you for voting!
Customer:
Robert from Lenoir, NC
Parts Used:
5303281153
Difficulty Level:
Really Easy
Total Repair Time:
30 - 60 mins
Tools:
Pliers, Screw drivers, Socket set
drum bearing worn out , making really bad noise and drum stopped turning
followed the directions , was very clear and precise , easy to follow
1 person found this instruction helpful.
Was this instruction helpful to you?
Thank you for voting!
Customer:
Debbie from Huntsville, AL
Parts Used:
5303281154, 5303281153
Difficulty Level:
A Bit Difficult
Total Repair Time:
More than 2 hours
Tools:
Nutdriver, Screw drivers
Noisy squealing and finally banging when dryer drum came out of bearing.
Ordered rear drum bearing kit and flat belt since drum had to be removed. Followed excellent video for the rear drum repair. The only hitch I encountered was removing the 3 small screws to release the shaft from the drum. One of them came out easily, but the remaining two were really difficult. Finally, I hit them with the heat from a hair dryer and they released, but in hindsight, I could have left the original shaft in place. It was in great shape and would have been fine. Here was the next problem...my husband got a little too aggressive when returning the drum to the new bearing and must have hit the heater element coil. Tumbled beautifully with no noise, but no heat. The coil was very brittle and likely broke easily so we are now replacing the coil. That can get expensive buying that entire assembly. Research the coil size (mine is 1/4") and carefully handle it and replacing the coil alone will save you $$$.
1 person found this instruction helpful.
Was this instruction helpful to you?
Thank you for voting!
Customer:
D M from Topeka, KS
Parts Used:
5303281153
Difficulty Level:
A Bit Difficult
Total Repair Time:
30 - 60 mins
Tools:
Nutdriver, Screw drivers
Replacing rear drum bearing
was able to release drive belt with access panel in back of dryer. removing old bearing, it was necessary to demolish bracket, due to age and brittleness of old one...replacement kit was complete and exact. rest of replacement went smoothly, except I wasn't sure I had new bearing seated properly - I didn't feel any positive 'snap' when I seated the bearing in the bracket. It must have gone in correctly, though, because everything worked perfectly
0 of 1 people found this instruction helpful.
Was this instruction helpful to you?
Thank you for voting!
Customer:
Jerry from Wytheville, VA
Parts Used:
5303281153
Difficulty Level:
Easy
Total Repair Time:
1- 2 hours
Tools:
Nutdriver, Screw drivers
Noise
removed the drum I have been repairing electrical appliances since 1965 the only problem with this repair was the screws in the rear of the drum would not break lose had to drill them out which it took a little longer.
0 of 1 people found this instruction helpful.
Was this instruction helpful to you?
Thank you for voting!
Customer:
Bill from Stephenson, MI
Parts Used:
5303281153
Difficulty Level:
A Bit Difficult
Total Repair Time:
1- 2 hours
Tools:
Nutdriver, Screw drivers
Noisy dryer
Popped he top off, removed the front, repaced the bearing and nylon bearing block, new grease and I waa done. 1 and 1/2 hours and I was done. All the parts I needed were in the kit. Never even had to pull it away from the wall. Nice and quiet again.
0 of 1 people found this instruction helpful.
Was this instruction helpful to you?
Thank you for voting!
Customer:
Chip from Portsmouth, OH
Parts Used:
5303281153
Difficulty Level:
Easy
Total Repair Time:
30 - 60 mins
my drum would not turn with heavy load, and squeaked loud, self diagnosed that I needed to replace the drum bearing.
First thing I did was watch the great video on this web site that showed me exactly what I needed to do. Anybody that can operate a screwdriver can do this repair. One word of caution. The metal edges on your dryer are very sharp. I cut my hands removing the drum. wear work gloves. After I replaced the drum bearing kit, (and clean up the blood) my dryer is running like new.
0 of 1 people found this instruction helpful.
Was this instruction helpful to you?
Thank you for voting!
Customer:
Robert from Sachse, TX
Parts Used:
5303281153
Difficulty Level:
Easy
Total Repair Time:
1- 2 hours
Tools:
Nutdriver, Screw drivers
Fairly loud noise
Watched video instructions several times. They were very clear. Did exactly as described except, since I'm quite a bit older than the repairman, had to remove the rear panel to reinstall the belt. Very pleased with experience, from order to delivery to completion.
0 of 1 people found this instruction helpful.
Was this instruction helpful to you?
Thank you for voting!
  • 1
  • 2
  • 3
Customer Reviews
Average Rating: (3 Reviews)
5.0
★★★★★
★★★★★
Filter By Rating:
  • 5
    3
  • 4
    0
  • 3
    0
  • 2
    0
  • 1
    0
  • 1
Sort by:
Sorry, we couldn't find any existing reviews that matched. Try using some different or simpler keywords.

Model Compatibility

This part works with the following models:
Fix Number: FIX459829
Manufacturer Part Number: 5303281153
Brand
Model Number
Description
Frigidaire
41749012890
Dryer - Residential, Electric
Frigidaire
41749022890
Dryer - Residential, Electric
Kenmore
41759012890
Dryer - Kemore Dryer 41759012890
Frigidaire
41759022890
Dryer - Gas
Kenmore
41761712510
Washer Dryer Combo - LAUNDRY CENTER
Kenmore
41761712511
Washer Dryer Combo - Kenmore 41761712511 Laundry Center
Kenmore
41761722510
Washer Dryer Combo - LAUNDRY CENTER
Kenmore
41761722511
Washer Dryer Combo - Laundry Center
Kenmore
41761723510
Washer Dryer Combo - LAUNDRY CENTER
Kenmore
41761723511
Washer Dryer Combo - Laundry Center
Kenmore
41761732810
Washer Dryer Combo - Laundry Center
Kenmore
41761732811
Washer Dryer Combo - Laundry Center
Kenmore
41761733810
Washer Dryer Combo - Laundry Center
Kenmore
41761733811
Washer Dryer Combo - Kenmore 41761733811 Laundry Center Combo
Kenmore
41764182300
Dryer
Kenmore
41769042990
Dryer
Kenmore
41769042991
Dryer
Kenmore
41769052990
Dryer
Kenmore
41769052991
Dryer
Kenmore
41771712510
Washer Dryer Combo - LAUNDRY CENTER
Kenmore
41771712511
Washer Dryer Combo - LAUNDRY CENTER
Kenmore
41771712512
Washer Dryer Combo - Laundry Center
Kenmore
41771722510
Washer Dryer Combo - LAUNDRY CENTER
Kenmore
41771722511
Washer Dryer Combo - LAUNDRY CENTER
Kenmore
41771722512
Washer Dryer Combo - Laundry Center
Kenmore
41771723510
Washer Dryer Combo - LAUNDRY CENTER
Kenmore
41771723511
Washer Dryer Combo - LAUNDRY CENTER
Kenmore
41771723512
Washer Dryer Combo - Laundry Center
Kenmore
41771732810
Washer Dryer Combo - Laundry Center
Kenmore
41771732811
Washer Dryer Combo - Kenmore 41771732811 Laundry Center Combo