Part Location Diagram of WP8539324 Whirlpool Upper Spray Arm Mount
See part 14 in the diagram
Replacing your Kenmore Dishwasher Upper Spray Arm Mount
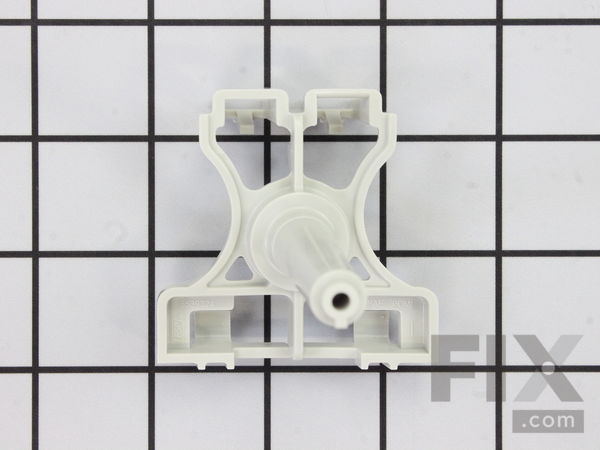
( Grid squares measure 1x1 inch )

Upper Spray Arm Mount

★★★★★
★★★★★
1 Review

Rated by 20 customers 

?

Really Easy 

15 - 30 mins 

Ratings submitted by customers like you who bought this part.

?
$10.39
In Stock
Fix Number:
FIX11746245
Manufacturer #:
WP8539324
Manufactured by:
Whirlpool

Product Description

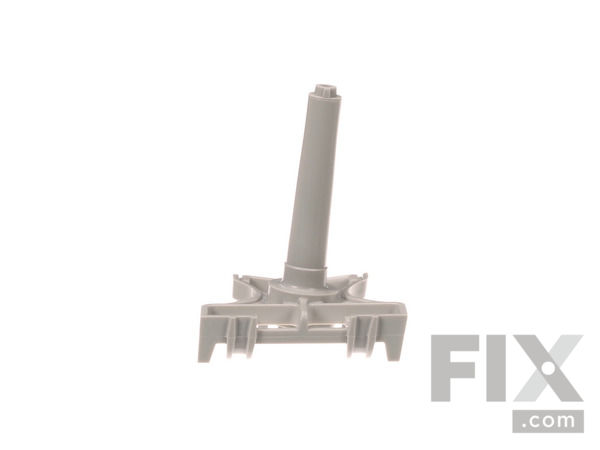
This genuine OEM upper spray arm mount is used to hold the spray arm to the top rack in your dishwasher. This part is made of plastic and has been redesigned by the manufactured so it may look different than the part you are replacing. This new version no longer needs to be screwed onto the top rack, it simply clips into place. To do this repair, you will need to remove the rack from the dishwasher by removing the rail stop clips. Once the top rack is on a suitable work surface, you will need a Philips screwdriver in order to remove the spray arm and the old, damaged mounting bracket. Once the new mount has been snapped into place, you can reinstall the other parts and place the rack back into your dishwasher.

Videos For installing this part.

Replacing your Upper Spray Arm Mount

Replacing your Upper Spray Arm Mount

Questions and Answers

We're sorry, but our Q&A experts are temporarily unavailable.
Please check back later if you still haven't found the answer you need.

Installation Instructions Provided by Fix customers like you.

Average Repair Rating: 4.2 / 5.0, 20 reviews.
  • 1
  • 2
Sort by:
Sorry, we couldn't find any existing installation instruction that matched.
Customer:
Christina from REDDING, CA
Parts Used:
WP8539324, 675808
Difficulty Level:
Really Easy
Total Repair Time:
15 - 30 mins
Tools:
Screw drivers
Replacing upper shower arm
I followed the instruction in the video you provided on product sale page ... was clear and very helpful.
4 of 4 people found this instruction helpful.
Was this instruction helpful to you?
Thank you for voting!
Customer:
Stephanie from Indianapolis, IN
Parts Used:
WP8539324, 675808, WP3378134
Difficulty Level:
Easy
Total Repair Time:
Less than 15 mins
Tools:
Screw drivers
The spray arm had broken off of the mount. Also, the rince aid cap had long ago melted.
I simply followed the video instructions to replace the spray arm kit. I had to first replace the spray arm mount as mine had actually broken apart. It literally took less than 15 minutes including watching the video. I have to admit I felt very proud of myself for doing this repair myself. After opening my dishwasher door one evening to find spray arm broken off and laying in the lower rack, my first thought was "oh no, I broke my dishwasher and I can't afford a new one". Once I calmed down I decided to see if it was possible to order dishwasher parts. I used my best friend, google, and found this site. I was impressed with both the affordability and the timeliness. I had my part within 36 hours of placing the order. When I first opened the package and realized there were no instructions included I was a little nervous but then I remembered that I had seen there was an instruction video on the site. I would highly recommend watching the video and will tell you that it was as simple a fix for me as it was for the technician in the video. As for the rinse aid cap, I had to pry out the old one with a screwdriver as it had melted but that wasn't difficult either. The best part is that my dishes look better than they have in a very long time!
2 of 2 people found this instruction helpful.
Was this instruction helpful to you?
Thank you for voting!
Customer:
Johnny from HEBER SPRINGS, AR
Parts Used:
WP8539324, 675808
Difficulty Level:
Really Easy
Total Repair Time:
15 - 30 mins
Tools:
Screw drivers
The spray arm assembly was worn out
Step 1. I removed the two clips/fasteners which allowed the top dishwasher rack to slide out.
Step two. I turned the rack upside down and placed it on the counter. Then I removed the middle spray assembly with a Phillips screwdriver.
Step 3. I replaced the spray arm assembly and also the upper spray mount.
Step 4. P laced the rack back into the dishwasher and put the clips back into place.
Step 5. Made sure everything was aligned.
***. There is an installation video available on the parts site. ***
1 person found this instruction helpful.
Was this instruction helpful to you?
Thank you for voting!
Customer:
Joseph from Monroe, WA
Parts Used:
WP8539324, WP9742946, 4172127, WP3376846
Difficulty Level:
Easy
Total Repair Time:
30 - 60 mins
Tools:
Nutdriver, Screw drivers
Leaking from bottom of the door.
I originally thought the bottom door seal was leaking. Replaced seal, still leaked. Replaced wash arm bearing ring and spray arm seal. Still leaked. Further inspection of top of the pump assembly, there were 2 screws very loose which allowed the ribbon gasket to leak which directed the water to spray forcefully under the door seal. Tightened the two screws after reseating the gasket. Problem solved. Success has struck! Always a good day!
1 person found this instruction helpful.
Was this instruction helpful to you?
Thank you for voting!
Customer:
Shanon M from Longview, WA
Parts Used:
WP8539324, WP8268843
Difficulty Level:
Really Easy
Total Repair Time:
15 - 30 mins
Tools:
Screw drivers
Cracked & broken
Unscrewed old one. Found part numbers located on pieces. Googled part numbers and there they were. Added to cart. Paid with PayPal. Waited for them to arrive. Clipped into place and replaced screws. Done??
0 of 1 people found this instruction helpful.
Was this instruction helpful to you?
Thank you for voting!
Customer:
Christopher from La Jolla, CA
Parts Used:
WP8539324
Difficulty Level:
Easy
Total Repair Time:
Less than 15 mins
Tools:
Screw drivers
Upper spray arm mount axle broken; spray arm detached from assembly
I unscrewed the old spray arm mount and snapped in the new one (which does not require screws). Then I reattached (using the old screw) the spray arm to the new axle (it looks like a nozzle). One thing that could be more clear is that the spray arm is designed deliberately a little bit tilted, so it is not supposed to line up at 90 degree s. (I confirmed this by trying to fit the old broken axle back onto old mount it broke off of, and it clearly was tilted off center by about 10 or 15 degrees).
0 of 1 people found this instruction helpful.
Was this instruction helpful to you?
Thank you for voting!
Customer:
Doris from Mount Vernon, IL
Parts Used:
WP8539324
Difficulty Level:
Really Easy
Total Repair Time:
Less than 15 mins
Tools:
Pliers, Screw drivers
Had broken spray arm mount.
Was so easy to remove old broken part and replace with new part. The new latch made it easy to reattach to dish drain.
0 of 1 people found this instruction helpful.
Was this instruction helpful to you?
Thank you for voting!
Customer:
Timothy from Elmont, NY
Parts Used:
WP8539324
Difficulty Level:
Very Easy
Total Repair Time:
Less than 15 mins
Tools:
Screw drivers
Top tray sprayer broke off
Replaced both the top sprayer and arm mount assembly. Took less than 5 min. My 20 yr old dishwasher is like new again
0 of 1 people found this instruction helpful.
Was this instruction helpful to you?
Thank you for voting!
Customer:
Helen from Grants Pass, OR
Parts Used:
WP8539324
Difficulty Level:
Very Easy
Total Repair Time:
15 - 30 mins
Tools:
Screw drivers
Mount broke
Replaced broken mount and arm with upper spray arm kit. New mount system. Paid attention to keyway in mount.
0 of 1 people found this instruction helpful.
Was this instruction helpful to you?
Thank you for voting!
Customer:
David from New York, NY
Parts Used:
WP8539324, WP8268812
Difficulty Level:
Easy
Total Repair Time:
15 - 30 mins
Tools:
Nutdriver, Screw drivers
Cracked upper spray arm mount causes arm to be blocked when spinning
Pulled off clip securing the flexible water channel to the upper tray. Unscrewed cracked mount. Used nutdriver to remove lower spray arm mount, releasing cracked upper mount. Replacement upper mount differed from original, so reassembly differed as well: first clip the new mount onto upper tray, then use nutdriver to reconnect lower moun t (and the spray arm) to the new mount. No need for old screw to retain the new mount (since it is clipped on). Re-clip the flexible water channel to the upper tray.
0 of 1 people found this instruction helpful.
Was this instruction helpful to you?
Thank you for voting!
  • 1
  • 2
Customer Reviews
Average Rating: (1 Review)
5.0
★★★★★
★★★★★
Filter By Rating:
  • 5
    1
  • 4
    0
  • 3
    0
  • 2
    0
  • 1
    0
  • 1
Sort by:
Sorry, we couldn't find any existing reviews that matched. Try using some different or simpler keywords.

Model Compatibility

This part works with the following models:
Fix Number: FIX11746245
Manufacturer Part Number: WP8539324
Brand
Model Number
Description
Kenmore
110773811
Dishwasher
Kenmore
110773812
Dishwasher
Kenmore
110773813
Dishwasher
Kenmore
110773881
Dishwasher
Kenmore
110773882
Dishwasher
Kenmore
110773883
Dishwasher
Kenmore
66515622000
Dishwasher
Kenmore
66515624000
Dishwasher
Kenmore
66515627000
Dishwasher
Kenmore
66515629000
Dishwasher
Kenmore
66515632000
Dishwasher
Kenmore
66515634000
Dishwasher
Kenmore
66515637000
Dishwasher
Kenmore
66515639000
Dishwasher
Kenmore
66515652000
Dishwasher
Kenmore
66515654000
Dishwasher
Kenmore
66515659000
Dishwasher
Kenmore
66515682000
Dishwasher
Kenmore
66515684000
Dishwasher
Kenmore
66515689000
Dishwasher
Kenmore
66515701890
Dishwasher
Kenmore
66515701891
Dishwasher
Kenmore
66515701892
Dishwasher
Kenmore
66515702990
Dishwasher
Kenmore
66515705890
Dishwasher
Kenmore
66515705891
Dishwasher
Kenmore
66515705892
Dishwasher
Kenmore
66515707990
Dishwasher
Kenmore
66515708890
Dishwasher
Kenmore
66515708891
Dishwasher