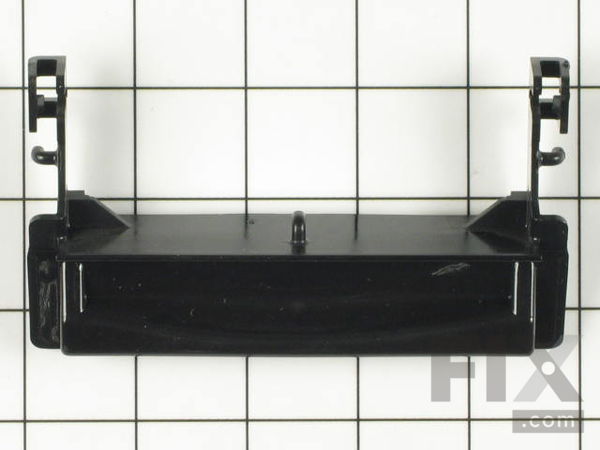
Part Location Diagram of WP8269117 Whirlpool Door Handle
See part 9 in the diagram
( Grid squares measure 1x1 inch )

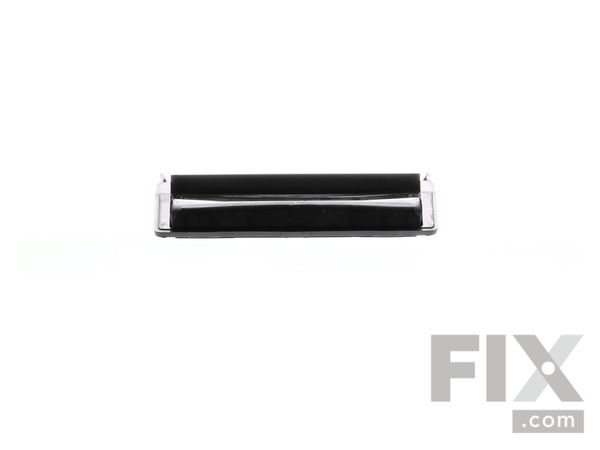
Door Handle WP8269117

★★★★★
★★★★★
1 Review

Rated by 8 customers 

?

Really Easy 

15 - 30 mins 

Ratings submitted by customers like you who bought this part.

?
$72.89
In Stock
Fix Number:
FIX11745495
Manufacturer #:
WP8269117
Manufactured by:
Whirlpool

Product Description

NOTE: This part is no longer available in white or biscuit. HANDLE only.

Questions and Answers

We're sorry, but our Q&A experts are temporarily unavailable.
Please check back later if you still haven't found the answer you need.

View More View Less
Door Release Spring
$5.41
In Stock
Door Latch Bracket Kit - NO Handle
$62.27
In Stock
Affresh Washing Machine Cleaner - 3 pack
$12.58
In Stock
Produce Preserver Filter
$21.50
In Stock
Affresh Dishwasher Cleaner Tablets - 6
$19.09
In Stock
Cooktop Cleaning Cream
$15.57
In Stock
Cooktop Cleaner
$17.74
In Stock
Affresh Cleaner
$19.09
In Stock

Installation Instructions Provided by Fix customers like you.

Average Repair Rating: 4.2 / 5.0, 8 reviews.
  • 1
Sort by:
Sorry, we couldn't find any existing installation instruction that matched.
Customer:
Kerry from HANSVILLE, WA
Parts Used:
WP8269117, WP8268540
Difficulty Level:
Easy
Total Repair Time:
30 - 60 mins
Tools:
Pliers
Door handle would not lock. Dishwasher would therefore not start. Latch turned out to been broken internally right at the hinge point and 1 of 2 springs was missing from it.
1) Turn off the circuit breaker to dishwasher.
2) I would suggest you park a chair right at your dishwasher door so you can comfortably be there for awhile.
3) Use Hex head driver to remove top set of screws.
4) Gently pull away upper electronic panel to see the mechanics of the door lock mechanism. Move gently as there are a lot of wires attached that won't let you take the panel too far away from the main door panel without damage. I did not have to unplug any of these wires but it was occasionally a balancing act at first.
5) The door handle mechanism is held in by friction. At the top of the unit (closest to the top of dishwasher), on opposite sides, you will see two gray tabs (gray being the color of main panels plastic frame) holding two black hooking tabs (black being the color of the door mechanism) tightly into the body of the dishwasher frame. Use your fingers to gently pull away the gray tabs to allow the door mechanism loose. Pull up. It will be still wired in but it should give enough room to work.
6) The door latch itself (located between the door mechanism and door panel) will now be very loose as it is not pressured into the door frame. Your main concern here is to use both hands to gently open up the door latch hinge (plastic, flexible to a degree but you have to work with it to not break it) let off the off the old door latch. Remove the old springs.
7) Put in the new door latch and again gently ease it's swivels over the main mechanisms hinges (on the door mechanism) with two fingers. This is firm but gentle work so as to not break the plastic.
8) Attach the new springs first on the main door mechanism plastic hook. Use needle nose pliers to grab the loose spring loop up to the door latch mechanisms hook. The springs that Fix.com sells are actually pretty strong and can handle a good amount of pressure with pliers without bending out of shape. You have to hold the latch to the body of the mechanism as you now install the spring to match on the other side. Do a little test to swinging action of the latch to make sure it all holds together.
9) Place the door mechanism and new latch back into place. There are gray plastic guidance pins on the main panel so you can place it correctly. Then press the black door mechanism tabs down on the upper right and left sides down on the gray locking pins to lock it in... just the opposite of what you did at the start to remove the door mechanism.
10) Note: The door handle will not work the way you remember before the fix/operation until you turn the circuit breaker back on because the mechanism uses an electric hydraulic pin to push back against the latch spring action.
11) Re-screw the door panel back on firmly.
12) Turn on the circuit breaker. Test the door action (the feel will tell you if you put the latch in correctly). Ultimately, if the machine now progresses and starts a wash, you likely installed it correctly **BUT** I would not start a wash with out being able to hang around and make sure the door seal is tight and not leaking.
13) Enjoy the fact that you spent $60 to get 5 more years of life out of a otherwise perfectly good dishwasher as opposed to dropping $500 un-necessarily.
5 of 6 people found this instruction helpful.
Was this instruction helpful to you?
Thank you for voting!
Customer:
michael from warren,, RI
Parts Used:
WP8269117, WP8268540
Difficulty Level:
Really Easy
Total Repair Time:
Less than 15 mins
Tools:
Nutdriver, Screw drivers
BROKEN DOOR HANDLE , WOULD NOT LOCK DOOR
FOLLOW WEB SITE INSTRUCTIONS AND VIDEO. VIDEO EXSPLAINED WHAT TO EXSPECT PRIOR TO ATTEMPTING REPAIR VERY HELPFUL.IN UNDERSTANDING WHAT NOT TO TAKE APART AS WELL WHAT TO DO
2 of 2 people found this instruction helpful.
Was this instruction helpful to you?
Thank you for voting!
Customer:
Tom from McLean, VA
Parts Used:
WP8269117, WP8268540
Difficulty Level:
Really Easy
Total Repair Time:
Less than 15 mins
Tools:
Nutdriver, Socket set, Wrench set
Broken handle on dishwasher
I used Thomas from Austin's great instructions with a couple of additions for the tool sizes. Ordered new part(s), parts arrived in a few days, removed the 6 screws holding the control panel cover onto the dishwasher door (requires a T-15 torx driver), removed control panel cover (carefully, so as not to break any wires on the wiring harn ess from the door to the computer board), unscrewed/removed door switch with a 3/16" or 5 mm socket, popped off the the two plastic brackets holding the door handle assembly (door handle, latch bracket, door latch actuator, spring) to the front door, removed the broken handle, installed the new handle, reversed steps, done. Works like a champ.

The one thing I did do at the same time is notice that there's only one return spring for the door handle (even though both the handle and latch bracket have hooks for springs on both sides. I suspect this is what caused the door handle to break in the first place (the spring causes uneven tension on the handle, which over time caused the arms on the handle to catch and break). So I also ordered a second spring, and when I attached the new door handle to the latch bracket assembly I also installed return springs on both sides. With even tension, the handle doesn't tend to twist when it raises and lowers the latch, so hopefully won't break again. Just a thought while you have the unit off the dishwasher.
2 of 2 people found this instruction helpful.
Was this instruction helpful to you?
Thank you for voting!
Customer:
Robert from Arvada, CO
Parts Used:
WP8269117, WP8268540
Difficulty Level:
Very Easy
Total Repair Time:
30 - 60 mins
Tools:
Nutdriver, Screw drivers
Door handle broken
Removed control panel cover to access handle and latch assemble. Remove door handle and latch assemble to make it easier to replace broken hinge parts and spring. Reassemble with new handle and springs. Replace latch and handle back into door and replace control panel cover. 45 minute job from start time to clean up.
0 of 1 people found this instruction helpful.
Was this instruction helpful to you?
Thank you for voting!
Customer:
Stan from Fredericksburg, TX
Parts Used:
WP8269117, WP8268540
Difficulty Level:
Easy
Total Repair Time:
30 - 60 mins
Dishwasher failed to start, start light flashing
Unscrewed 6 Torx screws which attach control panel at the top of the door and observed that the latch handle was broken, which prevented the small switch which signals that the door is closed from working properly. Since the switch could not click "on", neither would the washer! Used superglue to make a temp repair, then installed new par t with an extra spring when they arrived a few days later. Unplug the unit for safety. Removing the small switch (one small screw) allows one to lift out the whole plastic latch assembly and change the latch handle and spring(s) with little difficulty.
0 of 1 people found this instruction helpful.
Was this instruction helpful to you?
Thank you for voting!
Customer:
Chuck from Kiel, WI
Parts Used:
WP8269117
Difficulty Level:
Really Easy
Total Repair Time:
15 - 30 mins
Tools:
Pliers, Screw drivers
Handle was broke.
Very easy installation. Parts arrived in 2 days. Great service.
0 of 1 people found this instruction helpful.
Was this instruction helpful to you?
Thank you for voting!
Customer:
DAVID from ELDRIDGE, IA
Parts Used:
WP8269117, WP8268540
Difficulty Level:
Really Easy
Total Repair Time:
Less than 15 mins
Tools:
Pliers, Screw drivers
door handle broke
Revere process in taking out broken. Very simple. Appreciated how quick the new parts arrived.
0 of 1 people found this instruction helpful.
Was this instruction helpful to you?
Thank you for voting!
Customer:
Richard from Grand Isle, VT
Parts Used:
WP8269117
Difficulty Level:
Easy
Total Repair Time:
15 - 30 mins
Tools:
Screw drivers
Remove six screws in the upper door and replace the handle and spring
The old handle had broken off and laid inside the door. I first removed the upper section of door by removing the six torques screws that hold it in place. The handle itself, is held in place by two snap connections. Release the snaps and be careful not harm the sensor switch wires that are attached. I installed the handle and found the original spring laying inside the door casing. reverse the process and you are done. Not a very hard repair and I recommend watching the brief video online, which makes it easy.
0 of 1 people found this instruction helpful.
Was this instruction helpful to you?
Thank you for voting!
  • 1
Customer Reviews
Average Rating: (1 Review)
5.0
★★★★★
★★★★★
Filter By Rating:
  • 5
    1
  • 4
    0
  • 3
    0
  • 2
    0
  • 1
    0
  • 1
Sort by:
Sorry, we couldn't find any existing reviews that matched. Try using some different or simpler keywords.

Model Compatibility

This part works with the following models:
Fix Number: FIX11745495
Manufacturer Part Number: WP8269117
Brand
Model Number
Description
KitchenAid
KUDC01TMBL0
Dishwasher
KitchenAid
KUDC01TMBL1
Dishwasher
KitchenAid
KUDC01TMBL6
Dishwasher
KitchenAid
KUDC01TMWH1
Dishwasher
KitchenAid
KUDC01TMWH6
Dishwasher
KitchenAid
KUDC01TMWHO
Dishwasher
KitchenAid
KUDC02IRBL0
Dishwasher
KitchenAid
KUDC02IRBL1
Dishwasher
KitchenAid
KUDC02IRBL2
Dishwasher
KitchenAid
KUDC02IRBL3
Dishwasher
KitchenAid
KUDC02IRBL4
Dishwasher
KitchenAid
KUDC02IRBS1
Dishwasher
KitchenAid
KUDC02IRBS2
Dishwasher
KitchenAid
KUDC02IRBS3
Dishwasher
KitchenAid
KUDC02IRBS4
Dishwasher
KitchenAid
KUDC02IRWH0
Dishwasher
KitchenAid
KUDC02IRWH1
Dishwasher
KitchenAid
KUDC02IRWH2
Dishwasher
KitchenAid
KUDC02IRWH3
Dishwasher
KitchenAid
KUDC02IRWH4
Dishwasher
KitchenAid
KUDC03ITBL0
Dishwasher
KitchenAid
KUDC03ITBL1
Dishwasher
KitchenAid
KUDC03ITBL2
Dishwasher
KitchenAid
KUDC03ITBL3
Dishwasher
KitchenAid
KUDC03ITBS0
Dishwasher
KitchenAid
KUDC03ITBS1
Dishwasher
KitchenAid
KUDC03ITBS2
Dishwasher
KitchenAid
KUDC03ITBS3
Dishwasher
KitchenAid
KUDC03IVBL0
Dishwasher
KitchenAid
KUDC03IVBL1
Dishwasher