Some of the parts we sell are eligible for mail-in rebates since we can recycle them. We will display any applicable rebates in your shopping cart. To redeem your rebate, contact Customer Service after you have received your part.
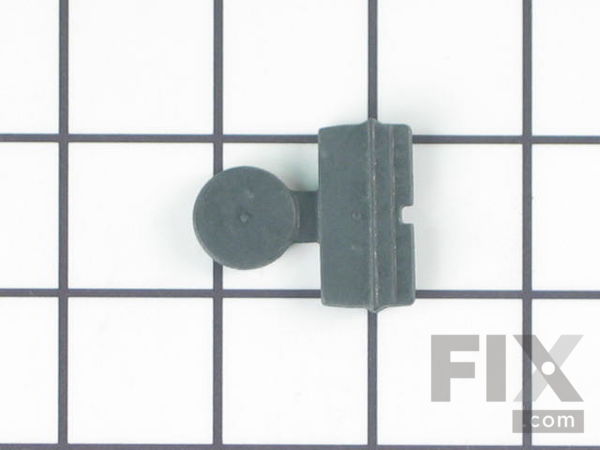
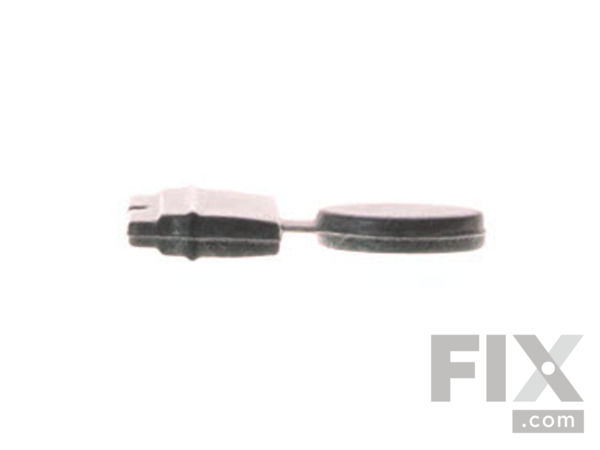
Sump Pump Check Valve
$52.87
In Stock
- Fix Number:
- FIX11745441
- Manufacturer #:
- WP8268375
- Manufactured by:
- Whirlpool
- Product Description
- May differ in appearance, but functions same as original. This valve allows the water to flow in the drain direction only and prevents the dirty water from coming back into the tub.
- Works with the following brands:
- KitchenAid, Kenmore, Whirlpool, Maytag
- Works with the following products
- Dishwasher
- Fixes the following symptoms
- Not cleaning dishes properly, Not draining, Leaking, Noisy
- Part# WP8268375 replaces these:
- AP6012234, 8268375, 8268389
Part Number Cross Reference
Product Description
May differ in appearance, but functions same as original. This valve allows the water to flow in the drain direction only and prevents the dirty water from coming back into the tub.
-
Works with the following brands:KitchenAid, Kenmore, Whirlpool, Maytag
-
Works with the following products:Dishwasher
-
Fixes the following symptoms:Not cleaning dishes properly, Not draining, Leaking, Noisy
-
Part# WP8268375 replaces these:AP6012234, 8268375, 8268389
Videos For installing this part.
Replacing your Sump Pump Check Valve

Questions and Answers
We're sorry, but our Q&A experts are temporarily unavailable.
Please check back later if you still haven't found the answer you need.
Related Parts Additional or alternate parts to consider.
Installation Instructions Provided by Fix customers like you.
- < Prev
- 1
- Next >
Sort by:
Search filter:
Clear Filter
Your search term must have 3 or more characters.
Keep searches simple. Use keywords, e.g. "leaking", "pump", "broken" or "fit".
Sorry, we couldn't find any existing installation instruction that matched.
Dishwasher was not cleaning well
It was news to me but a dishwasher needs to be cleaned periodically at least once per year. I watched a You tube video to get the basiscs for this dishwasher. The first step is to remove the upper racks. the two plastic end clips on the sling rails must be removed. 2. Remove the lower rack. 3. The third step is the water spinner. T
... Read more
his is done by holding the retaining nut with a pair of pliers and rotating the water spinner counterclockwise 4. Remove the water distribution system that conveys water to the upper rack by twisting it approx. 30 degrees clcckwise and lifting the bottom hub over the spinner assemby hub. This system is connected to the back and top of the dishwasher with retaing spring clips . 5 Next, remove the filter in the bottom of the dishwasher by using t20 star bit to remove 4 screws. 6. Use a smaller T bit to rove two scews holdin a flat retaining plate and the cover for the chopper assembly. 7. Remove chopper assem. housing by rpivoting housing up to the right . A screwdriver is needed. Clean all parts including dissassembly of the filter, the upper water distribution system etc. If you clean well and put it all back together, your dishwasher will clean again.
Read less
1 person
found this instruction helpful.
Was this instruction helpful to you?
Thank you for voting!
- Customer:
- James from vista, CA
- Parts Used:
- WP8268375
- Difficulty Level:
- Very Easy
- Total Repair Time:
- Less than 15 mins
- Tools:
- Pliers, Screw drivers, Wrench (Adjustable)
Dishwasher quit draining
Replaced the Sump pump check valve, but ended up replacing whole pump, still only took 30-60 minutes from start to finish.. Videos helped a ton...
1 person
found this instruction helpful.
Was this instruction helpful to you?
Thank you for voting!
Top tray not clean-spotty residue on dishes and glasses
The discharge hose was replaced, the original was loaded with residue but not blocked. Next I checked the possible parts to cause the problem-ordered and replaced. I did use a device, small wooden shim to assist installing the chopper. It was used to depress the spring during the installation.
1 person
found this instruction helpful.
Was this instruction helpful to you?
Thank you for voting!
- Customer:
- Gene from Killeen, TX
- Parts Used:
- WP8268375
- Difficulty Level:
- Really Easy
- Total Repair Time:
- 30 - 60 mins
- Tools:
- Pliers
Hose plugged up and noisy when running
Very easy to change
0 of 1 people
found this instruction helpful.
Was this instruction helpful to you?
Thank you for voting!
- Customer:
- Katrina from China, ME
- Parts Used:
- WP8268375
- Difficulty Level:
- Really Easy
- Total Repair Time:
- 30 - 60 mins
Machine was loud
Followed a YouTube video.
0 of 1 people
found this instruction helpful.
Was this instruction helpful to you?
Thank you for voting!
- Customer:
- Matthew from Seattle, WA
- Parts Used:
- WP8268375, W10083957V
- Difficulty Level:
- Really Easy
- Total Repair Time:
- 30 - 60 mins
- Tools:
- Screw drivers
not cleaning well
I followed instruction on the video to remove wash arms and lower cover. This hadn't been opened since I bought the machine. The area was completely disgusting and clogged. I'm surprised it worked at all. I removed all junk and cleaned with chlorine and an old tooth brush. The original chopper was loose and not working. The sump che
... Read more
ck valve had broken off and the disc was missing. I looked for but couldn't find the disc. I replaced both parts with new and the machine works as good as new now. I couldn't find any kind of schematic to see the water flow during the various cycles, but it looks like the check stops water from returning to sump during discharge. I was worried the old disc might damage the pump internally, but nothing seems amiss.
Read less
0 of 1 people
found this instruction helpful.
Was this instruction helpful to you?
Thank you for voting!
- Customer:
- Deiren from Myrtle Beach, SC
- Parts Used:
- WP8268375, WP8268433, W10083957V, WP8268340
- Difficulty Level:
- Easy
- Total Repair Time:
- 30 - 60 mins
- Tools:
- Screw drivers
Bad noise. Not cleaning well. Dishes in places not coming clean.
I followed a video to take the dishwasher apart and discovered that the chopper assembly was 'in pieces" and was the source of the "horrible noise". However, prior to the horrible noise I had noticed that dishes placed in certain places on the top rack were not coming clean and sometimes I would find debris that looked like "dirty dish w
... Read more
ater" had been used to rinse the dishes. When I had to dismantle the dishwasher to get to the chopper assembly, the sump pump check valve is in the same area. It definitely looked worn - so I ordered a new one. In getting to the chopper assembly, I had to remove the lower spray arm and the spray arm seal was frayed - so I ordered a new one. Then since the lower spray arm seal looked bad, I decided to take apart the upper spray arm assembly and that spray arm seal also looked quite worn - so I ordered a new one. Fortunately the video I found on line to disassemble my 10 year old Kenmore referred me to this site. This site had even better videos for replacing the above named parts. Furthermore, when they sent the "parts" they included links in their email for videos showing a step wise approach to replacing all 4 parts that I had ordered. They were the BEST instructions/videos. My 10 year old Kenmore is cleaning like a brand new dishwasher! Everything is clean and sparkling!
Read less
0 of 1 people
found this instruction helpful.
Was this instruction helpful to you?
Thank you for voting!
- Customer:
- Kim from Kennewick, WA
- Parts Used:
- WP8268375
- Difficulty Level:
- Easy
- Total Repair Time:
- 30 - 60 mins
- Tools:
- Nutdriver, Pliers, Screw drivers
Water was not draining completely
Before the repair, dirty water would consistently be left in the bottom of the dishwasher after a drain cycle resulting in dishes with spots or a dirty film. I replaced the check valve according to the video on this website, which was pretty straight forward, but it did not solve the drainage problem as I hoped. There was excess drain hos
... Read more
e in the cupboard under the sink which I pushed out of the cupboard and under the dishwasher and that fixed my drainage issue.
Read less
0 of 1 people
found this instruction helpful.
Was this instruction helpful to you?
Thank you for voting!
- Customer:
- James from Blairsville, GA
- Parts Used:
- WP8268375
- Difficulty Level:
- Easy
- Total Repair Time:
- 1- 2 hours
- Tools:
- Nutdriver, Screw drivers
water slowly draining back into machine after it turned off
Replaced the sump pump check valve according to the video. Hardest part was cleaning out gunk from the sump. Problem is I still have same problem. Machine will set overnight and the bottom will be covered with water. Need to keep looking.
0 of 1 people
found this instruction helpful.
Was this instruction helpful to you?
Thank you for voting!
- < Prev
- 1
- Next >
Model Compatibility
This part works with the following models:
Fix Number: FIX11745441
Manufacturer Part Number: WP8268375
Manufacturer Part Number: WP8268375
Brand
Model Number
Description
✖
Mail-In Recycling Rebate


