Wall Oven Parts
Find Parts Fast
Guaranteed Fit
Repair Videos

Popular Wall Oven Parts
- Fix Number
- FIX471605
- Manufacturer Part Number
- 5304409888
Fixes these symptoms
- Element will not heat
- Little to no heat when baking
- Little to no heat when broiling
- See more...
- Fix Number
- FIX470125
- Manufacturer Part Number
- 5303935058
Fixes these symptoms
- Element will not heat
- Oven not heating evenly
- Will Not Start
- See more...
Installation Instructions
SHIRLEY O from boxborough, MA
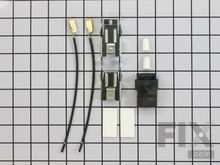
burner would not heat
removed burners, cut wires to each burner, installed new wires from terminal block kit. reinstalled surface element. Followed directions from video located at site of the ordered items
Read more...
- Fix Number
- FIX2376034
- Manufacturer Part Number
- 8206232A
Installation Instructions
Mark from North East, PA
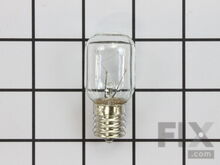
Bulb burnt out
Removed the screw holding the bulb cover replaced the bulb. Reinstalled the cover and screw. Remove dirty grease filter replaced with new grease filter.
Read more...
- Fix Number
- FIX1528542
- Manufacturer Part Number
- 316490000
Fixes these symptoms
- Element will not heat
- Gas igniter glows, but will not light
- Little to no heat when baking
- See more...
Installation Instructions
Paul from Chicopee, MA
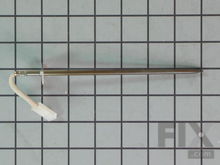
Bake element not heating
First tried heat probe replacement but bake element still not heating. Replaced control board solving problem. Easy installation.
Read more...
- Fix Number
- FIX884734
- Manufacturer Part Number
- 8009
Installation Instructions
Helen from Quincy, MA
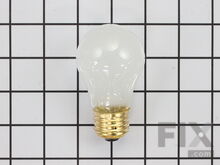
lightbulb in refrigerator went out
Removed plastic shield on top of refrigerator. Removed old bulb.. Replaced new bulb. Reinstalled plastic shield. Voila!
Read more...
- Fix Number
- FIX12751166
- Manufacturer Part Number
- 316538904
Installation Instructions
Chris from Lillington, NC
Broken bake element & light bulb
Turned of the power at the fuse box as the oven was hard wired to the electrical source and then removed the old element via the screws at the back of the oven. Disconnected the wires from the element and then reconnected those to the new element. Screwed the element base to the back wall of the oven and then replaced the light bulb.
Read more...
- Fix Number
- FIX470129
- Manufacturer Part Number
- 5303935066
Fixes these symptoms
- Element will not heat
- Gas igniter glows, but will not light
- Gas smell
- See more...
Installation Instructions
Mary from Ticonderoga, NY
When turning on the oven, it would not ignite.
Unplug the power.Took off the broiler door . Reached in , unscrewed the two screws holding the igniter (one screw was stripped so that gave me a little problem) put on the new igniter. Stripped the wires & put the caps on. Plugged back in the stove & worked great.
Read more...
- Fix Number
- FIX12008409
- Manufacturer Part Number
- SP0002652
Installation Instructions
muriel from NORTH BERGEN, NJ
Crumb tray uncleanable
The hardest part was unwrapping the package :) I was really pleased to see that this was a real quality product replacement and it fit perfectly.My only issue was the size of the packing box which would have fit 12 crumb trays when I only needed one. Too much waste! Read more...
- Fix Number
- FIX11731754
- Manufacturer Part Number
- 316233903
Fixes these symptoms
- Element will not heat
- Gas igniter glows, but will not light
- Little to no heat when baking
- See more...
- Fix Number
- FIX503627
- Manufacturer Part Number
- WFCB
Fixes these symptoms
- Ice maker dispenses too little ice
- Ice maker not making ice
- Ice maker won’t dispense ice
- See more...
Installation Instructions
Valerie from Staten Island, NY
side bin on the freezer door was broken.
It was fairly easy. Just open the freezer door remove the broken bin. Snap in the new one.
Read more...
Brands
- Admiral Wall Oven Parts
- Amana Wall Oven Parts
- Caloric Wall Oven Parts
- Crosley Wall Oven Parts
- Dacor Wall Oven Parts
- Electrolux Wall Oven Parts
- Frigidaire Wall Oven Parts
- General Electric Wall Oven Parts
- Gibson Wall Oven Parts
- Hardwick Wall Oven Parts
- Hoover Wall Oven Parts
- Hotpoint Wall Oven Parts
- Jenn-Air Wall Oven Parts
- Kelvinator Wall Oven Parts
- Kenmore Wall Oven Parts
- KitchenAid Wall Oven Parts
- Krups Wall Oven Parts
- LG Wall Oven Parts
- Litton Wall Oven Parts
- Magic Chef Wall Oven Parts
- Maytag Wall Oven Parts
- Norge Wall Oven Parts
- Roper Wall Oven Parts
- T-Fal Wall Oven Parts
- Tappan Wall Oven Parts
- Westinghouse Wall Oven Parts
- Whirlpool Wall Oven Parts
Related Pages
- Wall Oven Brackets and Flanges
- Wall Oven Caps and Lids
- Wall Oven Circuit Boards and Touch Pads
- Wall Oven Deflectors and Chutes
- Wall Oven Doors
- Wall Oven Drawers and Glides
- Wall Oven Ducts and Vents
- Wall Oven Elements and Burners
- Wall Oven Fans and Blowers
- Wall Oven Fuses
- Wall Oven Handles
- Wall Oven Handles and Latches
- Wall Oven Hardware
- Wall Oven Hinges
- Wall Oven Hoses and Tubes
- Wall Oven Igniters
- Wall Oven Insulation
- Wall Oven Knobs
- Wall Oven Latches
- Wall Oven Lights and Bulbs
- Wall Oven Motors
- Wall Oven Panels
- Wall Oven Racks
- Wall Oven Seals and Gaskets
- Wall Oven Sensors
- Wall Oven Springs and Shock Absorbers
- Wall Oven Switches
- Wall Oven Thermostats
- Wall Oven Transformers
- Wall Oven Trays and Shelves
- Wall Oven Trim
- Wall Oven Wire Plugs and Connectors
Popular Wall Oven Models
- MEW6530DDS Built-in, Electric
- KEBC208KSS02
- KEBC107KSS03
- PLEB30T8CCB Built-in, Electric
- PLEB30T9FCC Built-in, Electric
- KEBC208KSS0
- JS750SF1SS
- CWE5800ACB Built-in, Electric
- WW30430P Built-in, Electric, Wall
- MEW5530DDB Built-in, Electric
- NE59J7630SS ((AC)(0001)) Evn,5.9,120~240v 60hz,real Stainless
- JS630SF1SS
- KEBS107SSS04
- CWE5800ACE Built-in, Electric
- KEBS207SSS04
- KEBC208KSS04
- KEBS207BSS00
- NE58H9970WS ((AC)(0000)) 5.8 Cu. Ft. Induction Chef Collection Range Flex Duo Oven
- NE58H9970WS ((AA)(0001)) 5.8 Cu. Ft. Induction Chef Collection Range Flex Duo Oven
- NE58H9970WS ((AC)(0001)) 5.8 Cu. Ft. Induction Chef Collection Range Flex Duo Oven


