Caloric Refrigerator Parts
Find Parts Fast
Guaranteed Fit
Repair Videos


Popular Caloric Refrigerator Parts
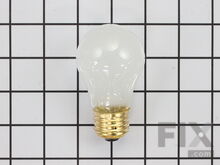
- Fix Number
- FIX884734
- Manufacturer Part Number
- 8009
Installation Instructions
Helen from Quincy, MA
lightbulb in refrigerator went out
Removed plastic shield on top of refrigerator. Removed old bulb.. Replaced new bulb. Reinstalled plastic shield. Voila!
Read more...
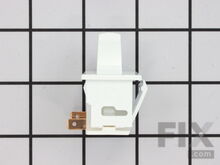
- Fix Number
- FIX12728638
- Manufacturer Part Number
- W11384469
Fixes these symptoms
- Light not working
- See more...
Installation Instructions
Marilyn from Dublin, OH
Light switch no longer worked
Turn off and unplug your refrigerator. I used the screwdriver on the left side of the part (where the plug is) and used the putty knife at the same time on the right side to push the spring lock portion of the part in. The part snapped out. I unplugged the left contact from the plug and put it on the new part, then I unplugged the right contact and put it on the new part. I did this so the wires would not go up into the refrigerator and be hard to find. I put the left side of the new part where the plug and contacts are in first then I snapped the right side in place. I plugged the refrigerator back in and it worked perfectly. Just take your time and gently remove and reconnect the new part. The store where I bought my refrigerator wanted $69.95 for a service call plus an hourly charge and part charge. Count on this site for your parts and do it yourself. I ordered the part on Monday, it was delivered on Tuesday around noon and I made the repair that afternoon.
Read more...
- Fix Number
- FIX2121513
- Manufacturer Part Number
- D7824706Q
Fixes these symptoms
- Clicking sound
- Doesn’t stop running
- Ice maker dispenses too little ice
- See more...
Installation Instructions
Edward from Casa Grande, AZ
Unit quit working. Wouldn't cycle any more. Made sounds like gears were maybe stripped..
Followed installation video on this web site. Works like a new one !
Read more...
- Fix Number
- FIX11757023
- Manufacturer Part Number
- WPW10662129
Fixes these symptoms
- Clicking sound
- Freezer not defrosting
- Freezer section too warm
- See more...
Installation Instructions
Lisa from Yulee, FL
Both comparments very warm but fan working and lights on
Bought Capacitor, but I had to purchase Combo Start Up Kit that Cap goes into. The site said that 78% of the time my problem of both compartments being warm were resolved/repair by replacing Capacitor, but when the item was replaced it did not and my son looked further and found that it would then be the Combination Start Up Kit (Part# PS11740412), which starts the compressor. Thanks to this site the video used to install both parts. I was able to use the old Capacitor and I am returning the new one first purchased.
Read more...
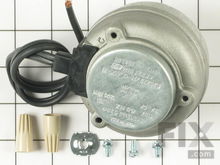
- Fix Number
- FIX395284
- Manufacturer Part Number
- 833697
Fixes these symptoms
- Freezer section too warm
- Fridge and Freezer are too warm
- Fridge runs too long
- See more...
Installation Instructions
Dan from Marietta, GA
Refrigerator not cooling.
Watched the video, replaced with the new motor, works great, fridge ice cold.
Read more...
- Fix Number
- FIX11741429
- Manufacturer Part Number
- WP338906
Fixes these symptoms
- Not Heating
- See more...
Installation Instructions
William from Corsicana, TX
Oor dryer would not get hot.
I opened the bottom section and watched as the igniter got red hot as it should but the gas valve did not open. I wired around the sensor and the gas valve opened and the fuel ignited. VERY IMPORTANT: DO NOT RUN YOUR DRYER IN THIS STATE: IT WILL BLOW UP!! I did a VERY short test, then ordered the new sensor. Just one screw holds the sensor (as shown in the Parts video). One screw out, new sensor, one screw in and our dryer is back in full and proper running order.
Read more...
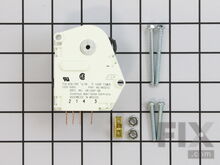
- Fix Number
- FIX11723171
- Manufacturer Part Number
- W10822278
Fixes these symptoms
- Freezer not defrosting
- Freezer section too warm
- Freezer too cold
- See more...
Installation Instructions
Carl from Columbia, SC
Refrigerator and freezer were warming to a temperature that was too warm.
Refrigerator and freezer were warming to a temperature that was too warm. I've known about defrost timers being a major part of the " frost free" design. In my model of refrigerator, the defrost timer is located at the bottom left on the left frame rail, behind a sheet metal mounting plate. Next to the drain pan. I recognized it with a flash light, and the one way knob that can only be turned in one direction. I turned the knob to manually advance the timer, then the compressor started, but be gentle with this practice as it can strip the plastic gears. If you lift the knob as you turn it, it will disengage the teeth of the gear and just turn the cam itself, stopping the defrost cycle and starting the refrigerating cycle. Then it's good for approx. 24 hours. Then it hung up again in the same spot. I did this for a week because I didn't have the time. Then I looked up my frige model number, and I found this site on a web search. I ordered the part over the phone with the helpful sales rep, just to confirm the part number. I've read about ten pages of the same repair from this website. Nothing I recognized as my frige. But the site had an exploded view of my frige and putting 2 & 2 together I nailed it down. Ordered the part, 2 1/2 days it was here. The instructions for your particular model may have the color coding listed, mine was not. So I figured my model was too old, the wiring diagram was simalar to mine on procedure 1. Long story. It took me longer to write this than to do the actual repair. Wiring research 15 minutes, change out 10 minutes. Hope this helps.
Read more...
- Fix Number
- FIX11747806
- Manufacturer Part Number
- WPA3073101
- Fix Number
- FIX2162263
- Manufacturer Part Number
- LA-1003
Fixes these symptoms
- Door won’t close
- See more...
Installation Instructions
James from Joshua, TX
Dryer plastic door catch was broke on dryer
I watched several videos on how to replace the latch, but my latch was broken on one side so I took a pair of pliers and a screwdriver and pried the old one out. Push the new one in, then replaced the male catch on the door. i didn't tighten the screw holding the male latch because they use it to allign the latch with the catch.
Read more...
- Fix Number
- FIX11742474
- Manufacturer Part Number
- WP4387503
Fixes these symptoms
- Freezer not defrosting
- Freezer section too warm
- Freezer too cold
- See more...
Installation Instructions
Chester from TALLAHASSEE, FL
My refrigerator freezer was freezing up.
Step 1. watch the videoStep 2. Unplug the unit
Step 3 remove bottom panel of freezer 2 screws, then remove ice maker 3 screws set it aside and take off back panel which has 2 screws. Remove bi-metal thermostat top right corner cut the two wires and replace with the new one. Splice wires back with same color wire use wire nut for each wire and tape up with electrical tape. Clip back on to copper tubing. Put panels back on. plug it in and you're done. Read more...
Appliance Type
Related Pages
Popular Caloric Refrigerator Models
- GFS207 (MN01) ELECTRIC REFRIGERATORS
- GTA18AL (P1184607WL) TOP MOUNT REFRIGERATOR/FREEZER
- GTA18AL (P1184606WL) TOP MOUNT REFRIGERATOR/FREEZER
- GTG18AL (P1181714WL) TOP MOUNT REFRIGERATOR/FREEZER
- GTW18AL (P1188801WL) TOP MOUNT REFRIGERATOR/FREEZER
- GFS185 (MN04) ELECTRIC REFRIGERATORS
- GFS185 (MN00) ELECTRIC REFRIGERATORS
- GFS185 (MN11) ELECTRIC REFRIGERATORS
- GFS185 (MN02) ELECTRIC REFRIGERATORS
- GFS185 (MN10) ELECTRIC REFRIGERATORS
- GFS185 (MN03) ELECTRIC REFRIGERATORS
- GFS162/MN11 Top Freezer
- GFS187/MN03 Electric
- GFS227/MN00 Side-by-side, Electric
- GFS140 Top Freezer
- GFS142MN01 (GFS142MN0 1) Electric
- GFD160 Electric
- GFS227 (MN00) ELECTRIC REFRIGERATORS
- GFS2271W10 (MN10) ELECTRIC REFRIGERATORS
- GFS187 (MN04) ELECTRIC REFRIGERATORS


