Range Hood Parts
Find Parts Fast
Guaranteed Fit
Repair Videos

Popular Range Hood Parts
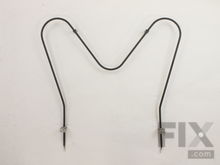
- Fix Number
- FIX438018
- Manufacturer Part Number
- 316075103
Fixes these symptoms
- Element will not heat
- Little to no heat when baking
- Little to no heat when broiling
- See more...
Installation Instructions
Werkheiser from Saylorsburg, PA
Bake element broke
Extremely easy. I unscrewed two screws and pulled out old element and plugged in the new one. Pushed back in and screwed the screws back in. That's it
Read more...
- Fix Number
- FIX471605
- Manufacturer Part Number
- 5304409888
Fixes these symptoms
- Element will not heat
- Little to no heat when baking
- Little to no heat when broiling
- See more...
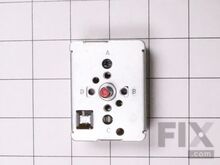
- Fix Number
- FIX1145040
- Manufacturer Part Number
- 316436001
Fixes these symptoms
- Element will not heat
- Little to no heat when broiling
- Oven is too hot
- See more...
Installation Instructions
Dan from RICEBORO, GA
8" burner on stove would go to high heat even if set on low.
Pulled stove out.Disconnected plug.
Removed back upper cover (6 screws).
Removed upper and lower wiring harness (quite easy).
Removed burner knob (on front of stove), removed two screws holding infinite switch.
Removed old switch, replaced with new.
Replaced screws at front.
Replaced burner knob.
Reinstalled back plate, plug in, good to go. Read more...
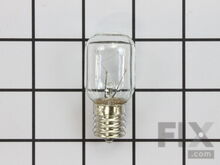
- Fix Number
- FIX2376034
- Manufacturer Part Number
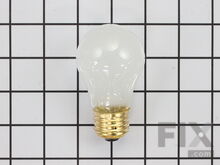
- 8206232A
Installation Instructions
Mark from North East, PA
Bulb burnt out
Removed the screw holding the bulb cover replaced the bulb. Reinstalled the cover and screw. Remove dirty grease filter replaced with new grease filter.
Read more...
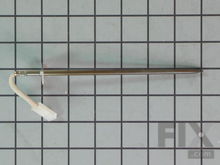
- Fix Number
- FIX1528542
- Manufacturer Part Number
- 316490000
Fixes these symptoms
- Element will not heat
- Gas igniter glows, but will not light
- Little to no heat when baking
- See more...
Installation Instructions
Paul from Chicopee, MA
Bake element not heating
First tried heat probe replacement but bake element still not heating. Replaced control board solving problem. Easy installation.
Read more...
- Fix Number
- FIX884734
- Manufacturer Part Number
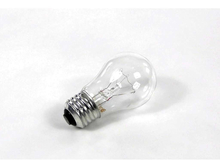
- 8009
Installation Instructions
Helen from Quincy, MA
lightbulb in refrigerator went out
Removed plastic shield on top of refrigerator. Removed old bulb.. Replaced new bulb. Reinstalled plastic shield. Voila!
Read more...
- Fix Number
- FIX12751166
- Manufacturer Part Number
- 316538904
Installation Instructions
Chris from Lillington, NC
Broken bake element & light bulb
Turned of the power at the fuse box as the oven was hard wired to the electrical source and then removed the old element via the screws at the back of the oven. Disconnected the wires from the element and then reconnected those to the new element. Screwed the element base to the back wall of the oven and then replaced the light bulb.
Read more...
- Fix Number
- FIX217532
- Manufacturer Part Number
- 40A15
Installation Instructions
Jeffrey from SEATTLE, WA
Bake element replacement
1. Turn of over power at the breaker.2. Remove bake element cover. There's 2 quarter inch nuts.
3. Disconnect old element. For me there was not much play in the wires so when I disconnected the old element I lost the wire in the insulation. If this happened you can remove the central plate cover on the back of the oven and you can easily find the wires again.
4. Connect the replacement element.
5. Screw the bake element cover back in.
6. Turn power back on. Read more...
- Fix Number
- FIX16763418
- Manufacturer Part Number
- 5304533520
Fixes these symptoms
- Element will not heat
- See more...
Installation Instructions
Chris from Dayville, CT
Burner would not turn on/ hot surface light always on
My issue ended up being more than just the burner, but it was all an easy repair. For about a year the "hot surface" light would stay on long after the cooktop had cooled. Then one day the burner just stopped working. (More on that later but my inexperience led me to just order the burner assuming that was the only problem) The burner I removed was not necessarily bad but the temp sensing element which was made of glass had shattered presumably the reason that light would never turn off. I might have been able to just replace the temp sensing probe but I had the new burner in hand and needed my stove up and running. Two screws hold down the glass surface, then you can raise it just like a car hood. Used a piece of wood to prop it up, there is a brace holding the burners in place. You need to take out the pair to access the burner you want to replace. Make note of the holes everything is screwed/clipped in to so the new one goes in exactly the same. There is a great video on youtube I found when searching for "Frigidaire burner replacement" that was step bystep exactly what i encountered on my repair. Once i got the new burner in I was surprised to find it didn't light. I used an ohm meter to test everything and it all looked good at the burner. I pulled the top back panel behind my controls and found a corroded and broken wire on the controls for that burner. My guess is all that time of that probe being broken caused there to be current through that line and fried the wire. Either way it was a quick splice and the new burner fired right up and has been working great ever since. I was especially happy that the new temp probe was metal and not glass so I hopefully don't run into this problem again.
Read more...
- Fix Number
- FIX12070620
- Manufacturer Part Number
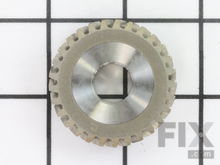
- W11086780
Fixes these symptoms
- Touchpad does not respond
- See more...
Installation Instructions
carol from whittaker, MI
mixer skipped while turning
followed instructional video the hardest part was removing the snap ring! once that was removed it was a piece of cake!
Read more...
Brands
- Amana Range Hood Parts
- Broan Range Hood Parts
- Caloric Range Hood Parts
- Dynasty Range Hood Parts
- Electrolux Range Hood Parts
- Frigidaire Range Hood Parts
- General Electric Range Hood Parts
- Gibson Range Hood Parts
- Hoover Range Hood Parts
- Hotpoint Range Hood Parts
- Inglis Range Hood Parts
- Jenn-Air Range Hood Parts
- Kenmore Range Hood Parts
- KitchenAid Range Hood Parts
- Litton Range Hood Parts
- Magic Chef Range Hood Parts
- Maytag Range Hood Parts
- Napoleon Range Hood Parts
- Nutone Range Hood Parts
- Roper Range Hood Parts
- Uni Range Hood Parts
- Whirlpool Range Hood Parts
Related Pages
- Range Hood Blades
- Range Hood Brackets and Flanges
- Range Hood Caps and Lids
- Range Hood Ducts and Vents
- Range Hood Fans and Blowers
- Range Hood Filters
- Range Hood Fuses
- Range Hood Grilles and Kickplates
- Range Hood Hardware
- Range Hood Insulation
- Range Hood Knobs
- Range Hood Lights and Bulbs
- Range Hood Motors
- Range Hood Panels
- Range Hood Seals and Gaskets
- Range Hood Springs and Shock Absorbers
- Range Hood Switches
- Range Hood Thermostats
- Range Hood Transformers
- Range Hood Trim
- Range Hood Wheels and Rollers


