


Models
>
YMED6000XW0
YMED6000XW0 Whirlpool
Jump to:
Find Part by Name
Keep searches simple, eg. "belt" or "pump".
Diagrams for YMED6000XW0
Viewing 6 of 6


 Diagram and Parts List for Whirlpool")
Keep searches simple, eg. "belt" or "pump".

$19.63
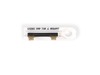
The dryer thermal fuse, also sometimes referred to as the thermal cut off or temperature fuse, is a 2 by 1/2-inch, white, plastic safety mechanism that halts the flow of electricity to the motor circu...
In Stock
Order within the next 4 hrs and your part ships today!

$22.69
This drum support roller is sold individually. Most dryers require two. The tri-rings are included. This is a drum support roller for a dryer. It is a genuine replacement part. The part includes the d...
In Stock
Order within the next 4 hrs and your part ships today!

$53.59
This dryer repair kit consists of five commonly replaced dryer parts: one multi-rib belt (part #661570V and measures 93 1/2 inches long), four drum support rollers, one idler assembly, nine tri-rings,...
In Stock
Order within the next 4 hrs and your part ships today!

$13.42
This small but mighty OEM piece is called a tri-ring and is used to support the drum roller shaft and the idler pulley shaft in your dryer. It helps to provide a tight seal between components by evenl...
In Stock
Order within the next 4 hrs and your part ships today!

$47.74
The internal-bias thermostat, also know as a thermistor, is used to prevent the dryer from overheating. It does this by monitoring and controlling the temperature of the inside of the dryer drum. If ...
In Stock
Order within the next 4 hrs and your part ships today!

$11.40
It is important for your dryer to be properly leveled, as an unleveled one can cause excessive vibration and noise when operating, may not drain properly, and can cause excessive wear on various parts...
In Stock
Order within the next 4 hrs and your part ships today!

$26.79
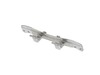
If your dryer is not tumbling, will not start, or is excessively noisy while operating, there may be an issue with your idler pulley. The idler pulley works by maintaining a constant tension on the dr...
In Stock
Order within the next 4 hrs and your part ships today!

$10.72
This is an authentic OEM replacement moisture sensor for your dryer. The sensor detects the moisture levels in your clothing while the appliance is operating, and once the appropriate level has been r...
In Stock
Order within the next 4 hrs and your part ships today!

This heating element connection wire kit is a genuine OEM replacement for your electric dryer. The kit is used to connect the thermostat to the heater element. The kit comes with a yellow wire nut and...
In Stock
Order within the next 4 hrs and your part ships today!

$5.42
This is a multi-use screw and can be used on a variety of appliances. The measurements of the screw are: 8/18 x 3/8. *Please note: the screw is sold individually. Refer to the manual provided by the m...
In Stock
Order within the next 4 hrs and your part ships today!

This part seals the drum to prevents air from escaping. This includes silicone rubber adhesive.
In Stock
Order within the next 4 hrs and your part ships today!

$8.00
This 18 ml bottle of white appliance touch-up paint is used to cover scratches or marks on your appliance. The white touch-up paint can be used on refrigerators, microwaves, ranges, clothes dryers, an...
In Stock
Order within the next 4 hrs and your part ships today!
Questions and Answers
We're sorry, but our Q&A experts are temporarily unavailable.
Please check back later if you still haven't found the answer you need.
Common Problems and Symptoms for YMED6000XW0
Viewing 12 of 12Noisy
Fixed by these parts


How to fix it
Too hot
Fixed by these parts


How to fix it
Not Heating
Fixed by these parts

How to fix it
Door won’t close
Fixed by these parts


How to fix it
Marks left on clothes
Fixed by these parts
How to fix it
Won’t Start
Fixed by these parts
How to fix it
Lid or door won’t close
Fixed by these parts
How to fix it
Touchpad does not respond
Fixed by these parts
How to fix it
Leaking
Fixed by these parts


How to fix it
Drum Not Spinning
Fixed by these parts
How to fix it
Will Not Start
Fixed by these parts
How to fix it
Heat stays on after drum has stopped
Fixed by these parts
How to fix it


Keep searches simple. Use keywords, e.g. "leaking", "pump", "broken" or "fit".
- Customer:
- ANTHONY from CHESHIRE, CT
- Parts Used:
- WP3392519
- Difficulty Level:
- Easy
- Total Repair Time:
- 15 - 30 mins
- Tools:
- Nutdriver, Pliers, Screw drivers
Dryer was working, but no heat.
First I unplugged the dryer, then removed the back panel, this exposed most all of the wiring and I could see the heater coils.
Not knowing what the problem was I started looking at the coils and could not see any broken parts.
So then checked the thermal fuse for continuity I removed the two wires from it with a small pair of ... Read more needle nose pliers, it was held in place by two screws, once they were removed the fuse came out easily, I checked continuity with a volt meter placing the meter on X1 Ohms and could not get a reading.
I replaced with a new one and put it all back together the way I took it apart.
Then I plugged it in and it worked first time, I now have warm dry clothes.
Read less
Was this instruction helpful to you?
Thank you for voting!
- Customer:
- Dana from Grassvally, CA
- Parts Used:
- WP3392519
- Difficulty Level:
- A Bit Difficult
- Total Repair Time:
- More than 2 hours
- Tools:
- Screw drivers
No heat but would run otherwise
Cleaning the lint out of the whole machine took quite a bit of time--it was everywhere. Underneath the lint trap was a collection that ultimately ruined the thermal fuse where it restricted the air flow considerably.
Ascertaining the problem was the most time consuming part.
The actual repair was quite simple and did ... Read more n't take but 15-20 minutes.
Ascertaining the problem was the most time consuming part.
The actual repair was quite simple and did ... Read more n't take but 15-20 minutes.
Read less
Was this instruction helpful to you?
Thank you for voting!
Dryer overheated, blew out thermal fuse
I started to repair this and got busy and ended up calling a repair service -- that was the first time. They repaired it for over $200 and said the cause was bad venting. I fixed the vent before using the fixed dryer but it blew again. So I ordered these parts and replaced them myself for a lot of savings. However, the dryer still ove
... Read more
rheated. Through lots of testing I found the root cause the repairman missed: The heating element had gotten so hot that the assembly holding it warped, hitting the element and shorting it. So a new element is on order. I still needed the parts I ordered here but the overall repair ended up more complicated and expensive. I was disappointed a paid repair person left without further diagnosis. If he had unplugged the vent and checked the heat on the exhaust vent (as I ended up doing) it would have been obvious more than a new thermal fuse/thermistor was necessary. Instead I wasted over $200 on his visit. So my advice is if you're at all handy, repair this yourself. The dryer has a service manual inside the front toe board that walks you through most diagnostics and tests. However, it took a little more than that for me to discover the heating element problem. This was a very dangerous situation that could have easily led to a fire, yet not found by a trained technician!
Read less
Was this instruction helpful to you?
Thank you for voting!